Halloween is a fun excuse to paint and craft something festively different
I had an idea to make a witch table for Halloween this year, and this is how I created it using Krylon® Brand.
A round table is a perfect base for making an upside-down witch hat. And it’s easier, and takes less time, than you might think.
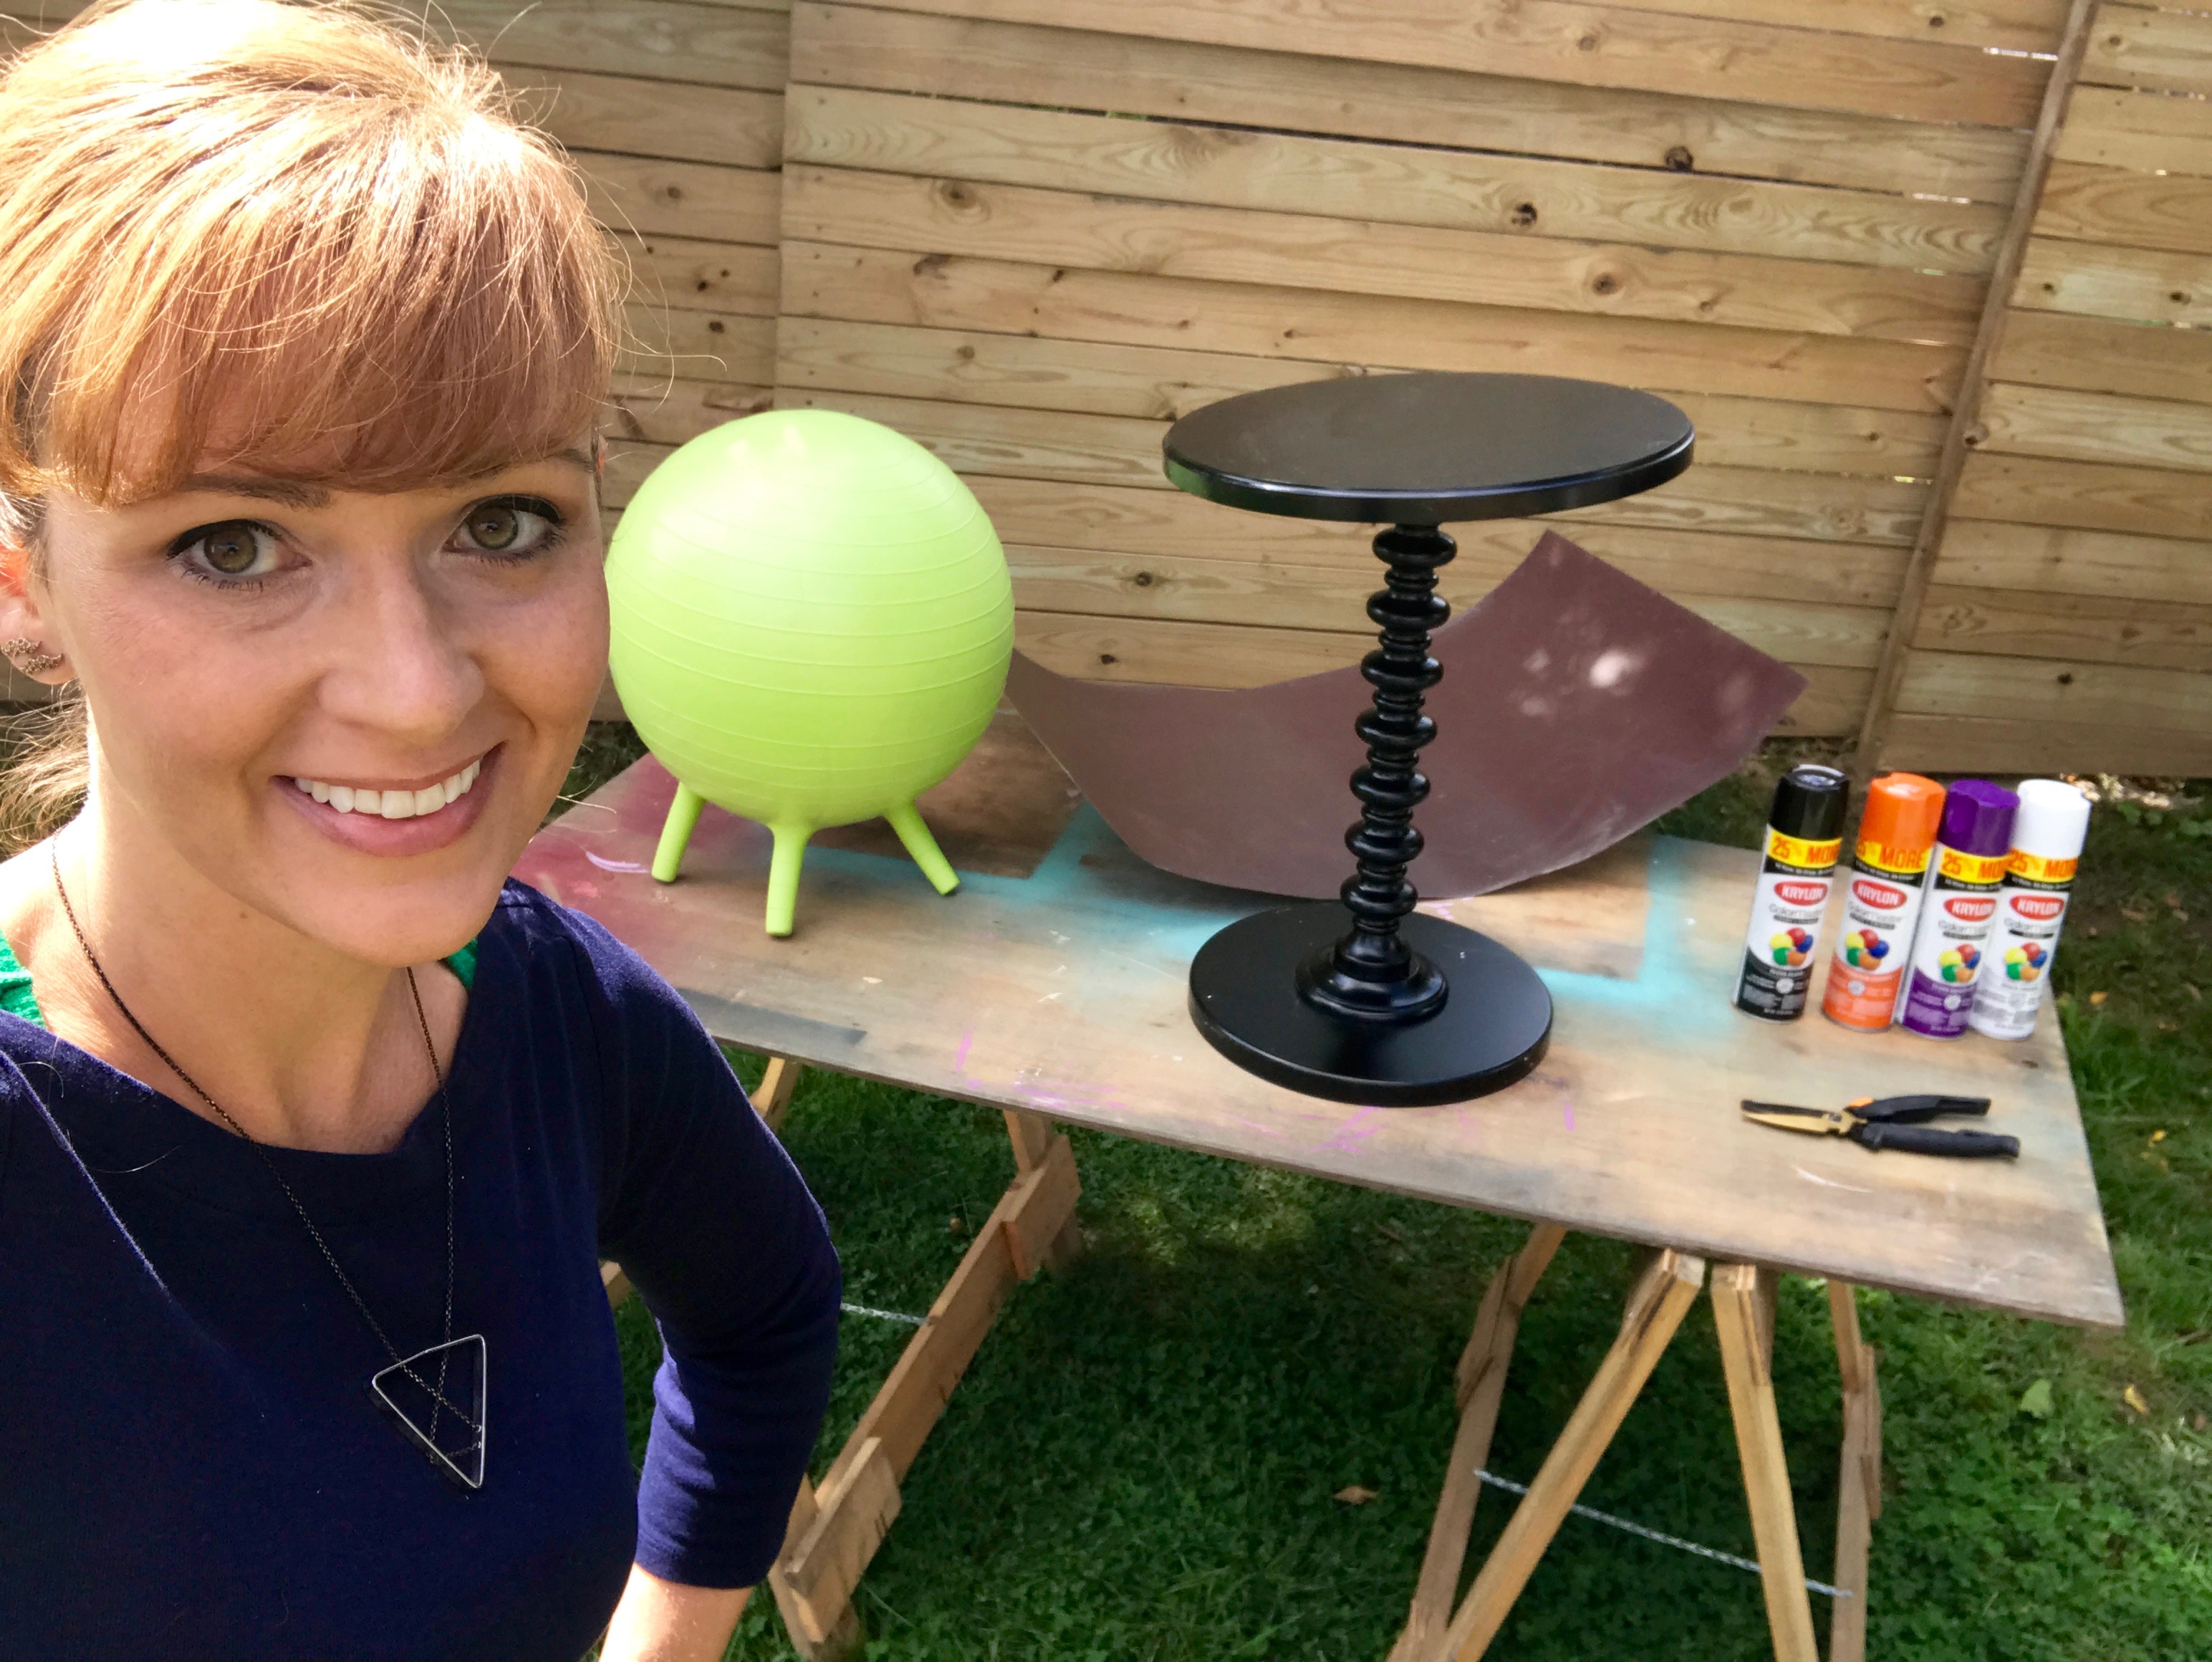
The first step to transforming a table into a witch hat is gathering the supplies.
Here’s my supply list for the witch hat table.
- Round table
- Poster board, or more durable sheet metal (it’s less than $20 at a home improvement store)
- Scissors (for sheet metal, use scissors that can cut metal)
- Tape measure, pencil
- Tape for poster board; metal screws and a drill for sheet metal
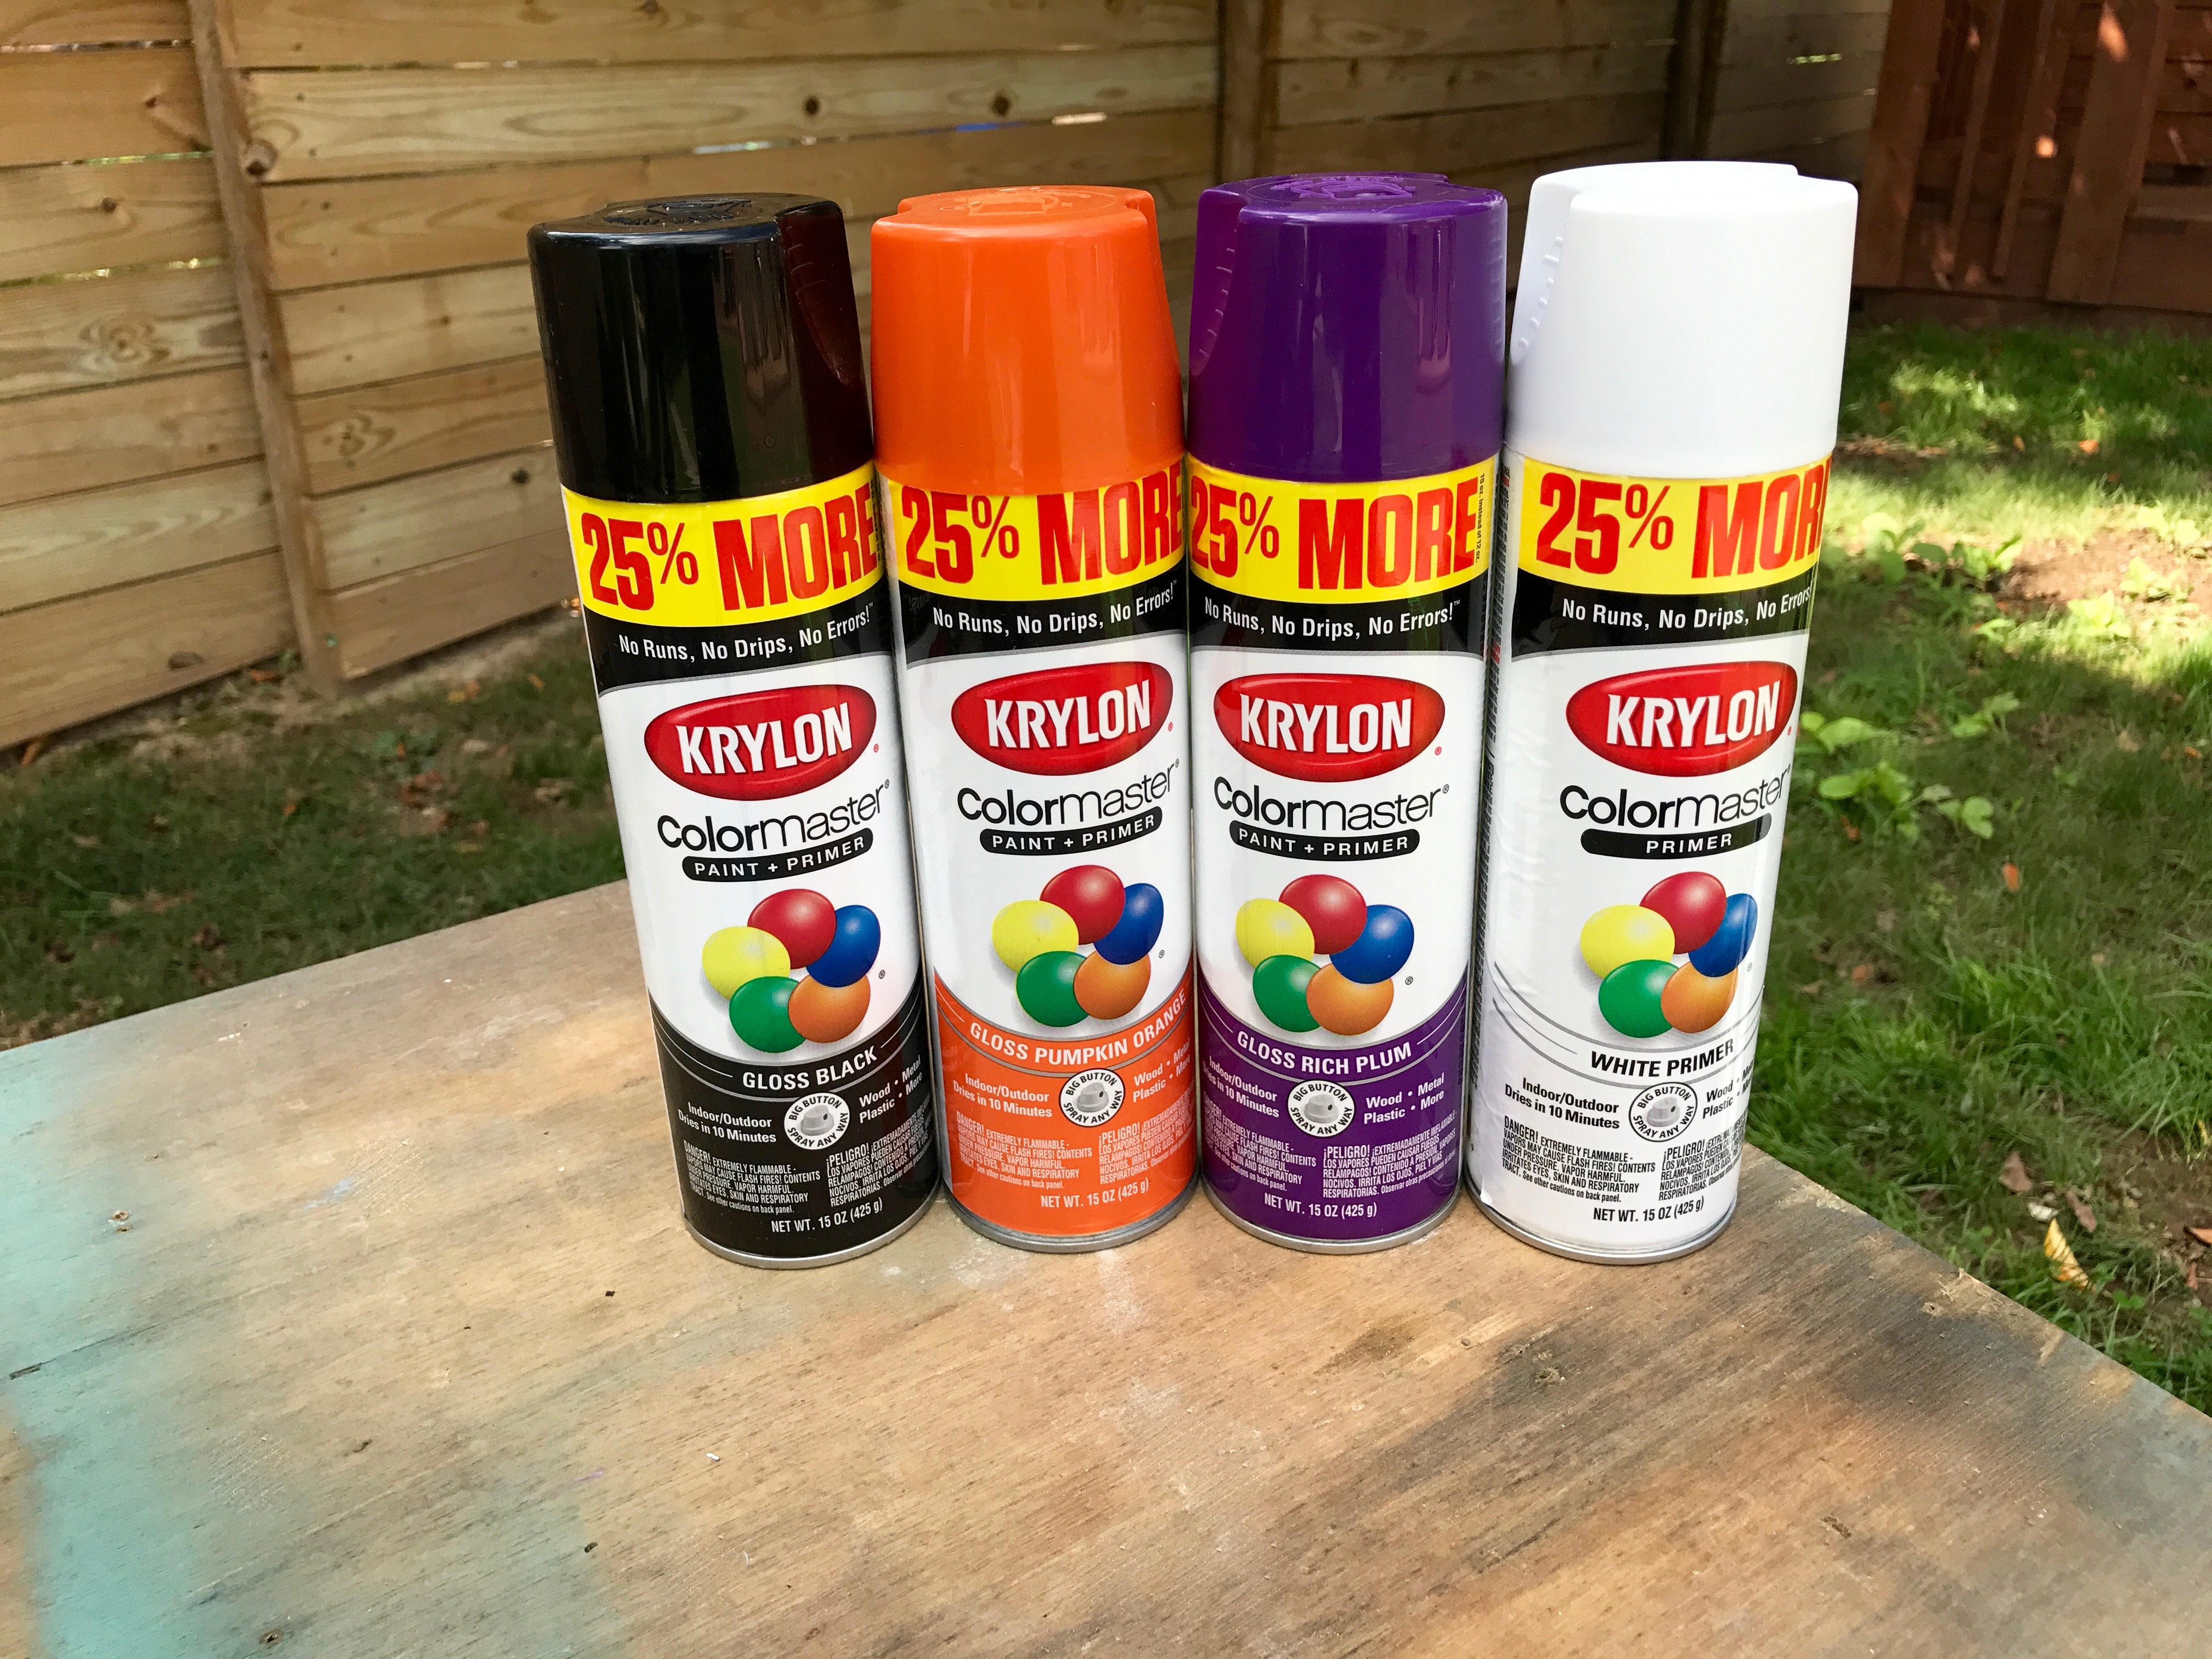
- Krylon® ColorMaster™Paint + Primer-25% More in Gloss Black, Gloss Rich Plum
- Thick ribbon for the hat trim
Here’s my supply list for the little spider stools.
- Yoga balls
- Krylon® ColorMaster™ Paint + Primer-25% More in Gloss Black, Gloss Pumpkin Orange, Gloss Rich Plum
- Round templates, jar or container lids, for eyes
- Scrap cardboard for eyes
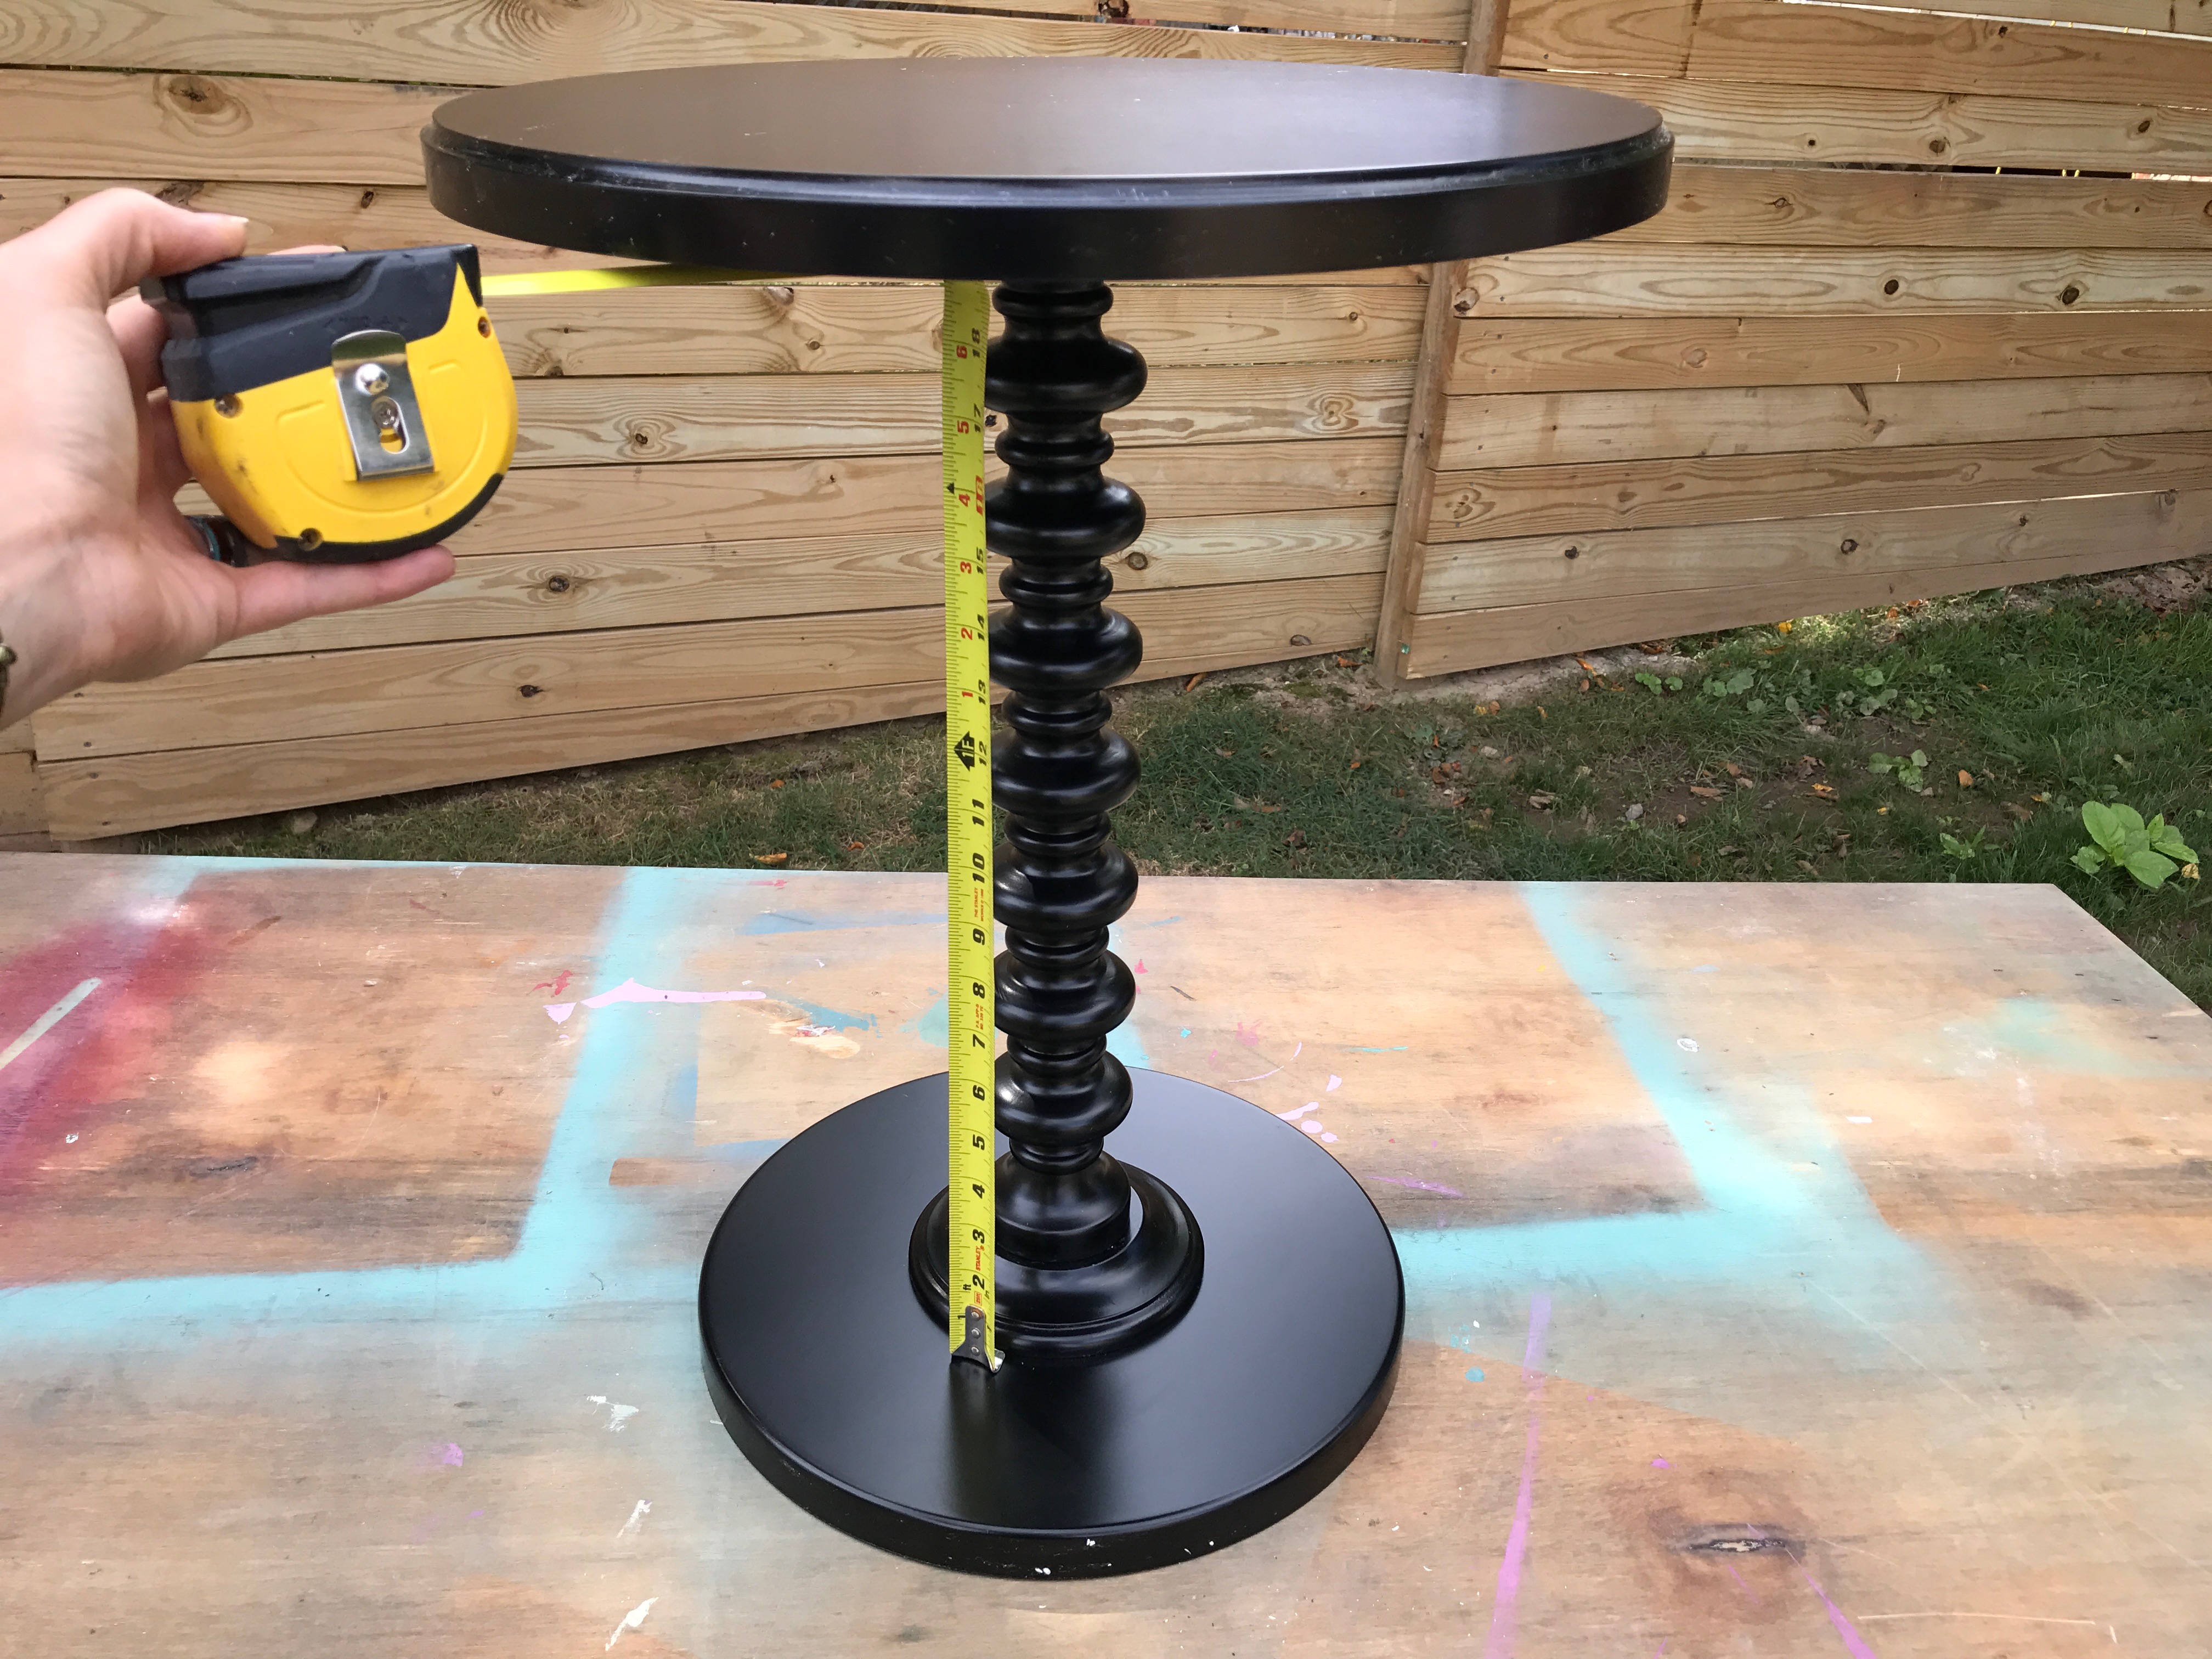
The first part of this project is creating the witch’s hat table. And the first step is measuring the height of the cone for the witch’s hat.
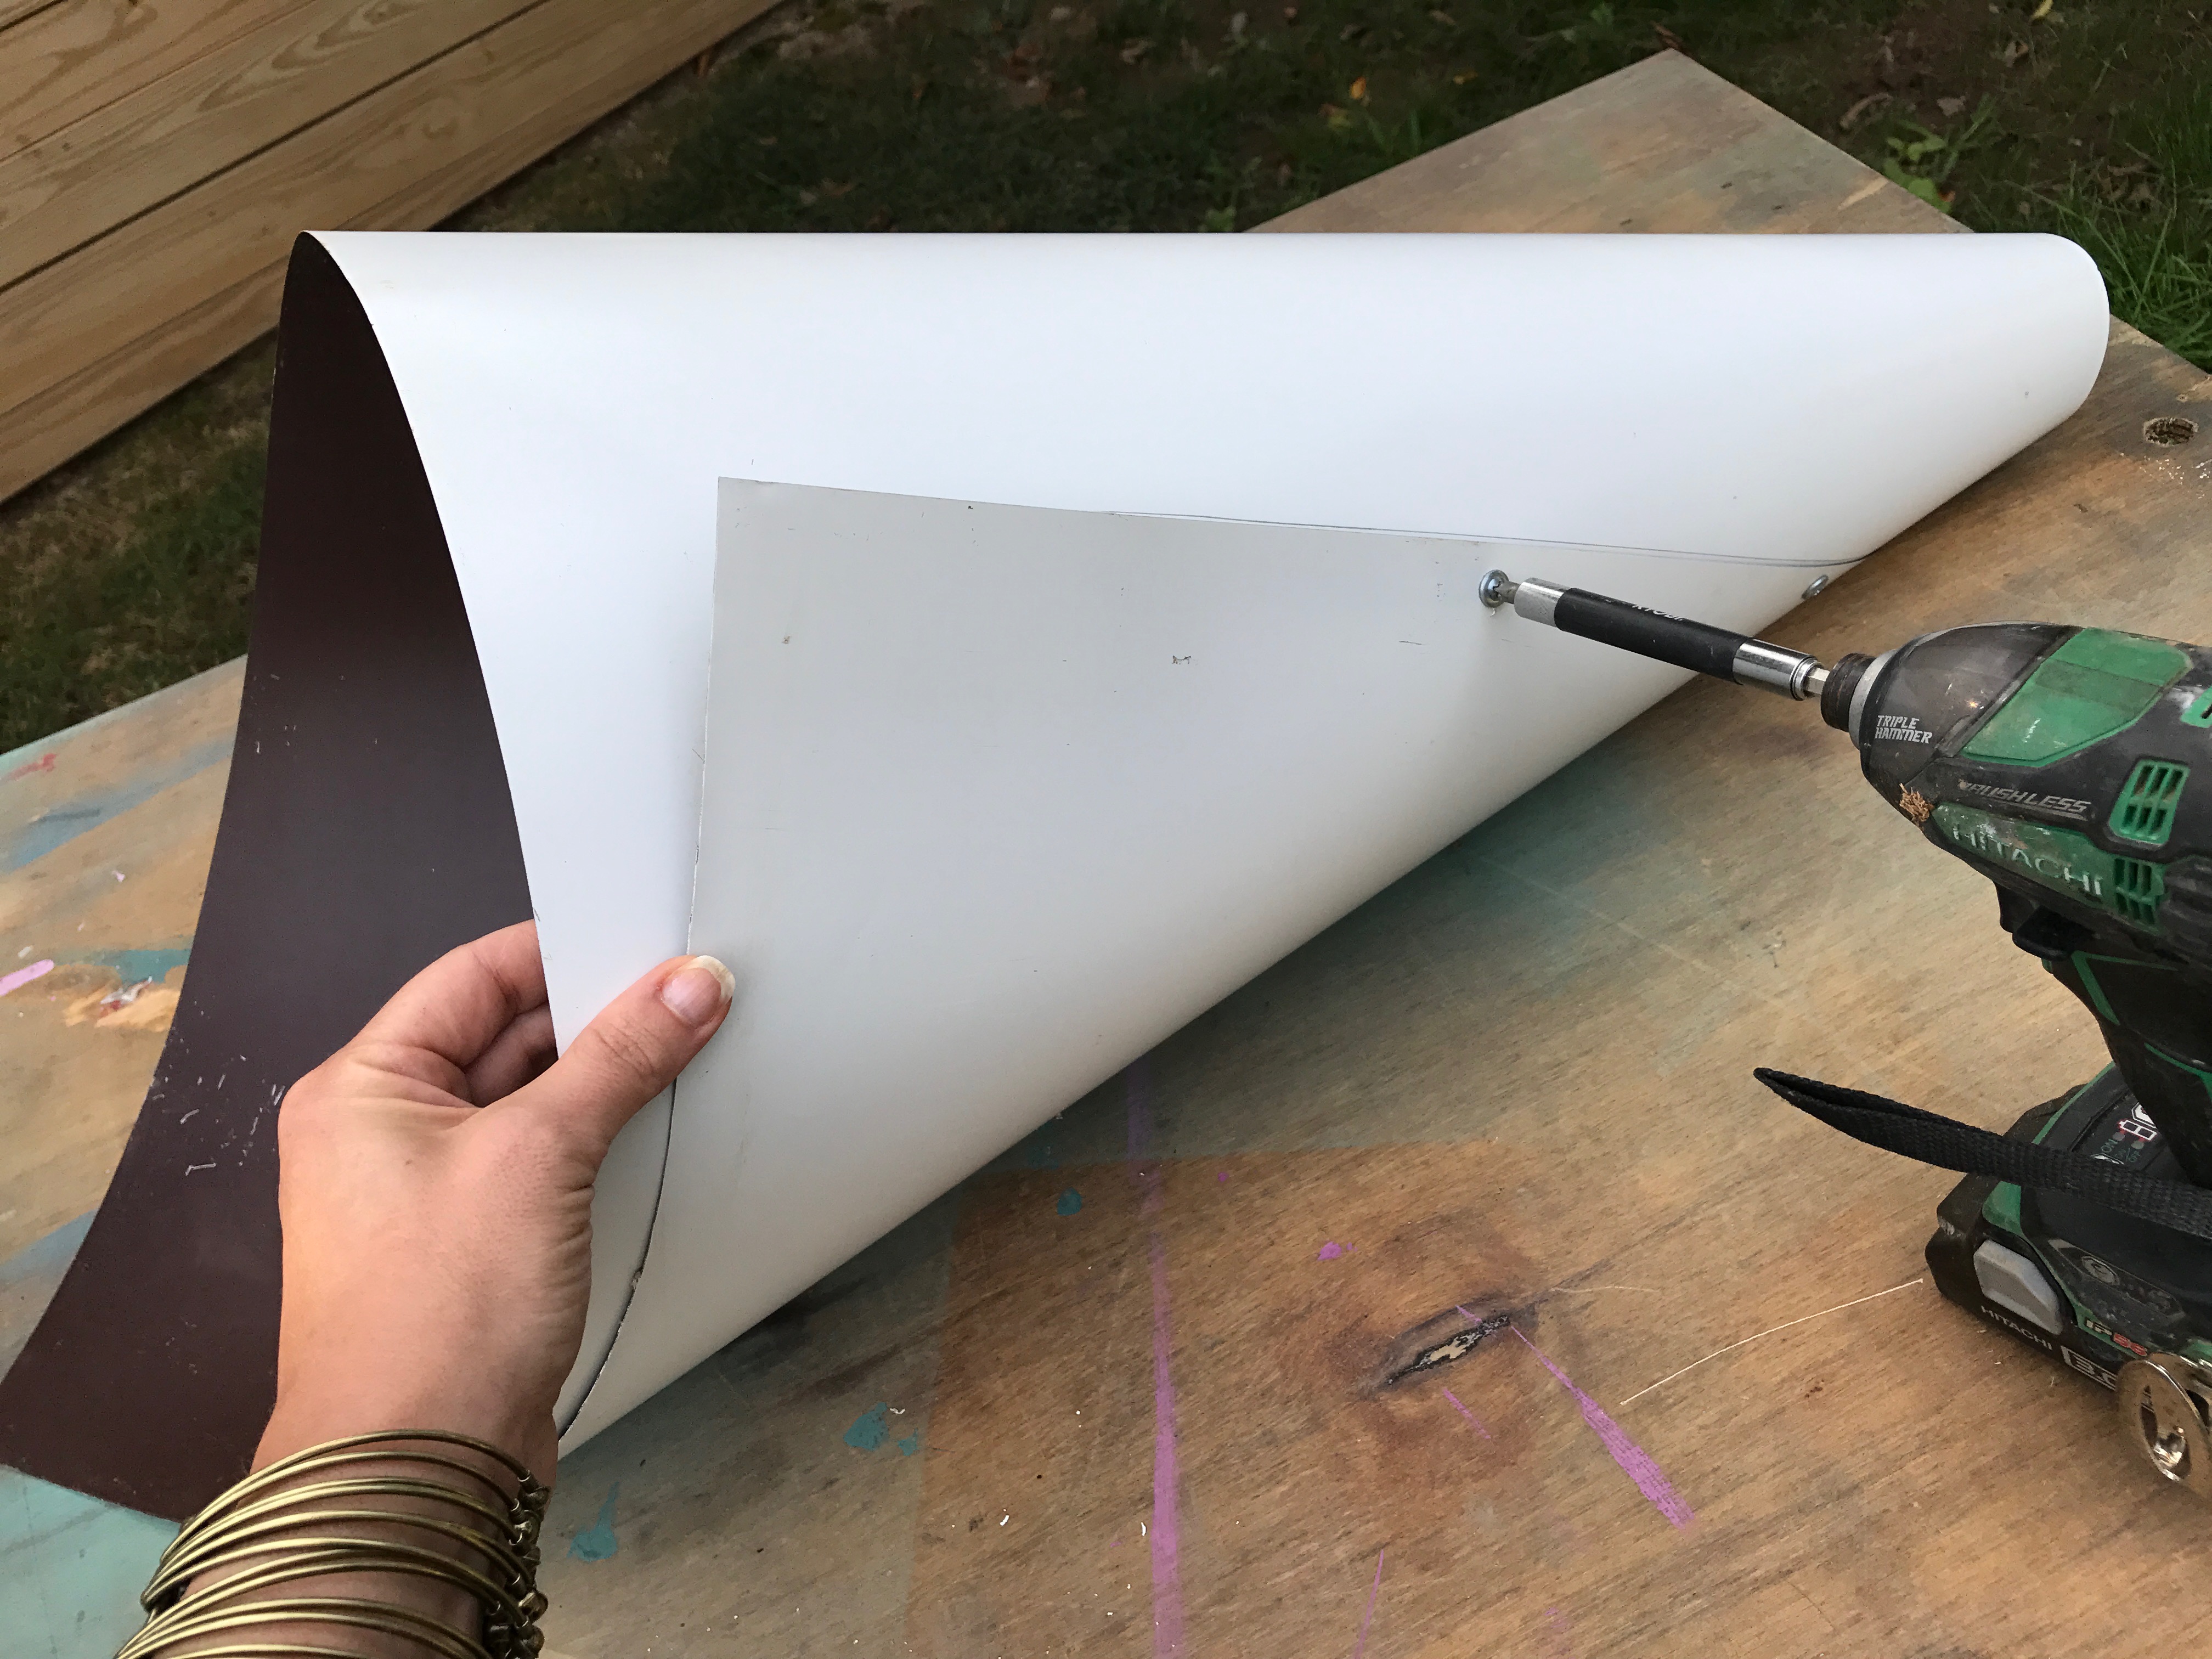
While this project can be done using poster board from your local craft store, I chose sheet metal for the hat, as it’s easy to roll into a cone shape, and it’s durable. If you’ve never worked with sheet metal before, wear gloves. The edges are sharper than paper, but not so sharp that if you are used to the material that you’ll end up with any cuts.
After rolling the cone to shape, I put a few metal screws into the sheet metal. If you are working with poster board, then you can use tape.
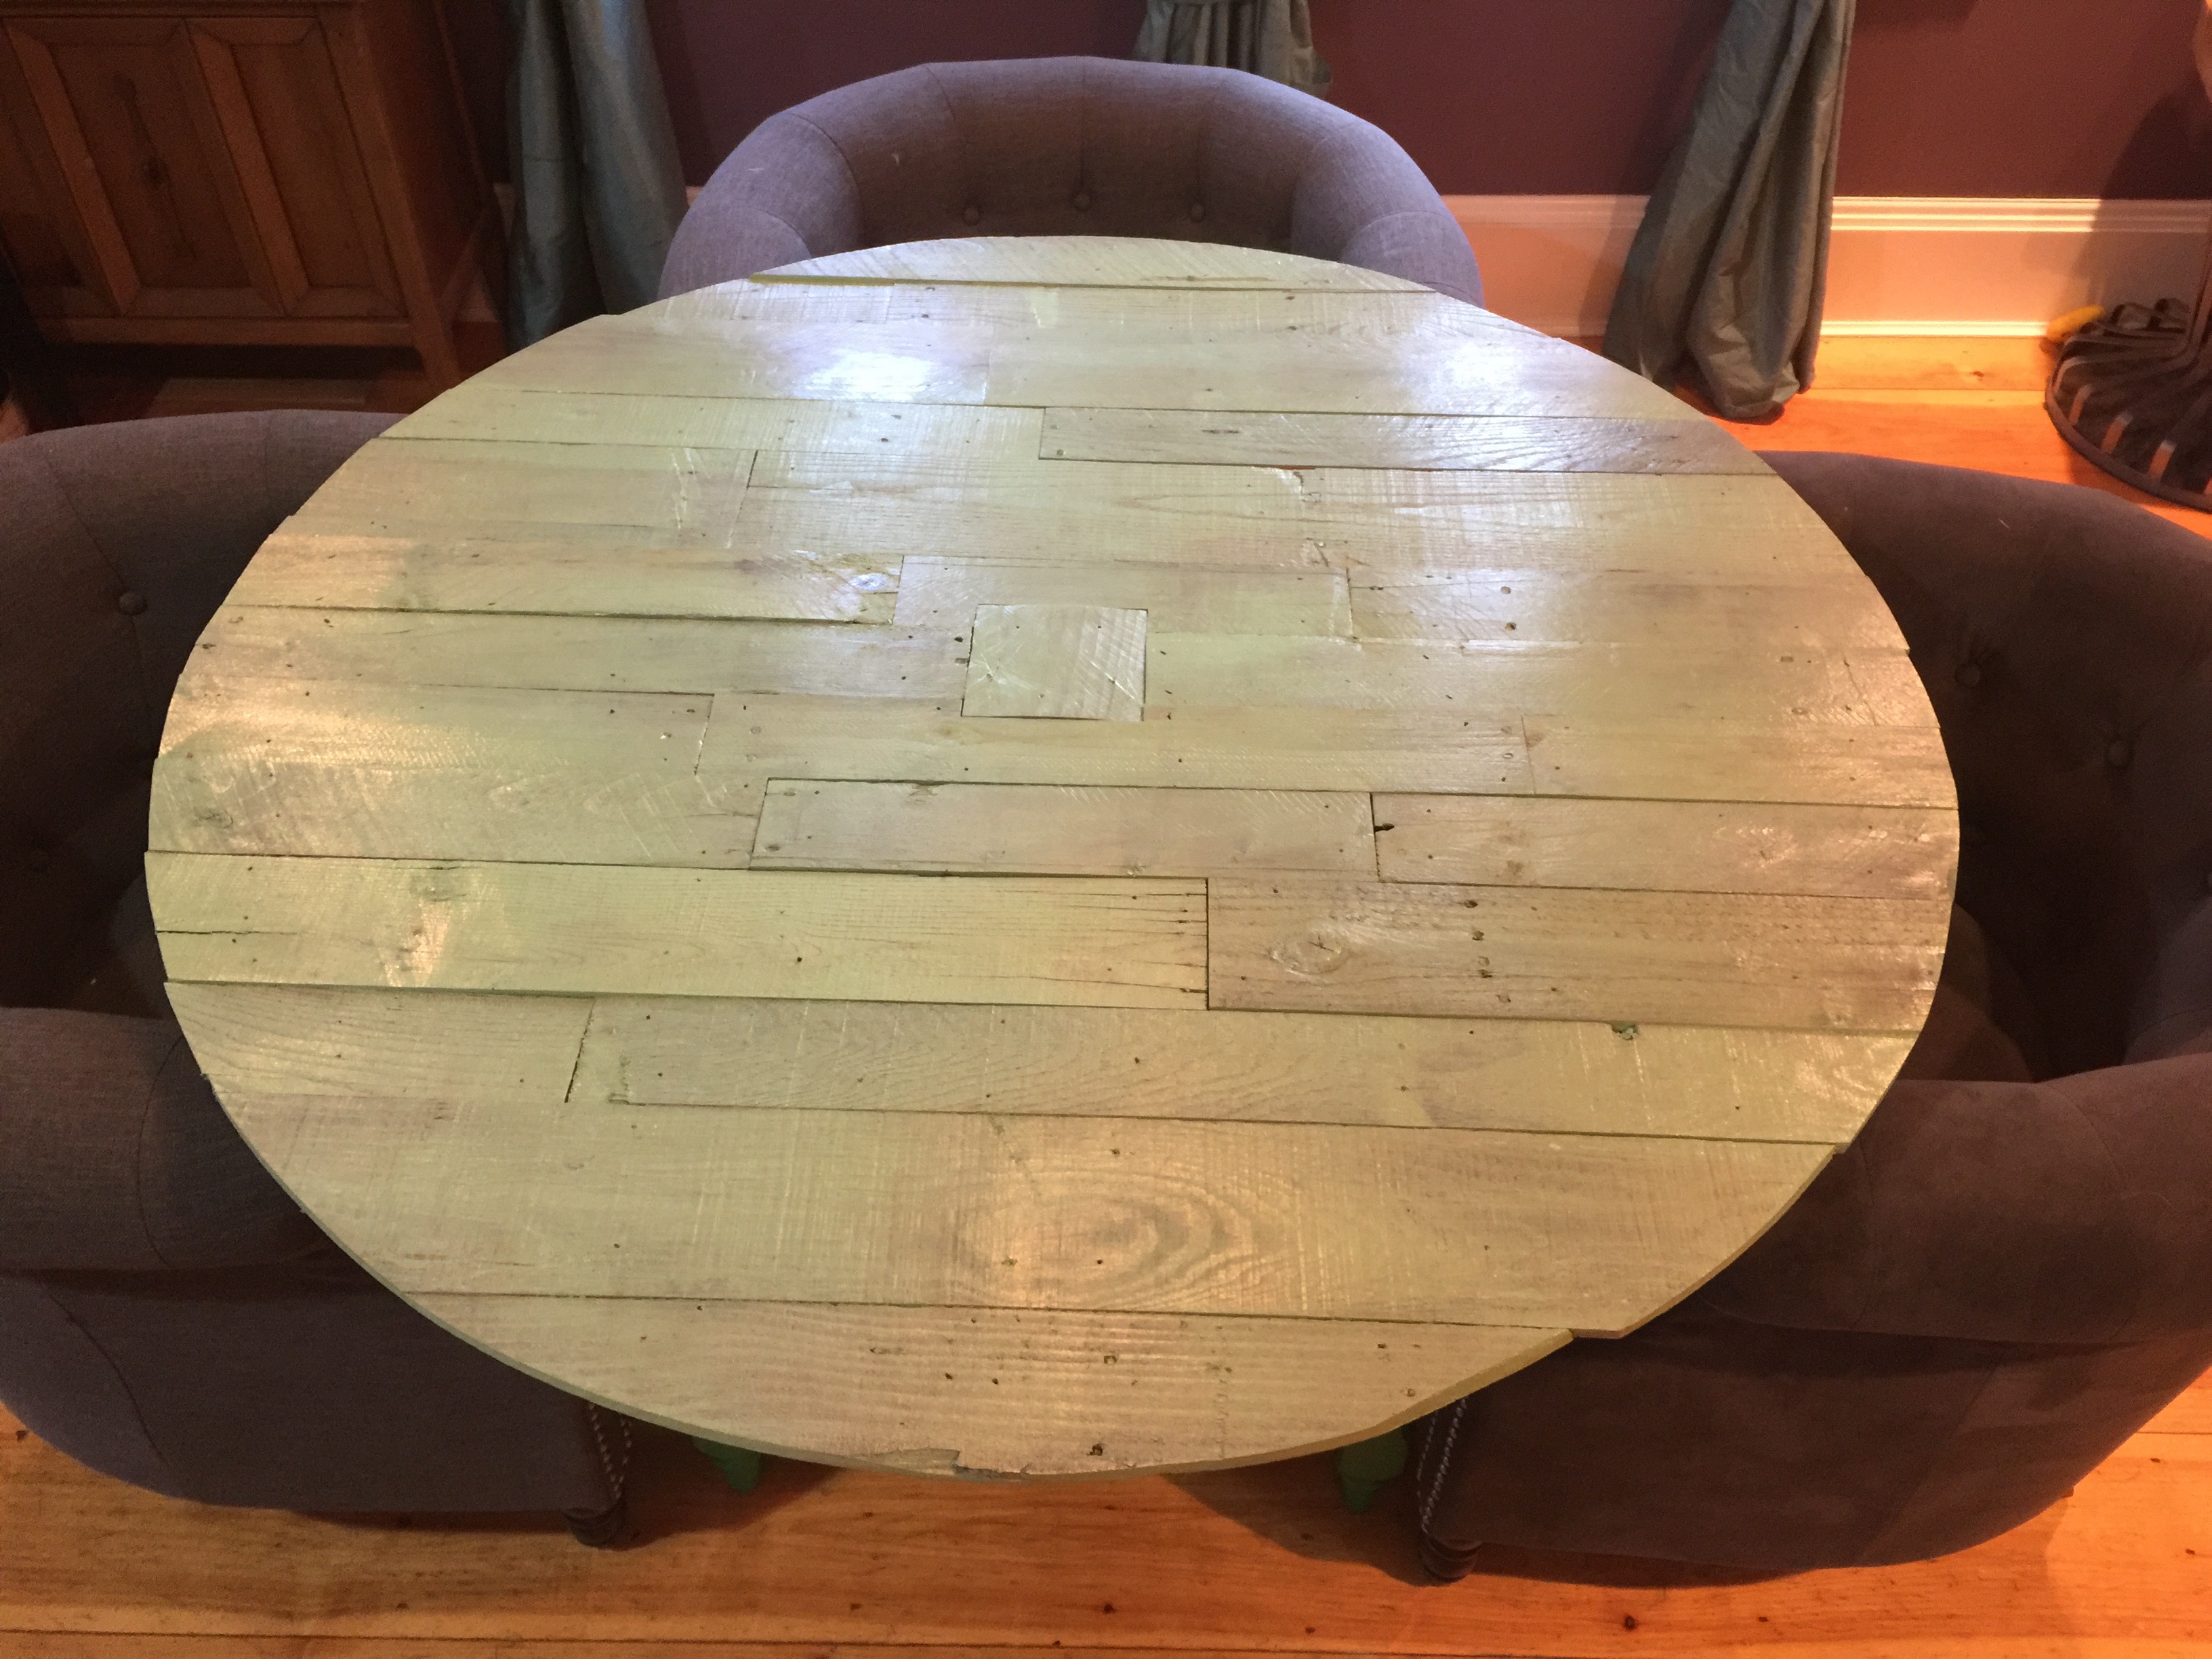
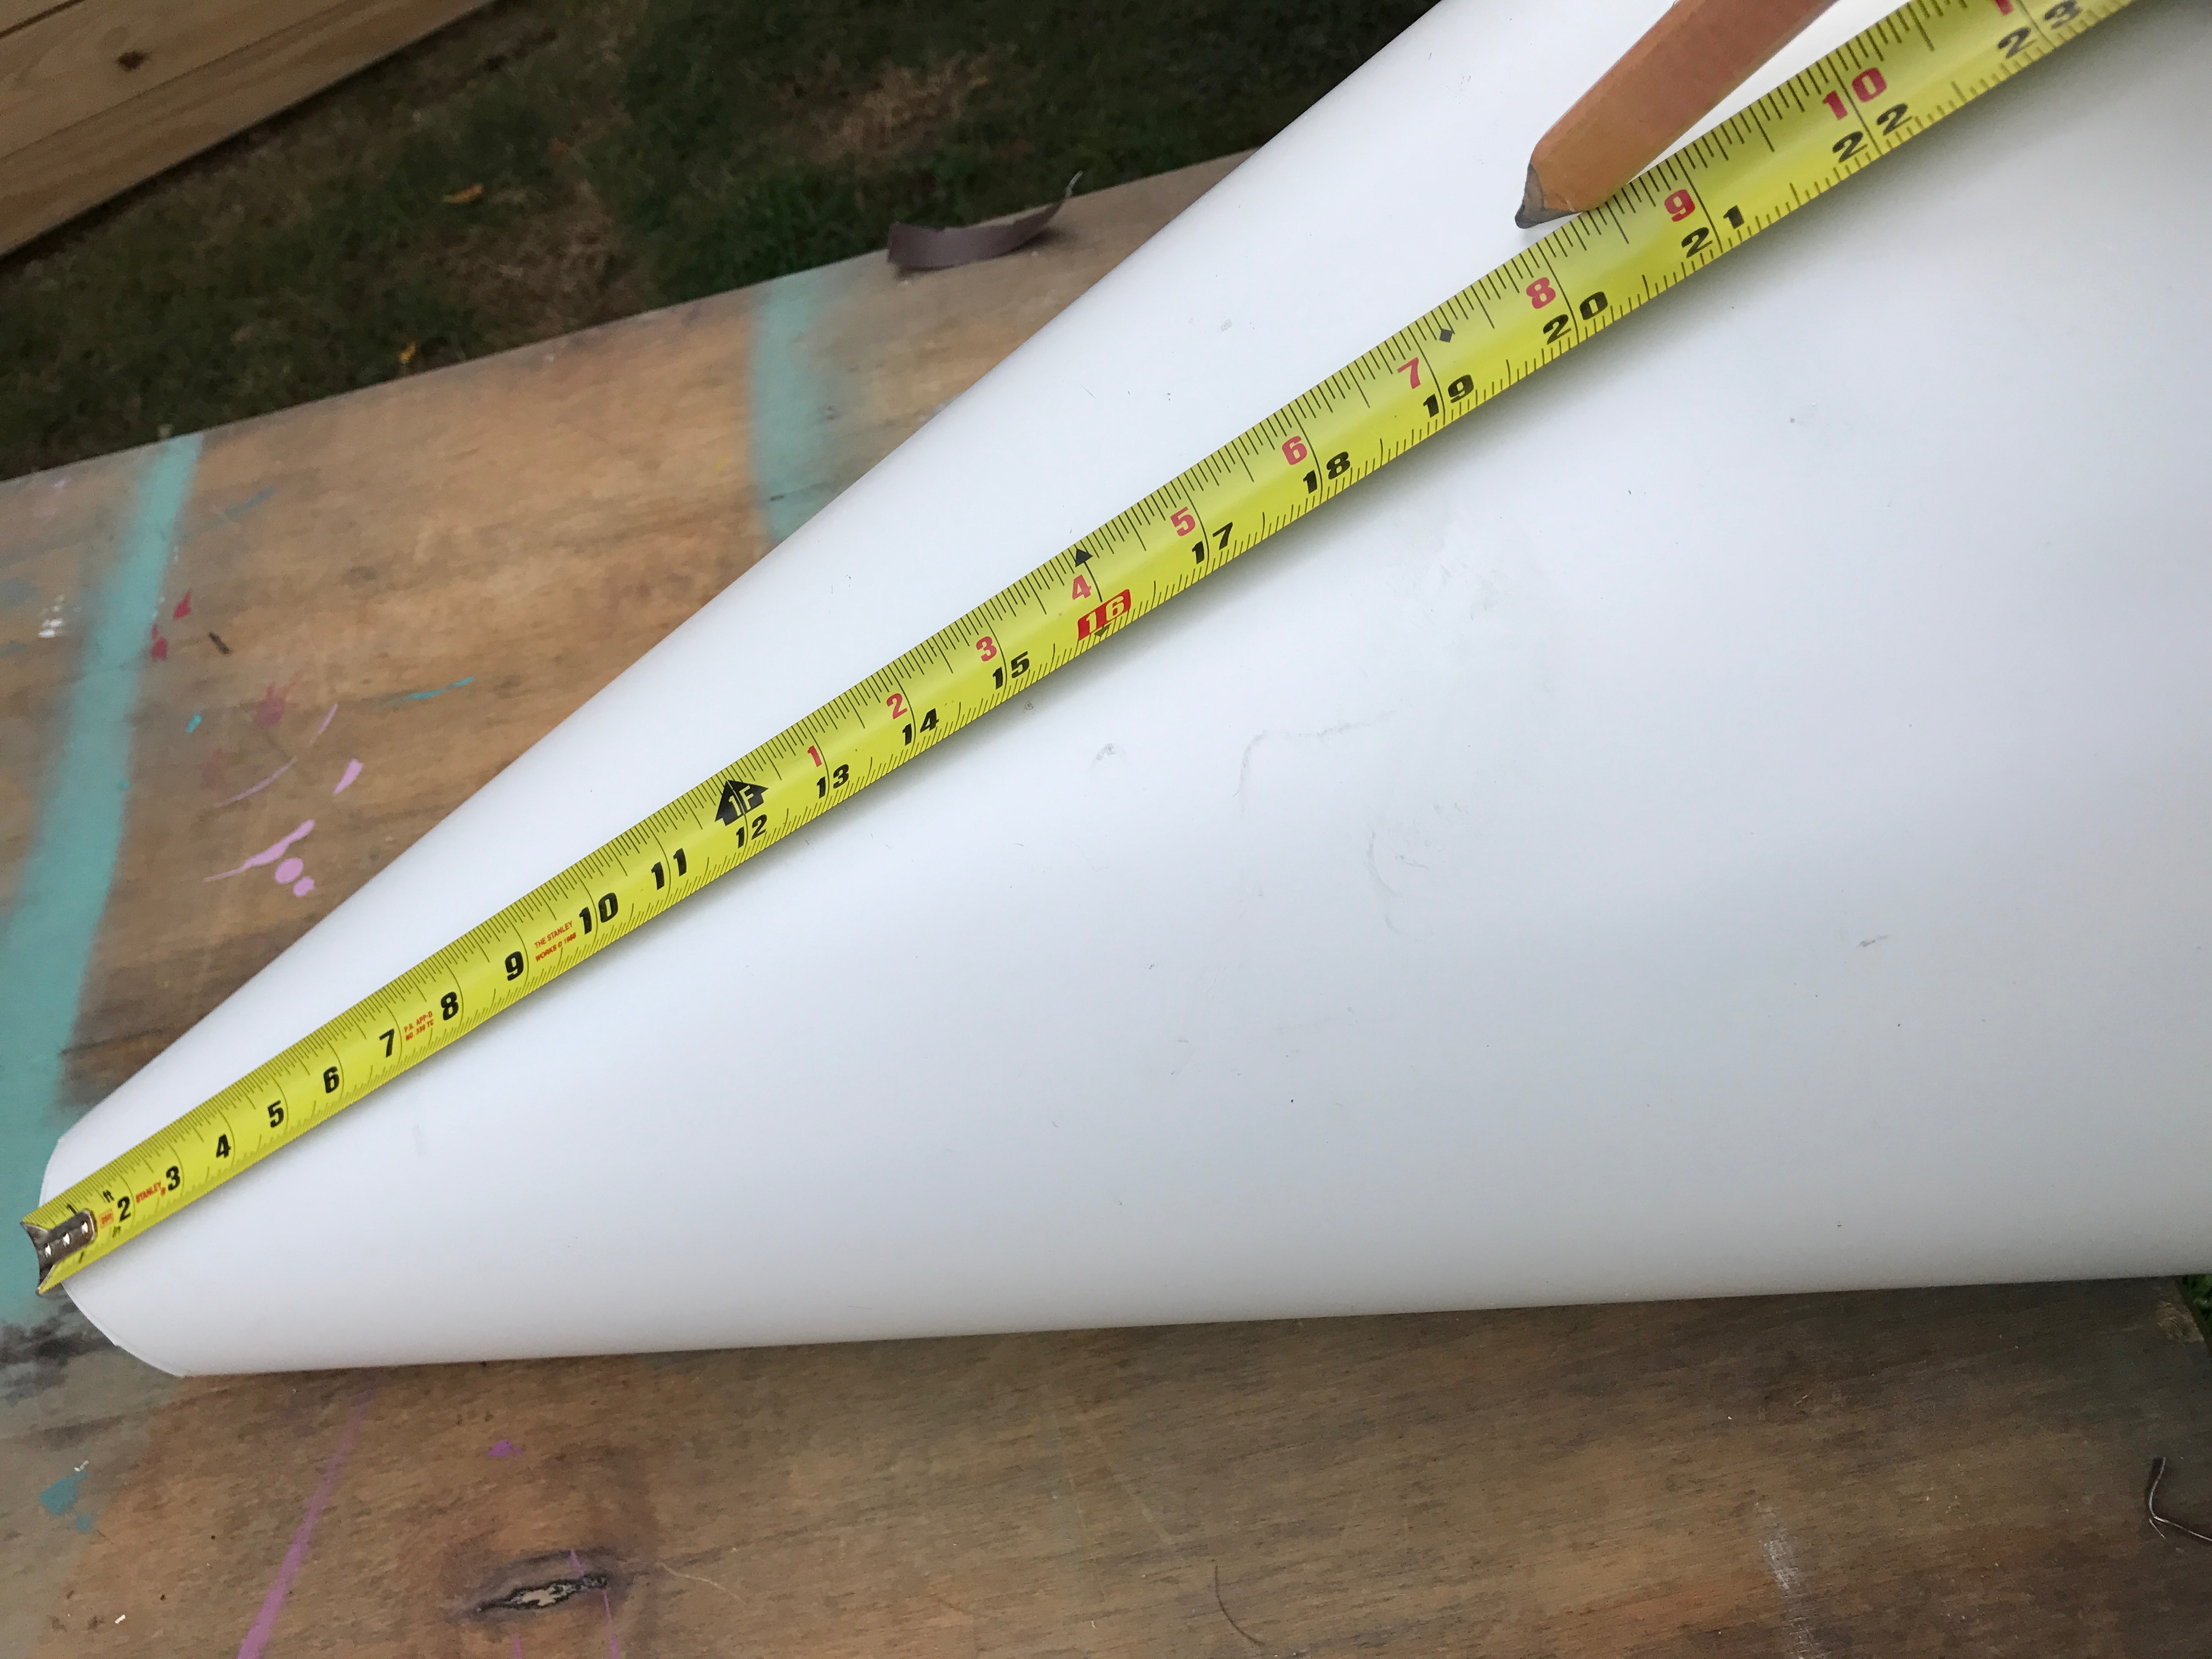
When creating a cone out of a rectangular shape, the result will not be a perfectly formed shape. So the next step is making the cone the right height, and trimming it so that it is flat on top and bottom. I used the measurement from the table to mark the cone.
To make sure the bottom and top of the cone are flat, I lined up the cone at the end of a table, using a framing square. You don’t need to go out and buy a framing square. Any straight-edge can help guide you to having an even edge.
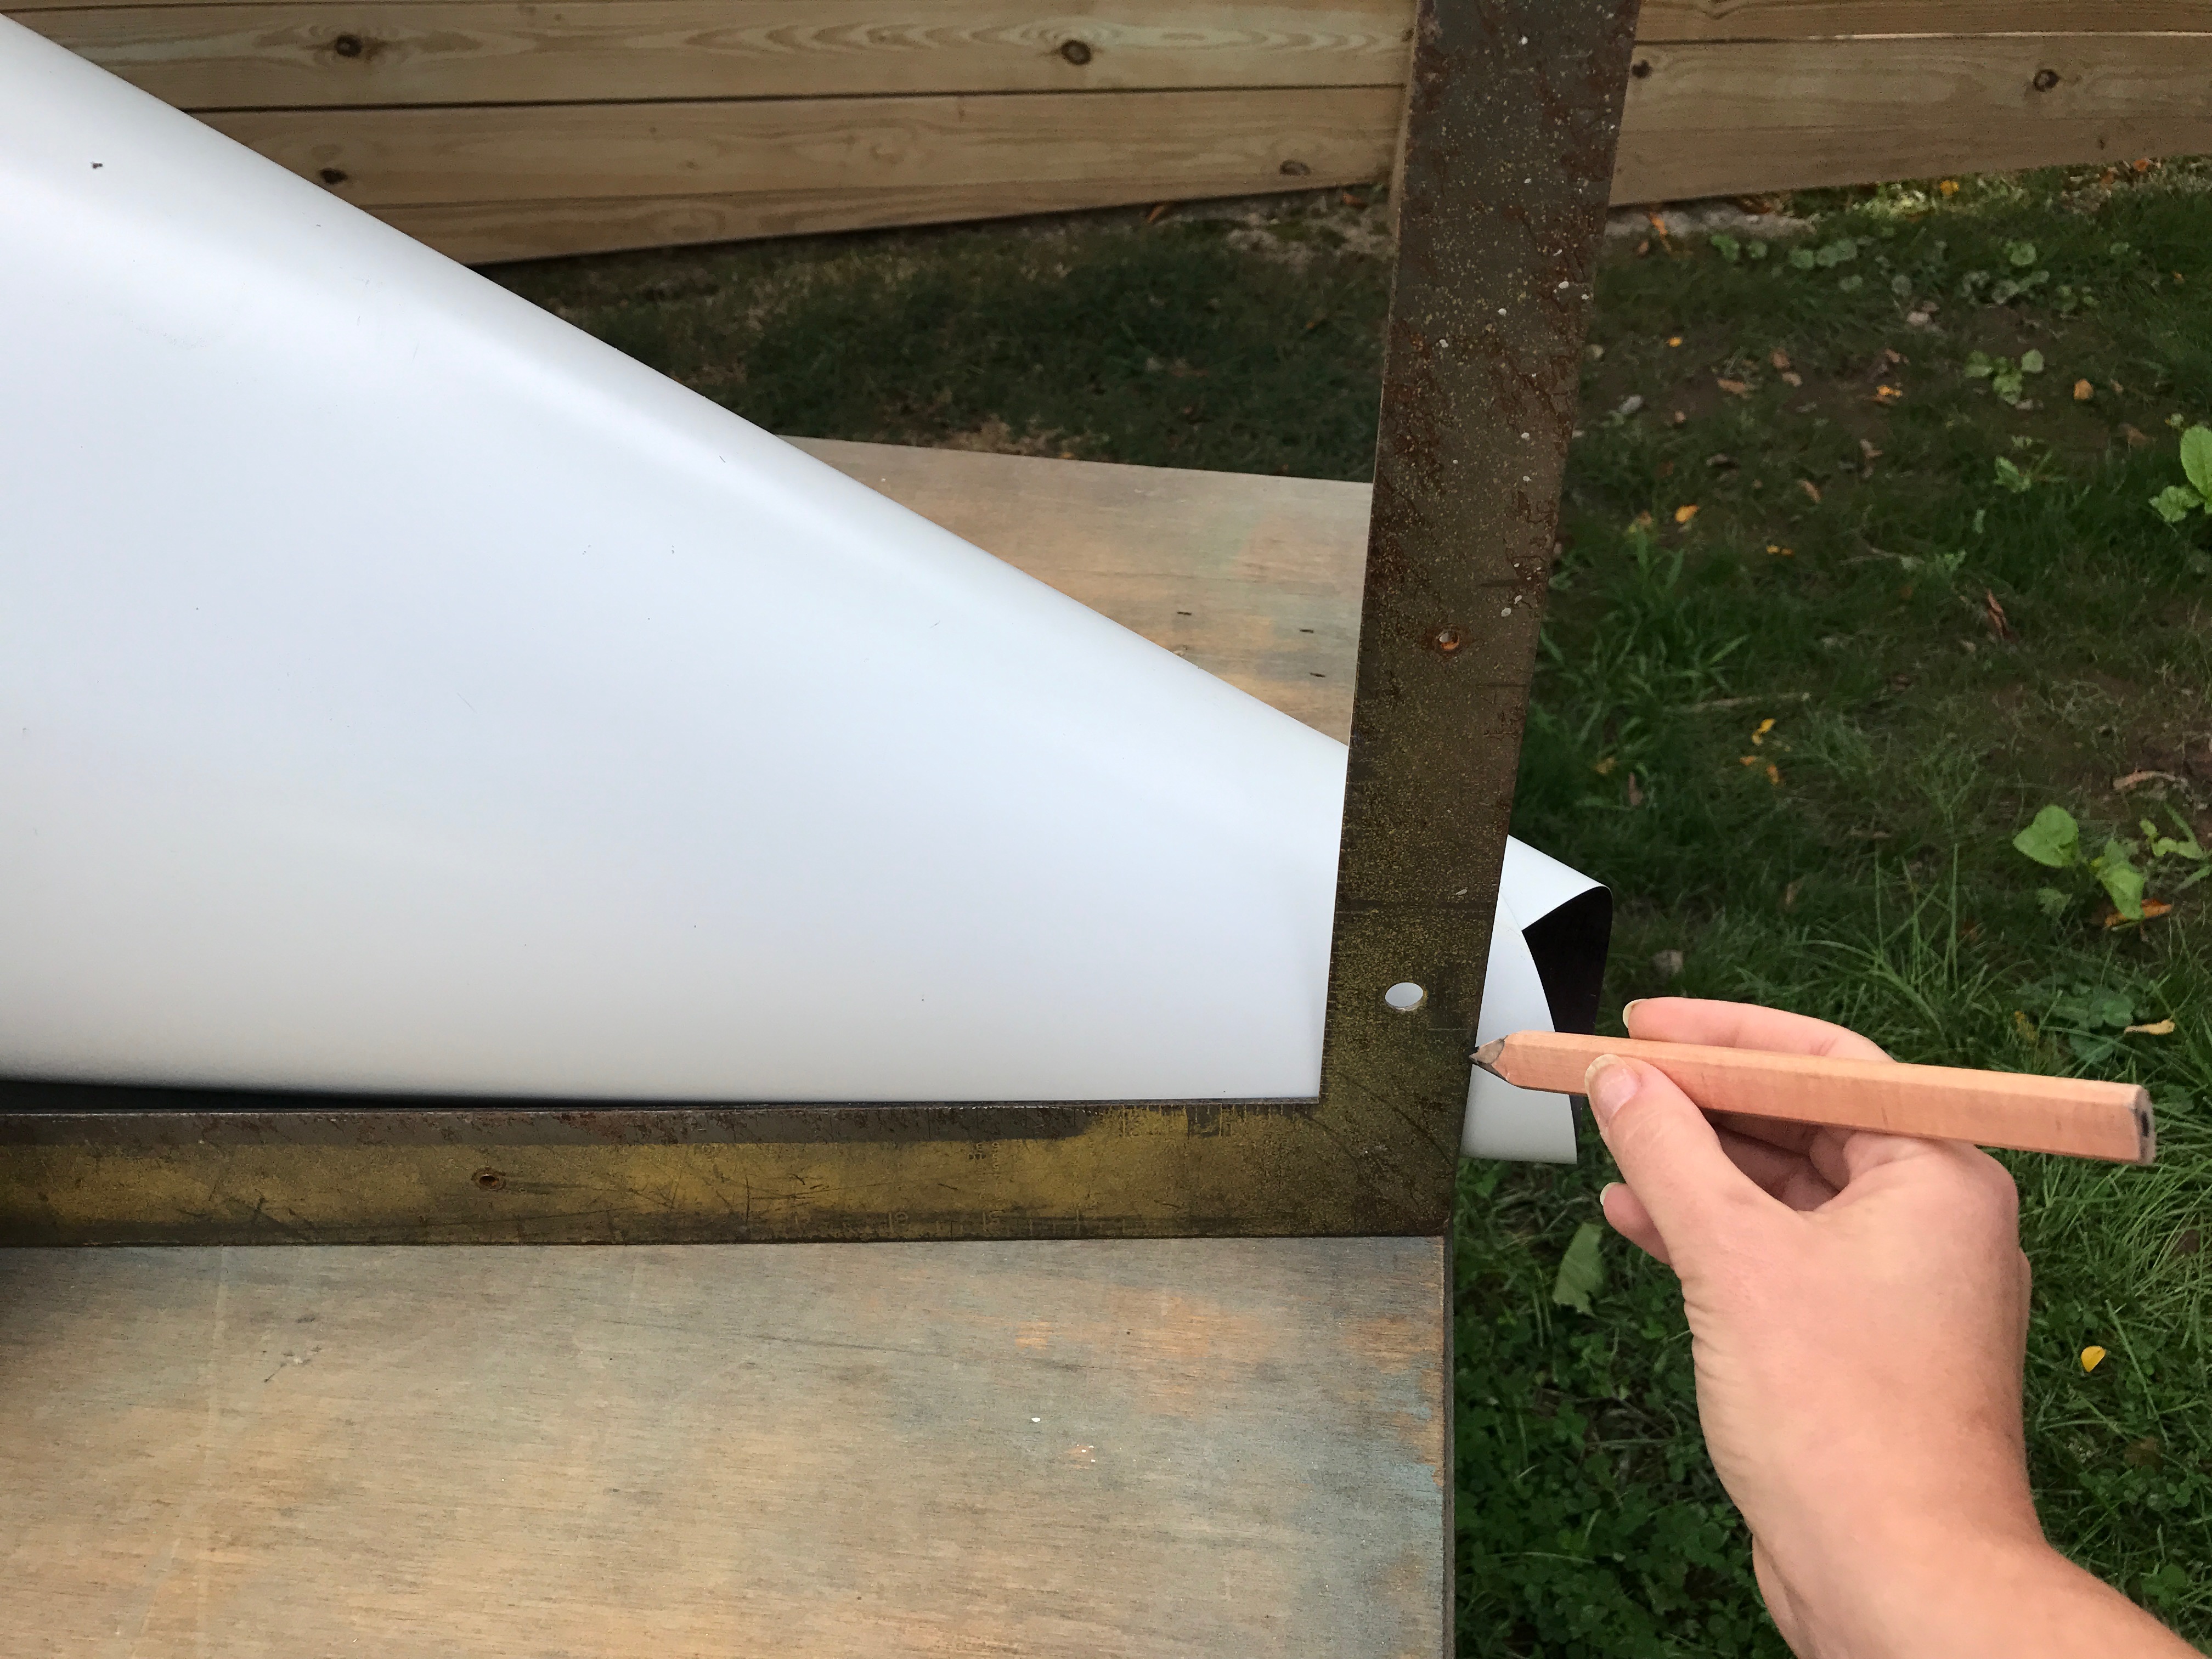
After making the pencil mark around the bottom of the cone, I cut the excess material. Then I used the bottom to mark the height of the cone (the measurement from inside the table), and cut off that extra material, too.
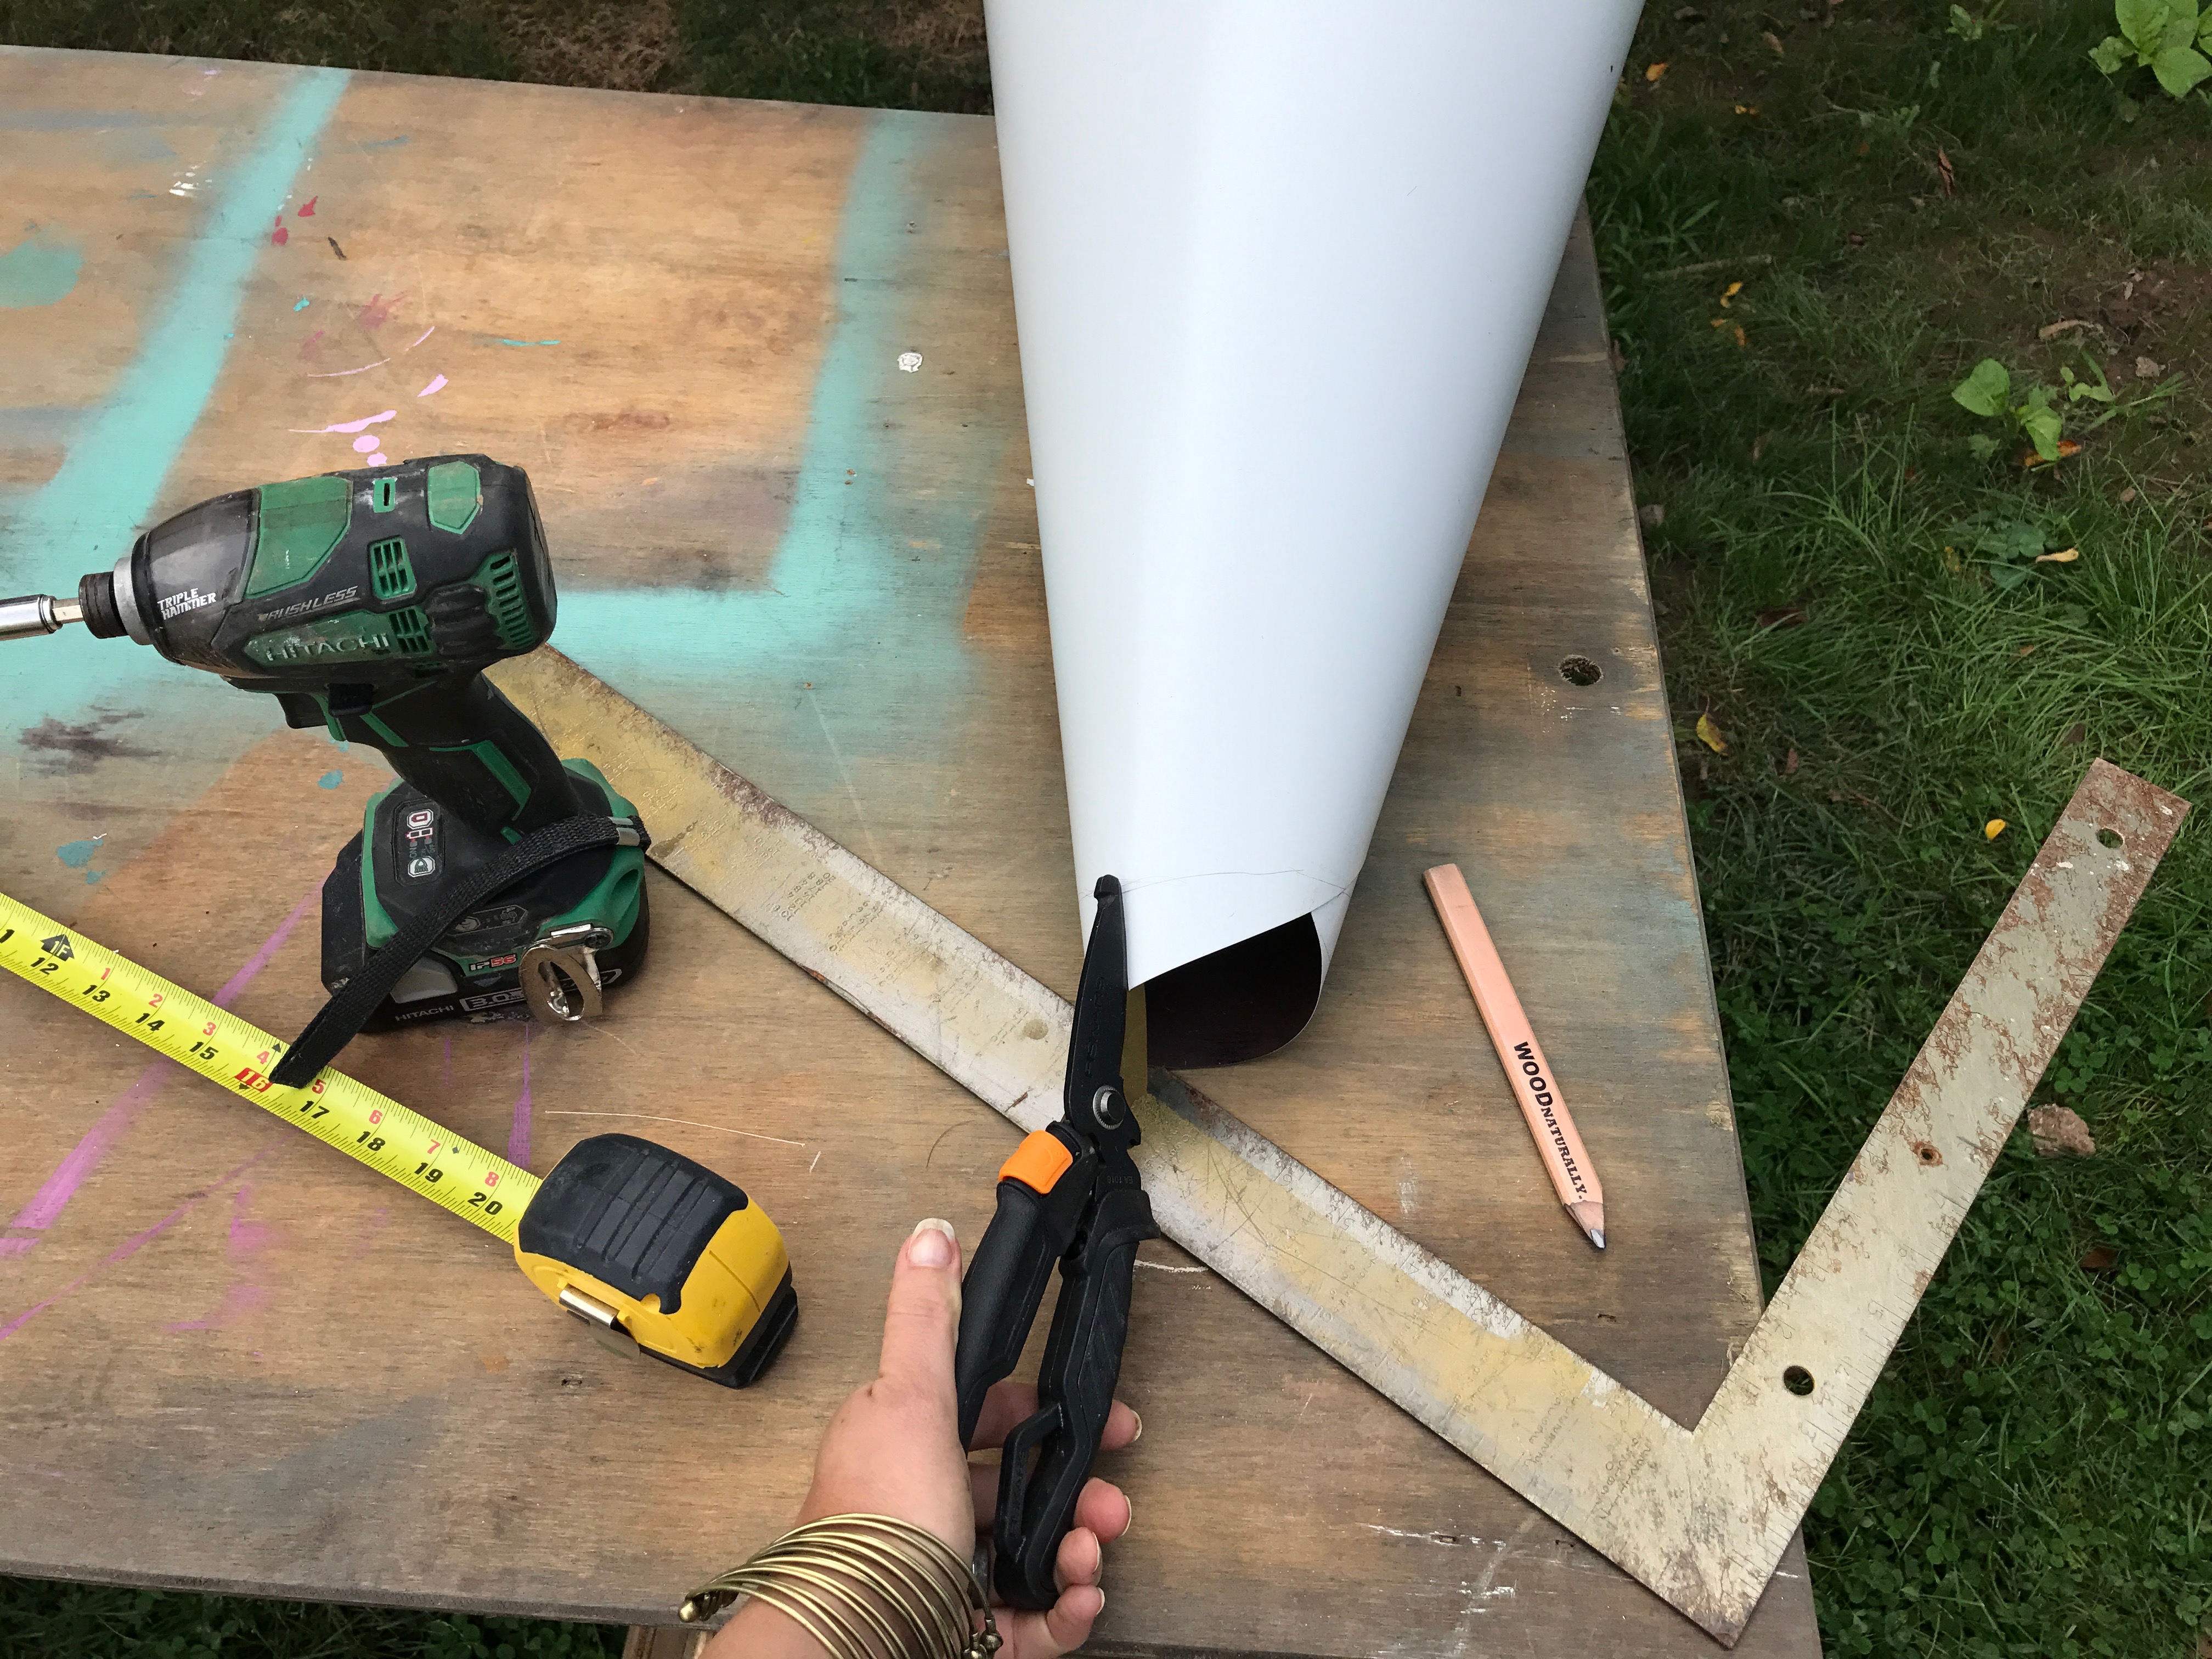
Before taking the next step in this DIY project, I made sure the cone fit perfectly inside the table top and bottom.
Now that I have a flat cone I’m ready for paint. Painting is my favorite part of every project. I love the way color transforms something ordinary into what’s living inside my imagination. Before I began, I made sure to read the application and safety instructions on the back of the can before spraying and painted in a well ventilated space.
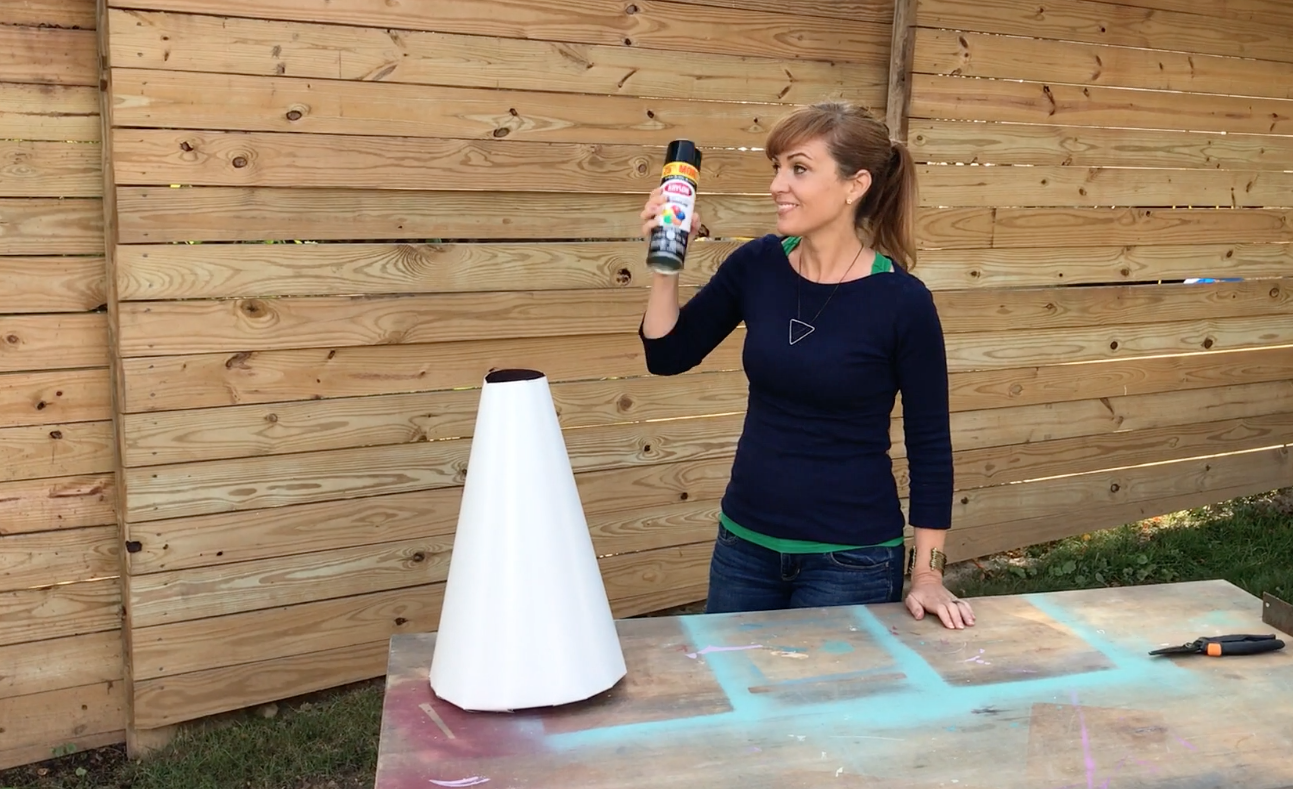
I used Krylon ColorMaster Paint + Primer-25% More in Gloss Black to paint the cone. With 3 light dusting coats, I ended up using about ½ a can to cover the sheet metal.
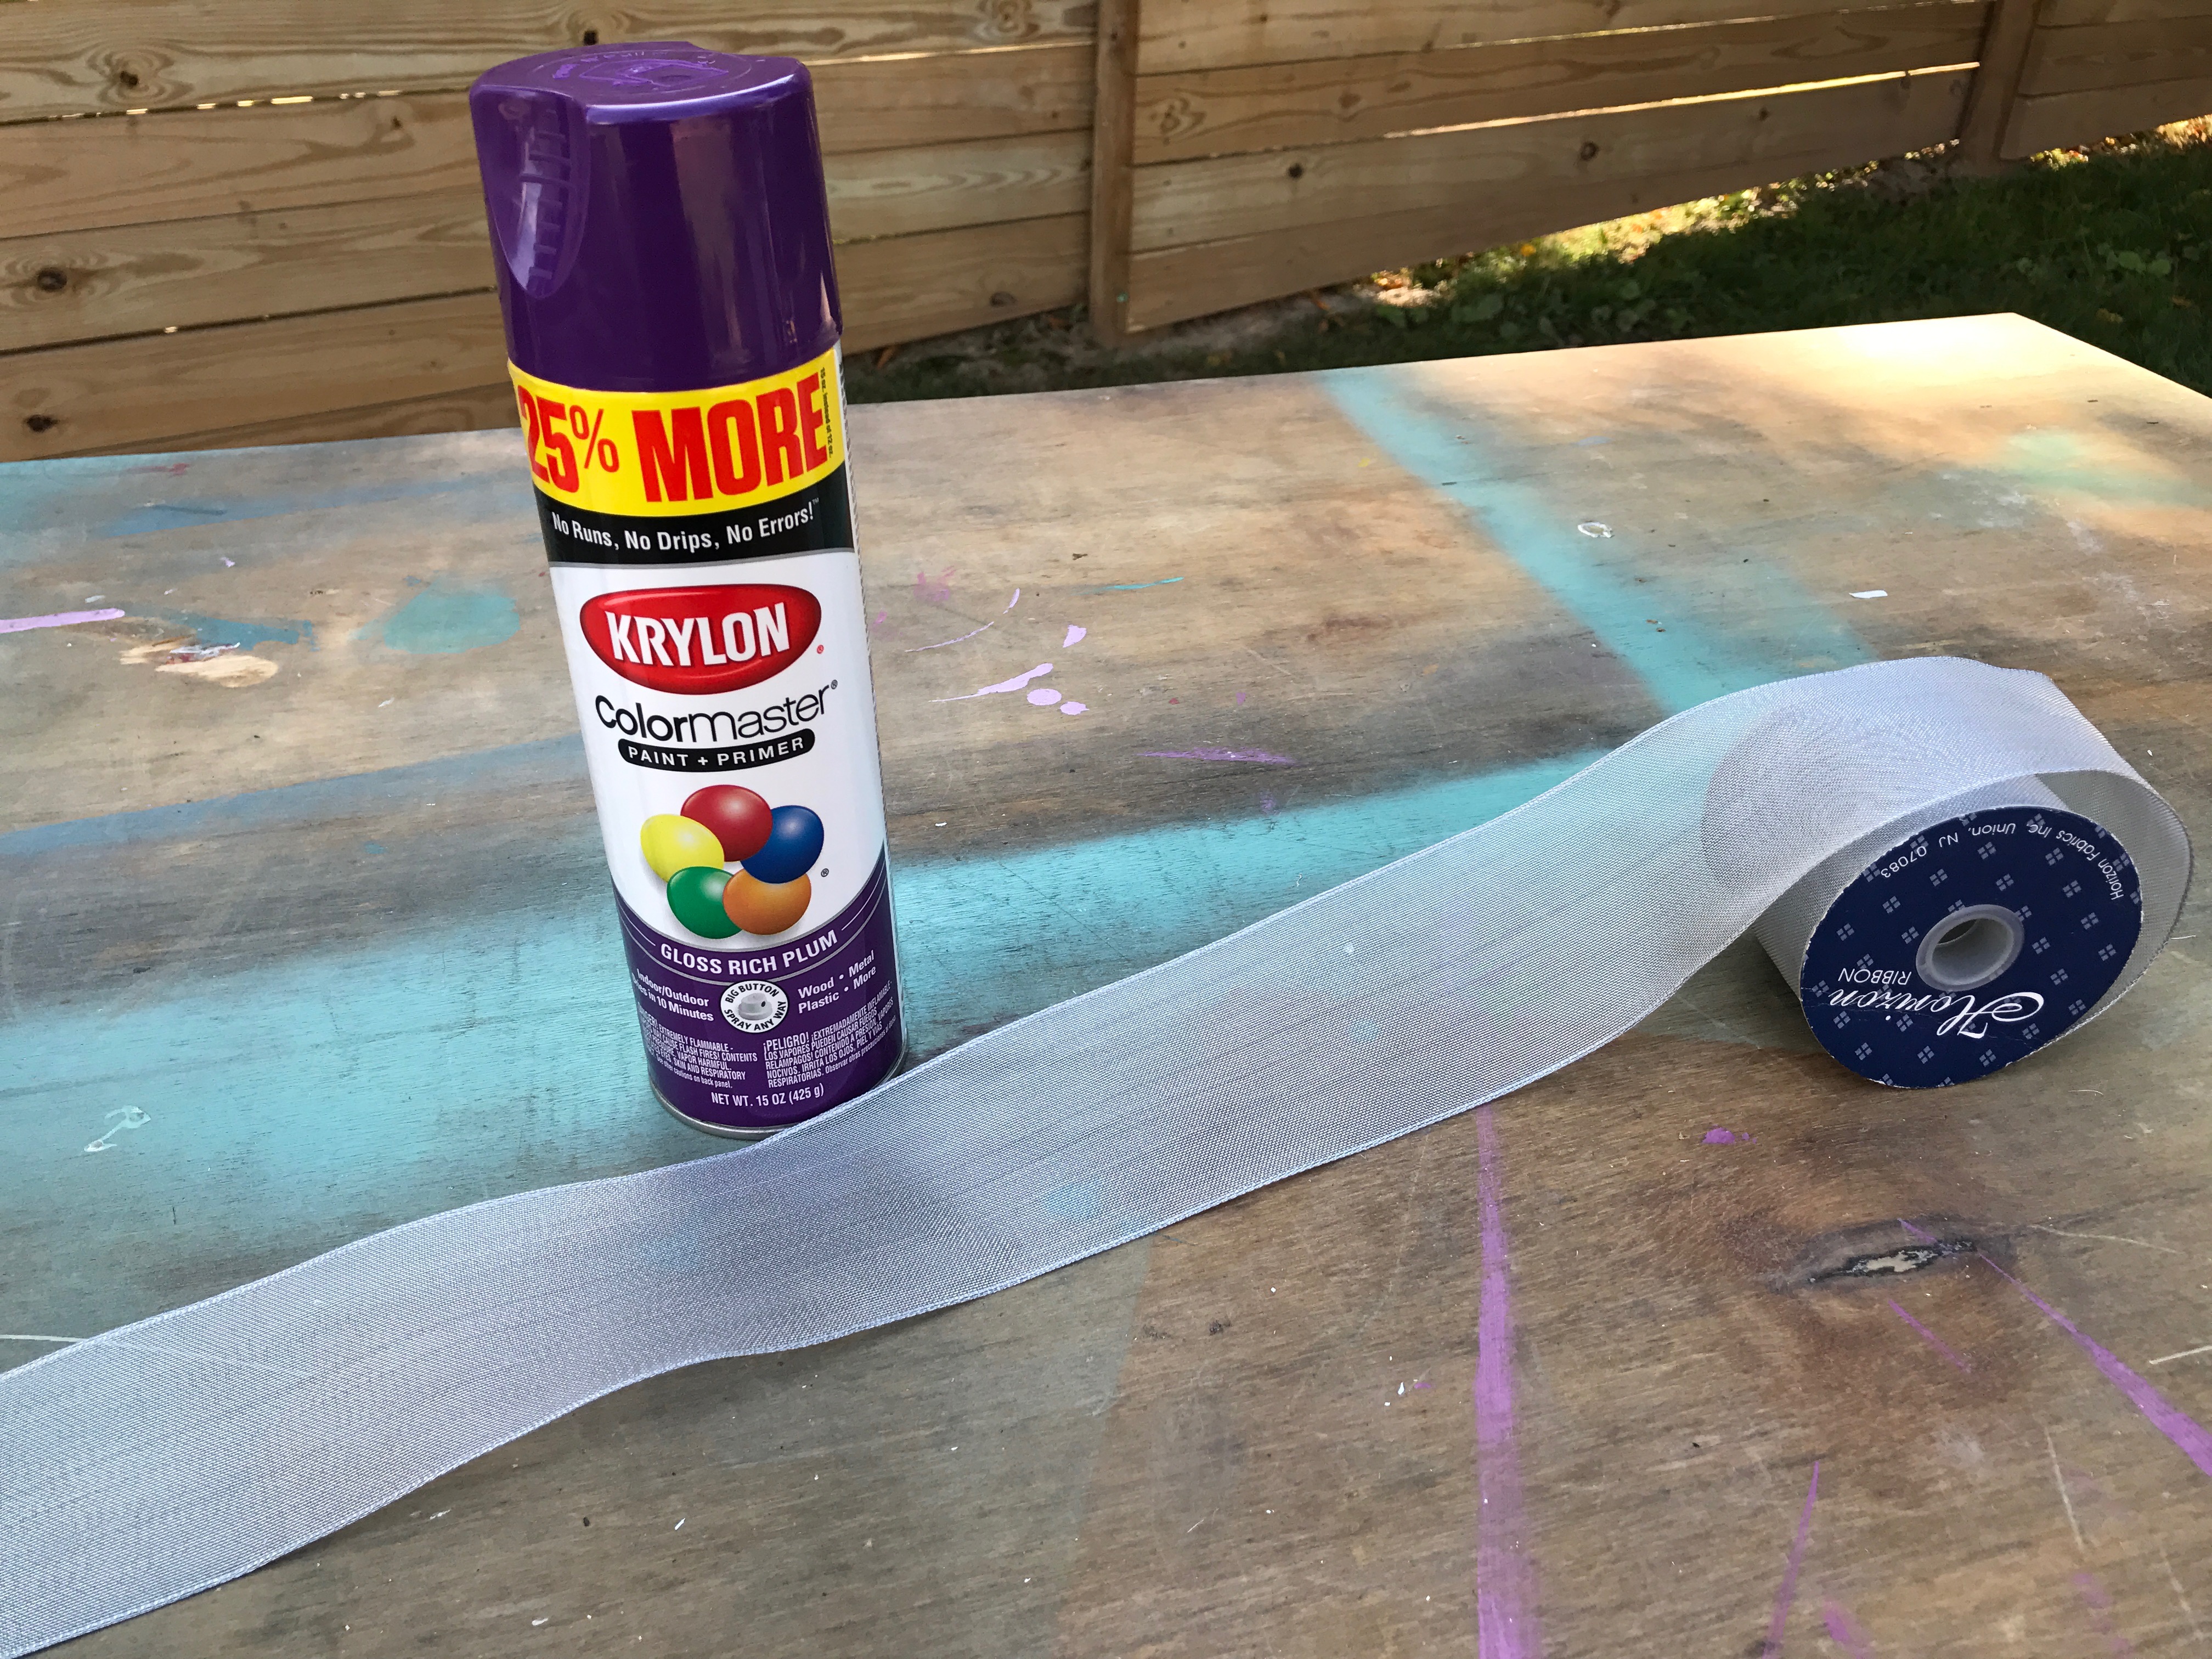
I think a witch’s hat needs trim, so I grabbed a thick ribbon out of my stash of craft supplies. It’s silver, which isn’t exactly what I envisioned for this witch, so I painted it will Krylon ColorMaster Paint + Primer -25% More in Gloss Rich Plum. Ribbon takes paint beautifully, so I only needed two dusting coats.
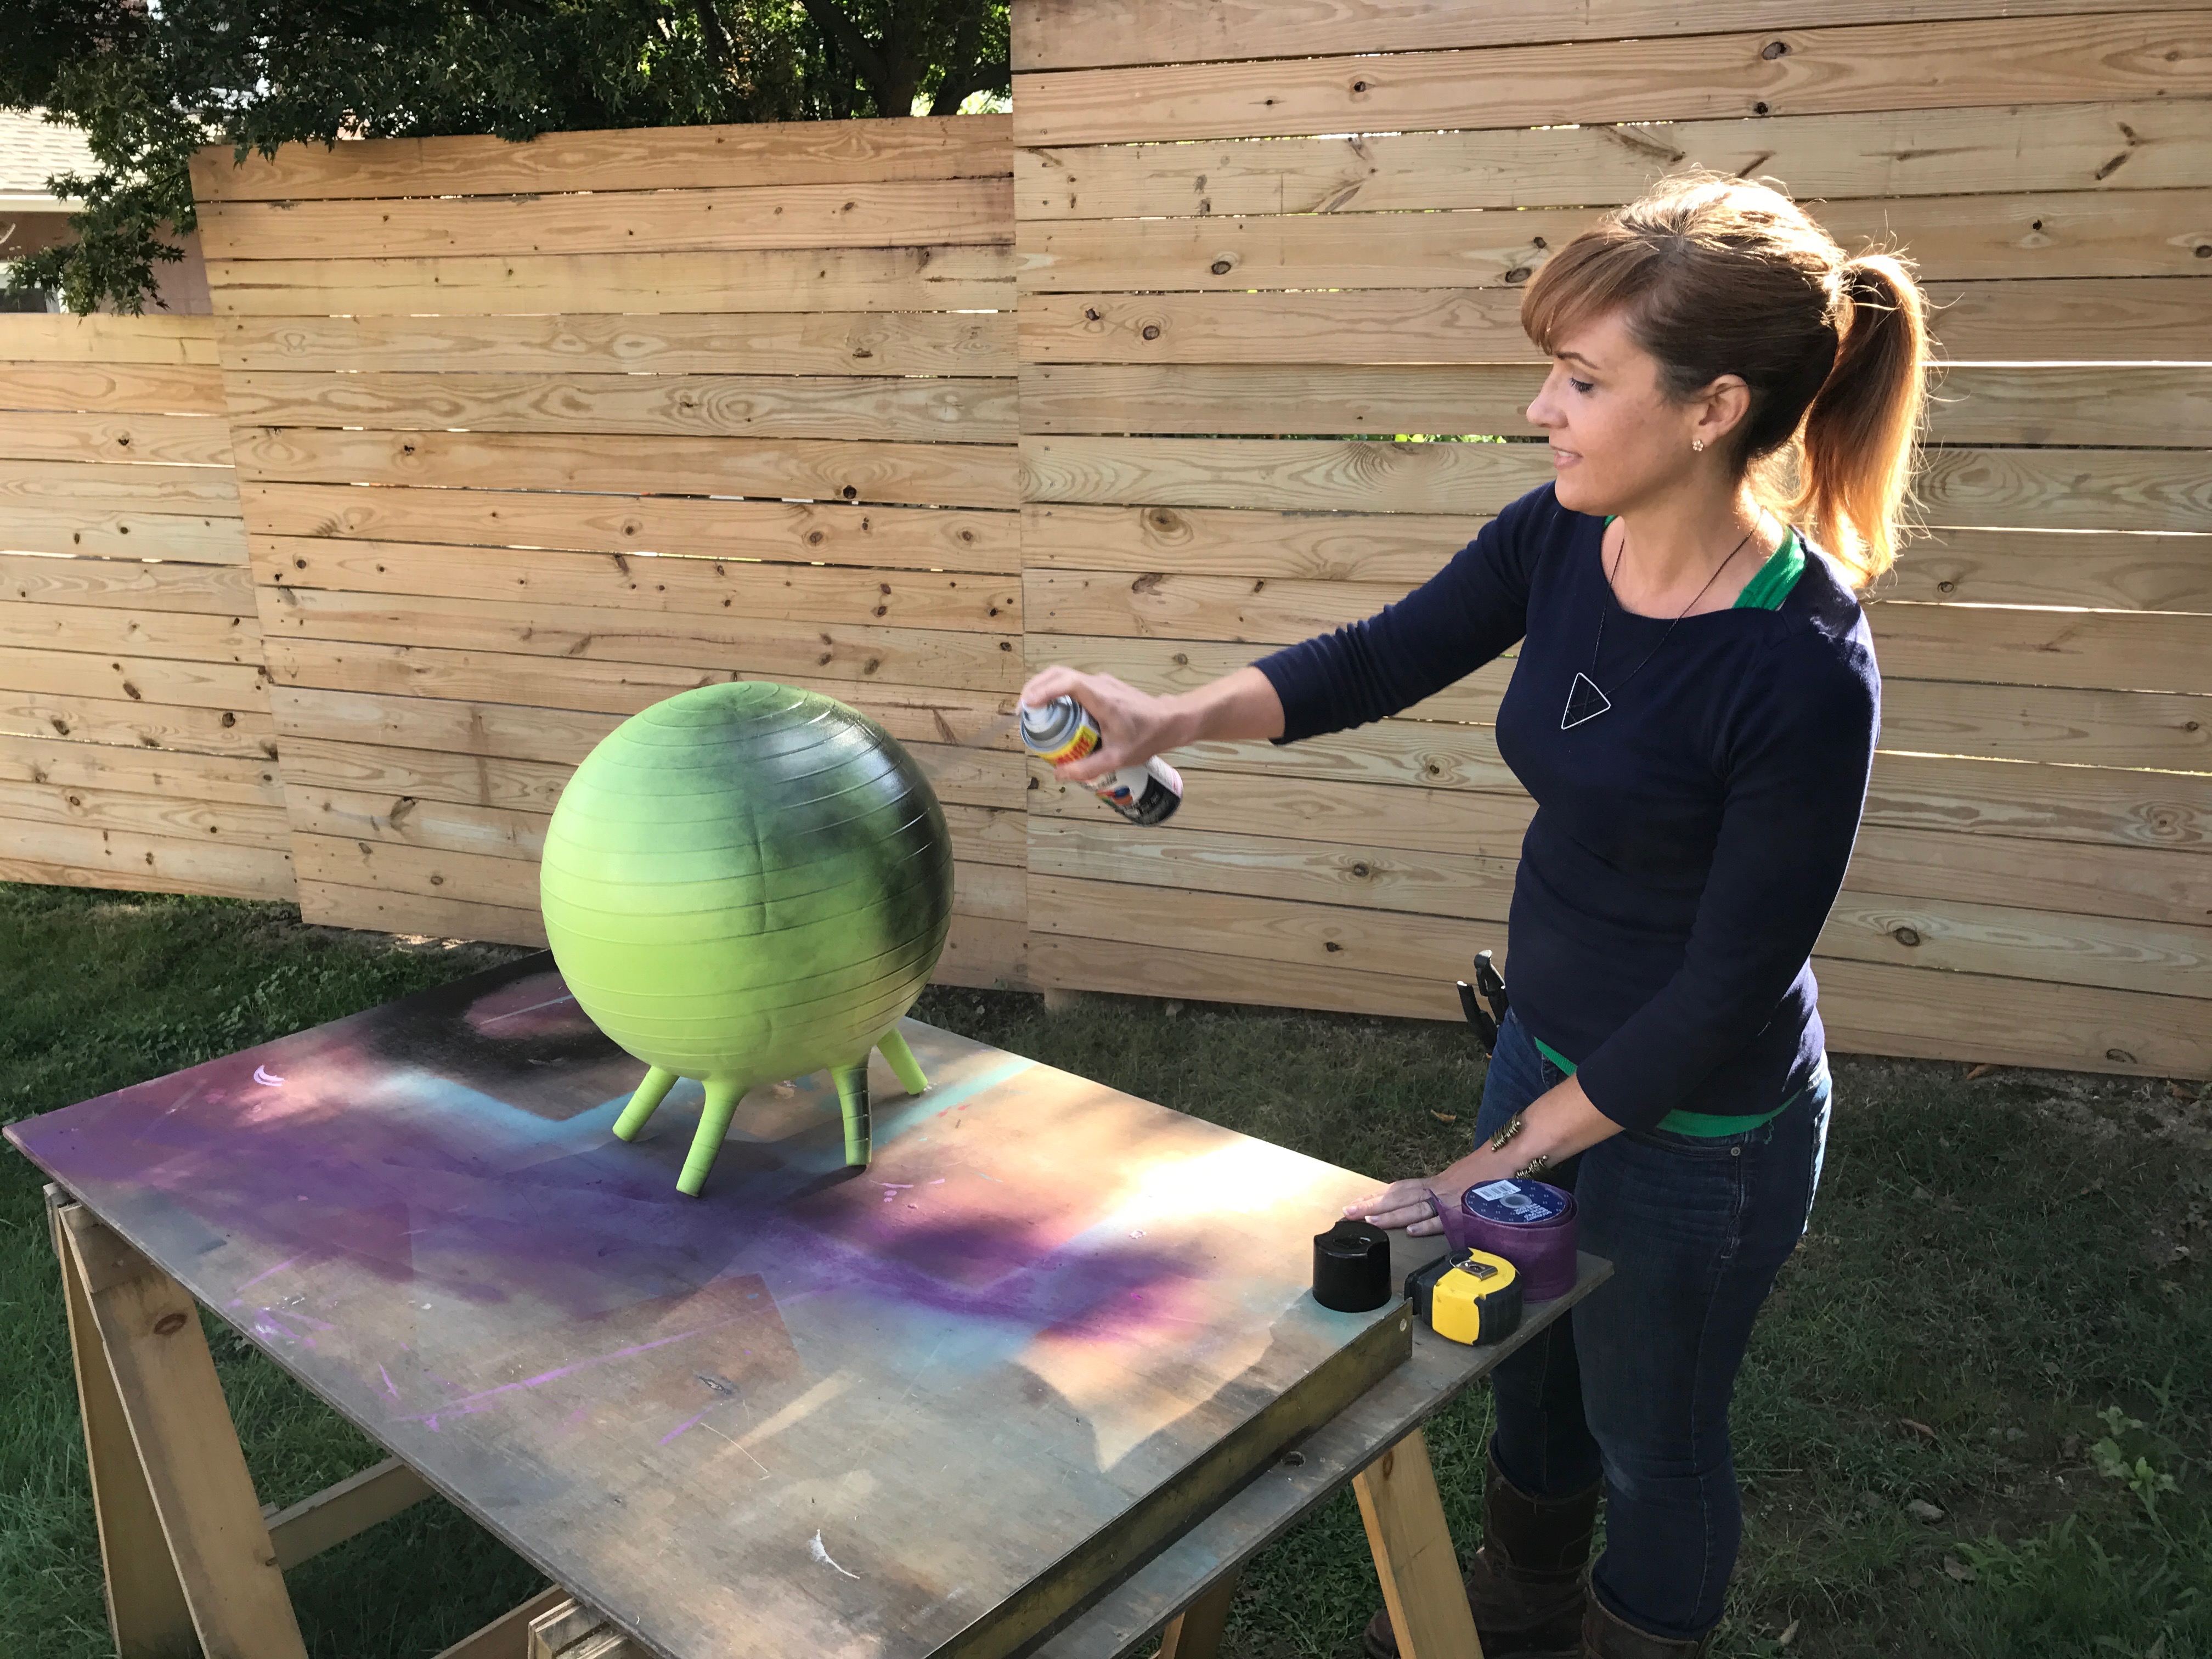
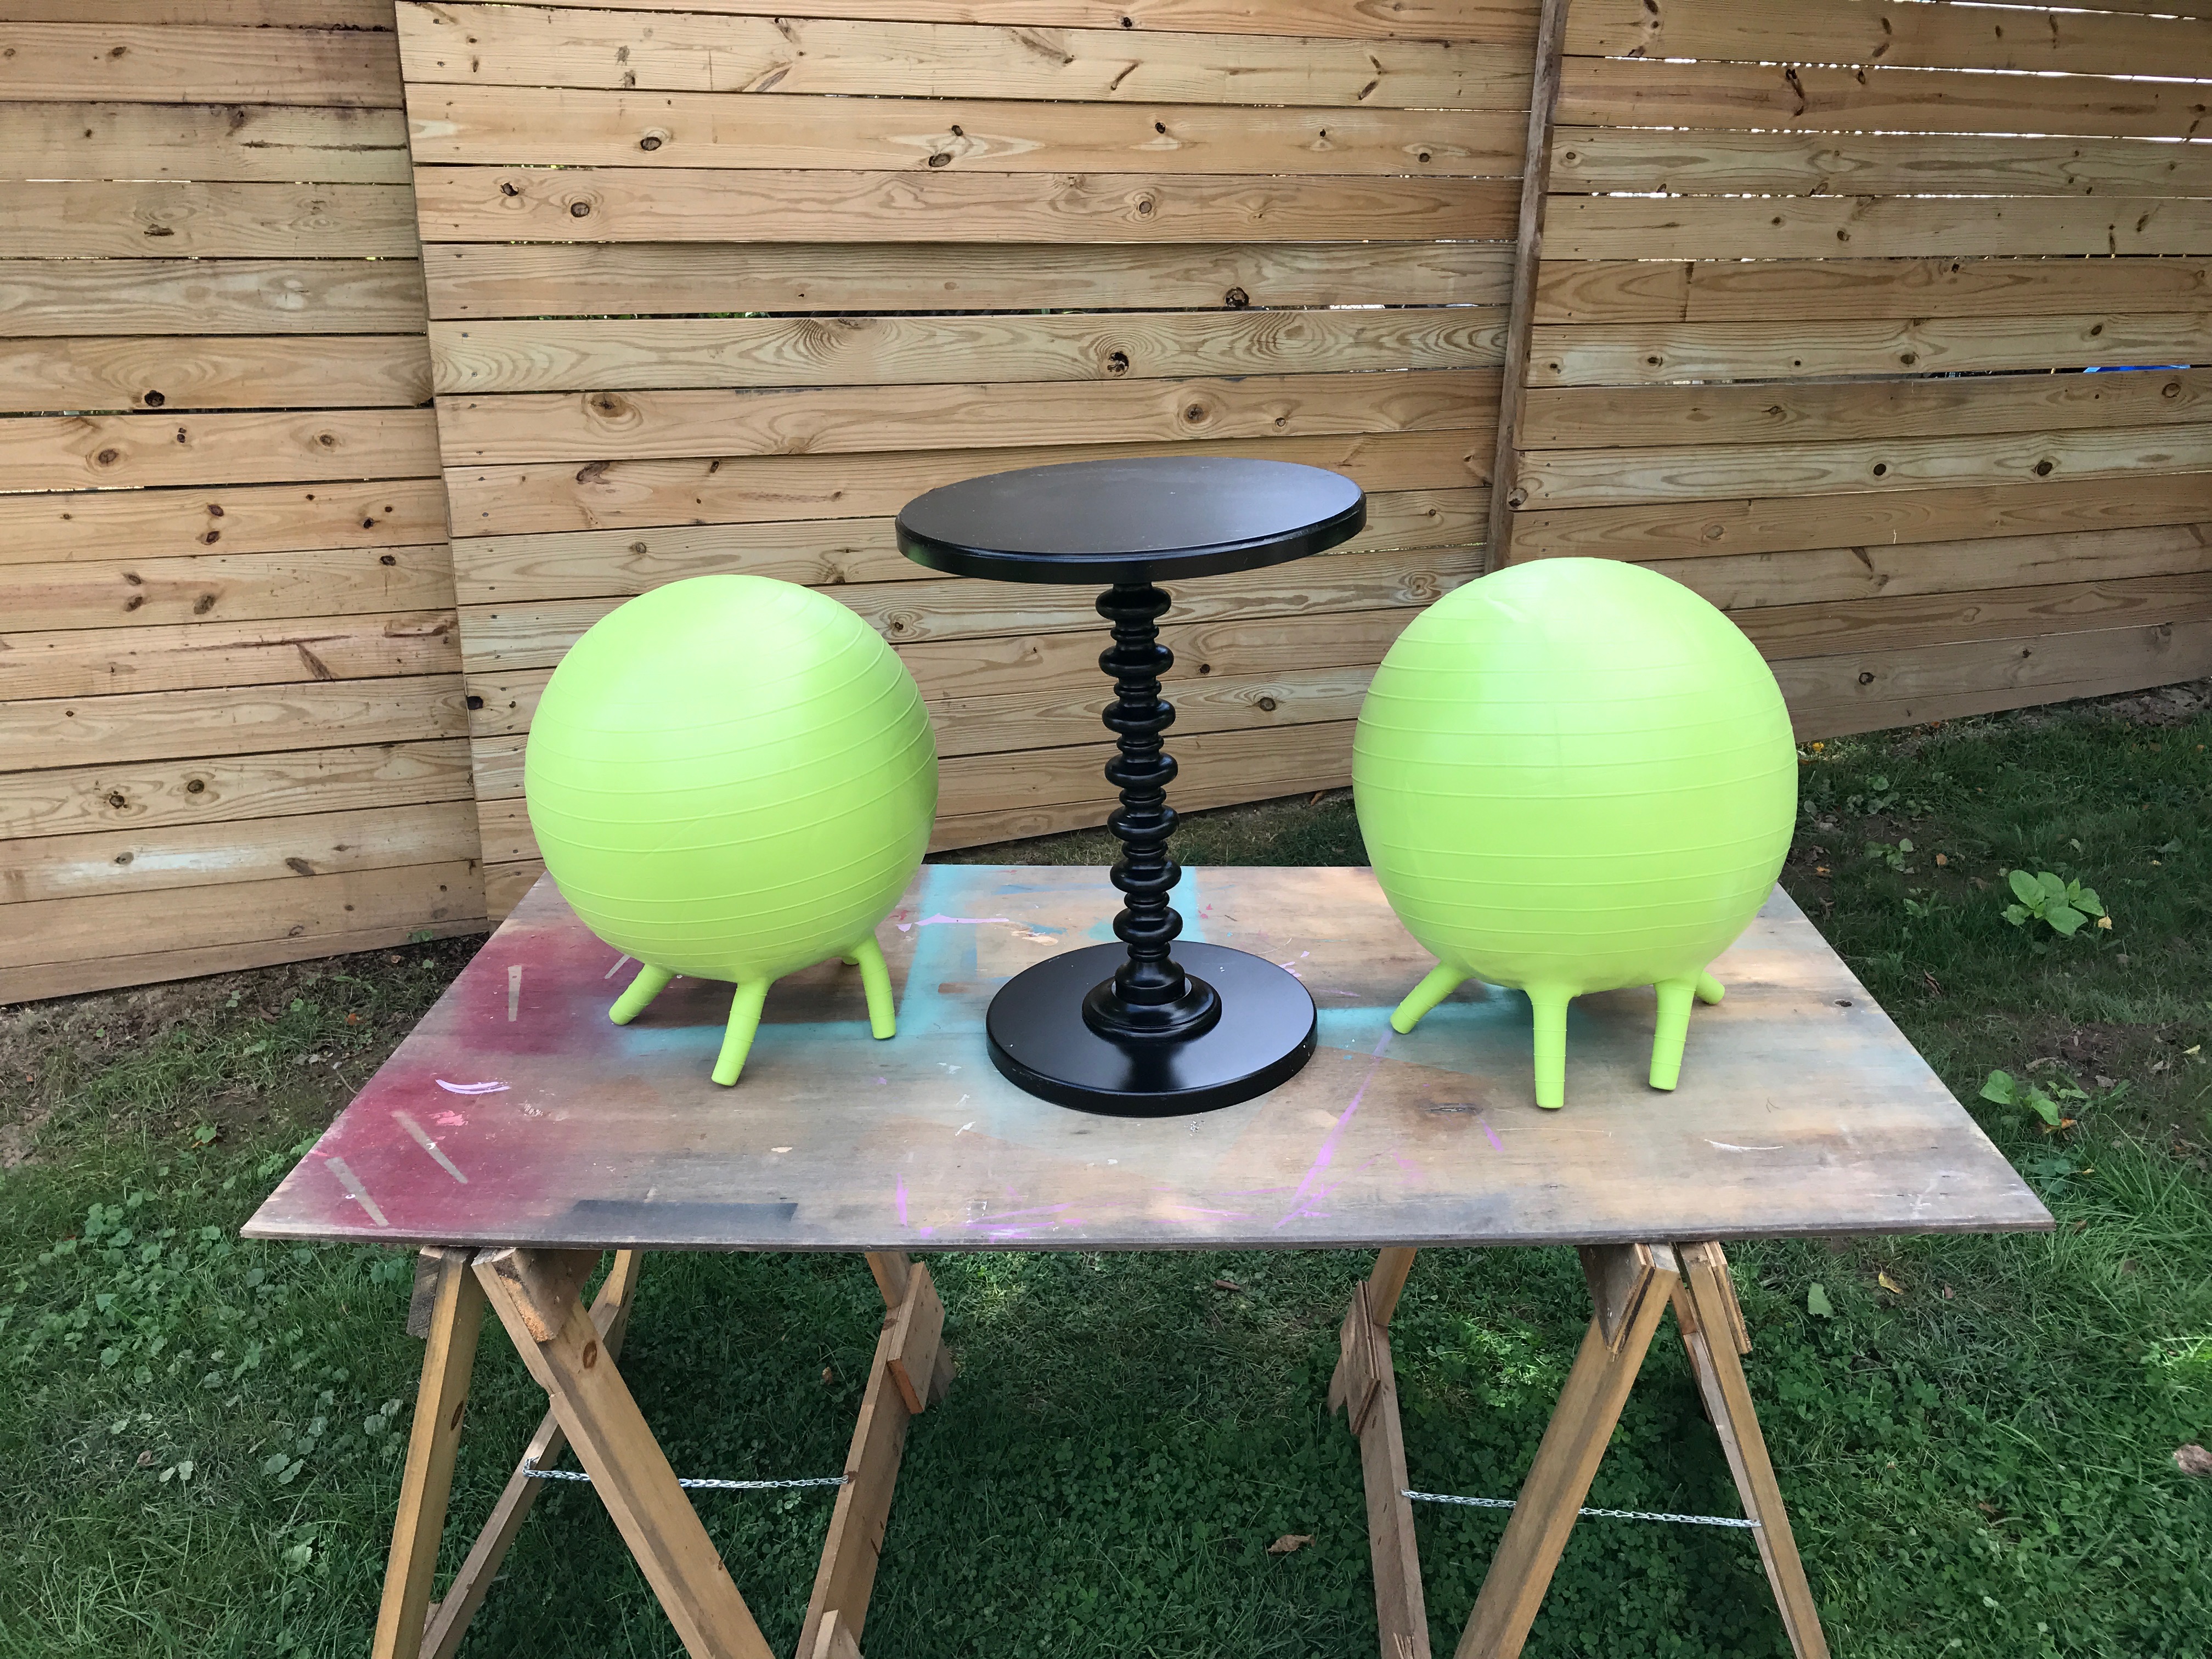
The next step of the project is transforming the little yoga balls into Halloween spiders. I painted both yoga balls with the same Krylon ColorMaster Paint + Primer-25% More in Gloss Black from the witch’s hat, using 3 coats and almost one can of paint.
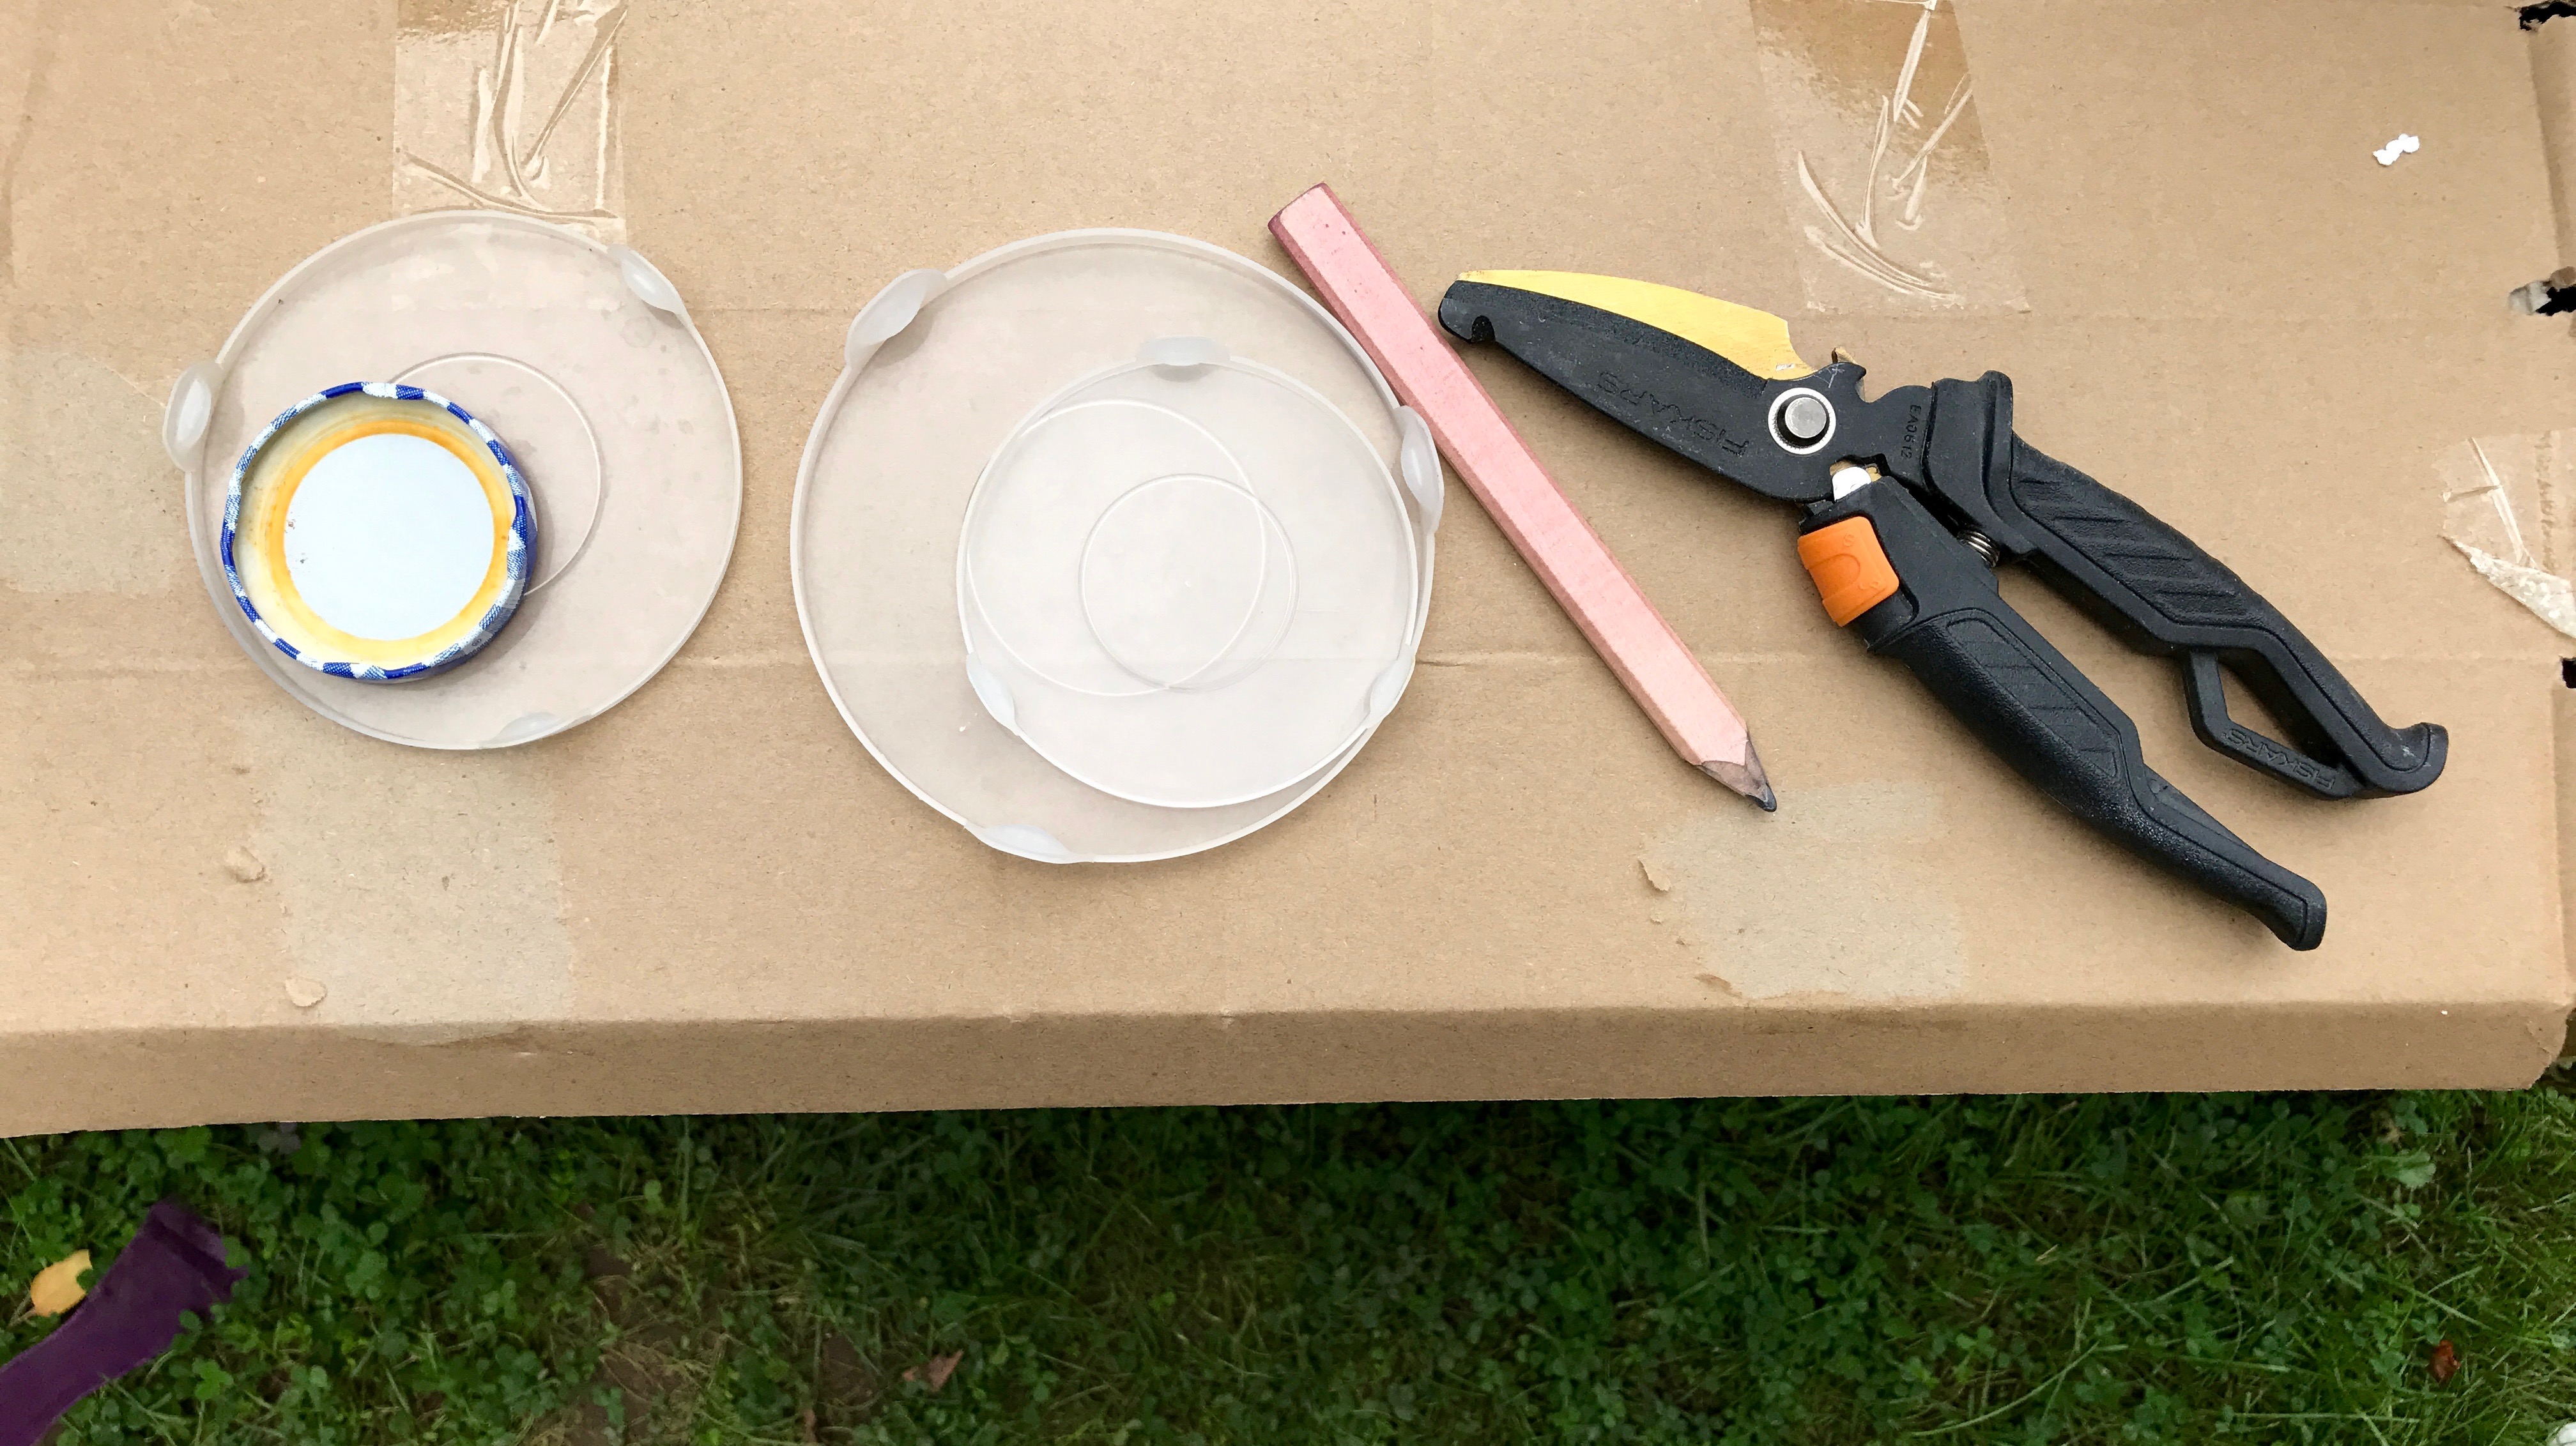
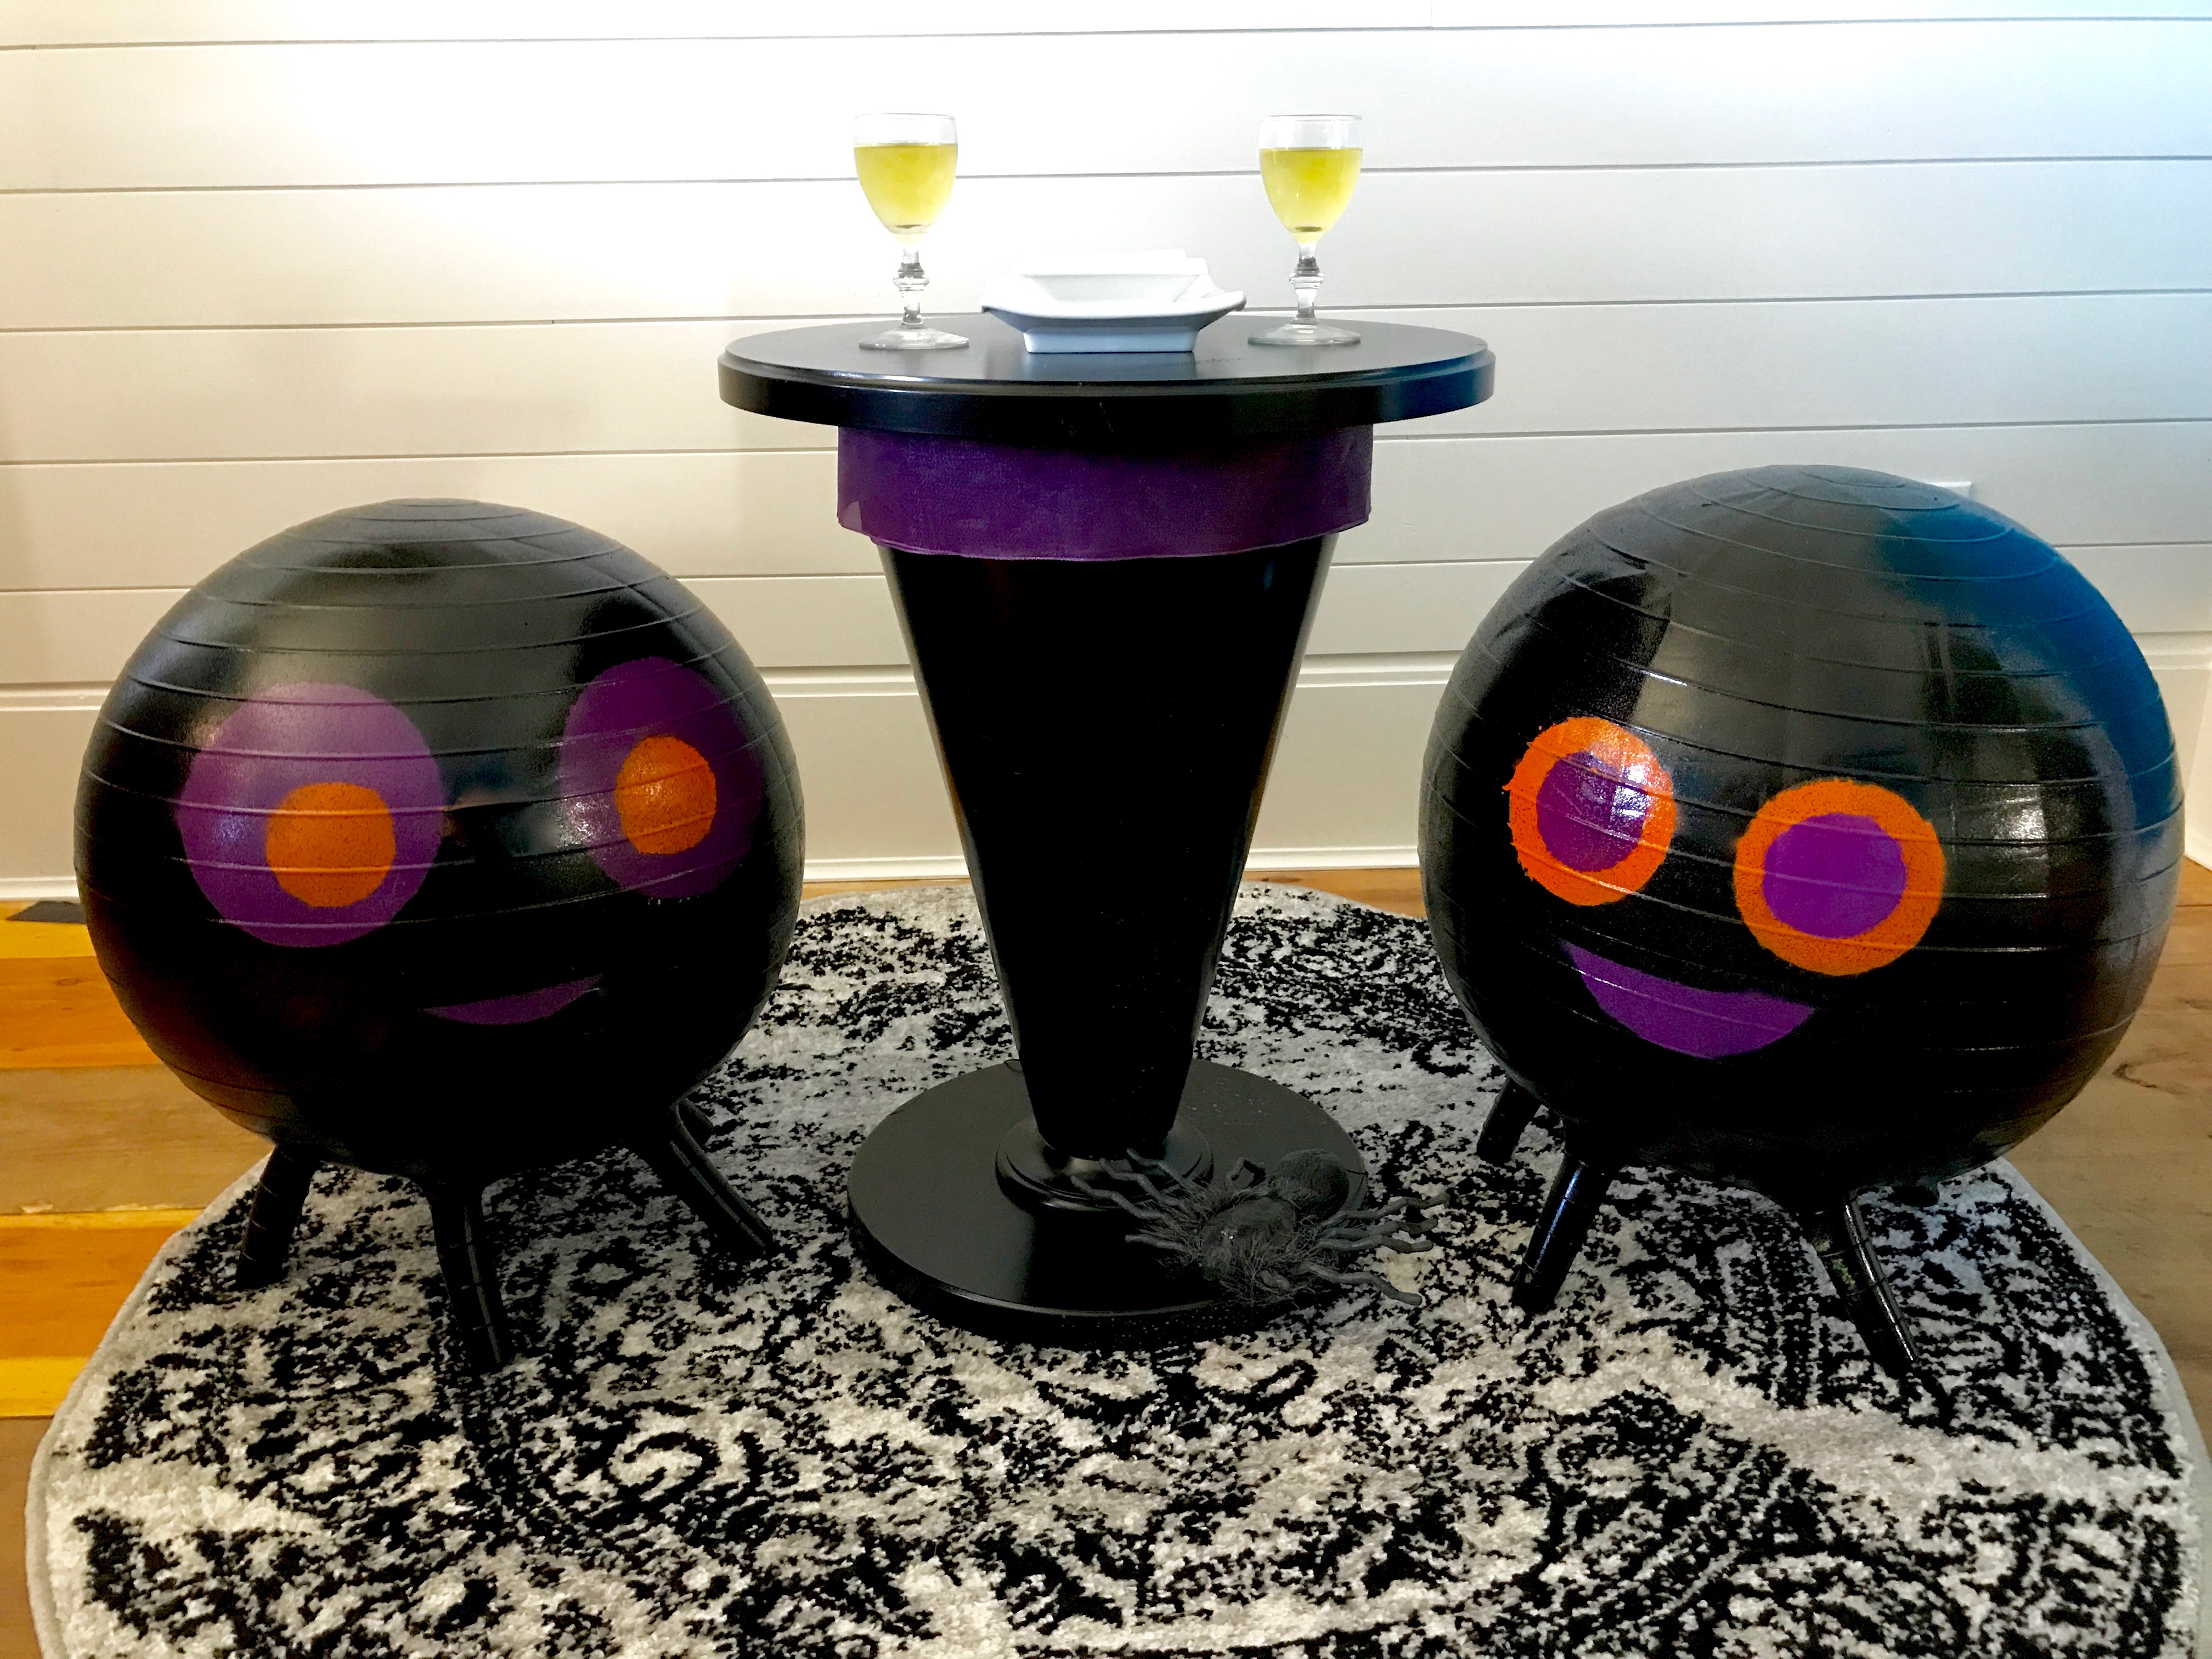
While the paint was drying on the yoga balls, I made templates for the spider eyes from scrap cardboard and a few lids from containers in my kitchen.
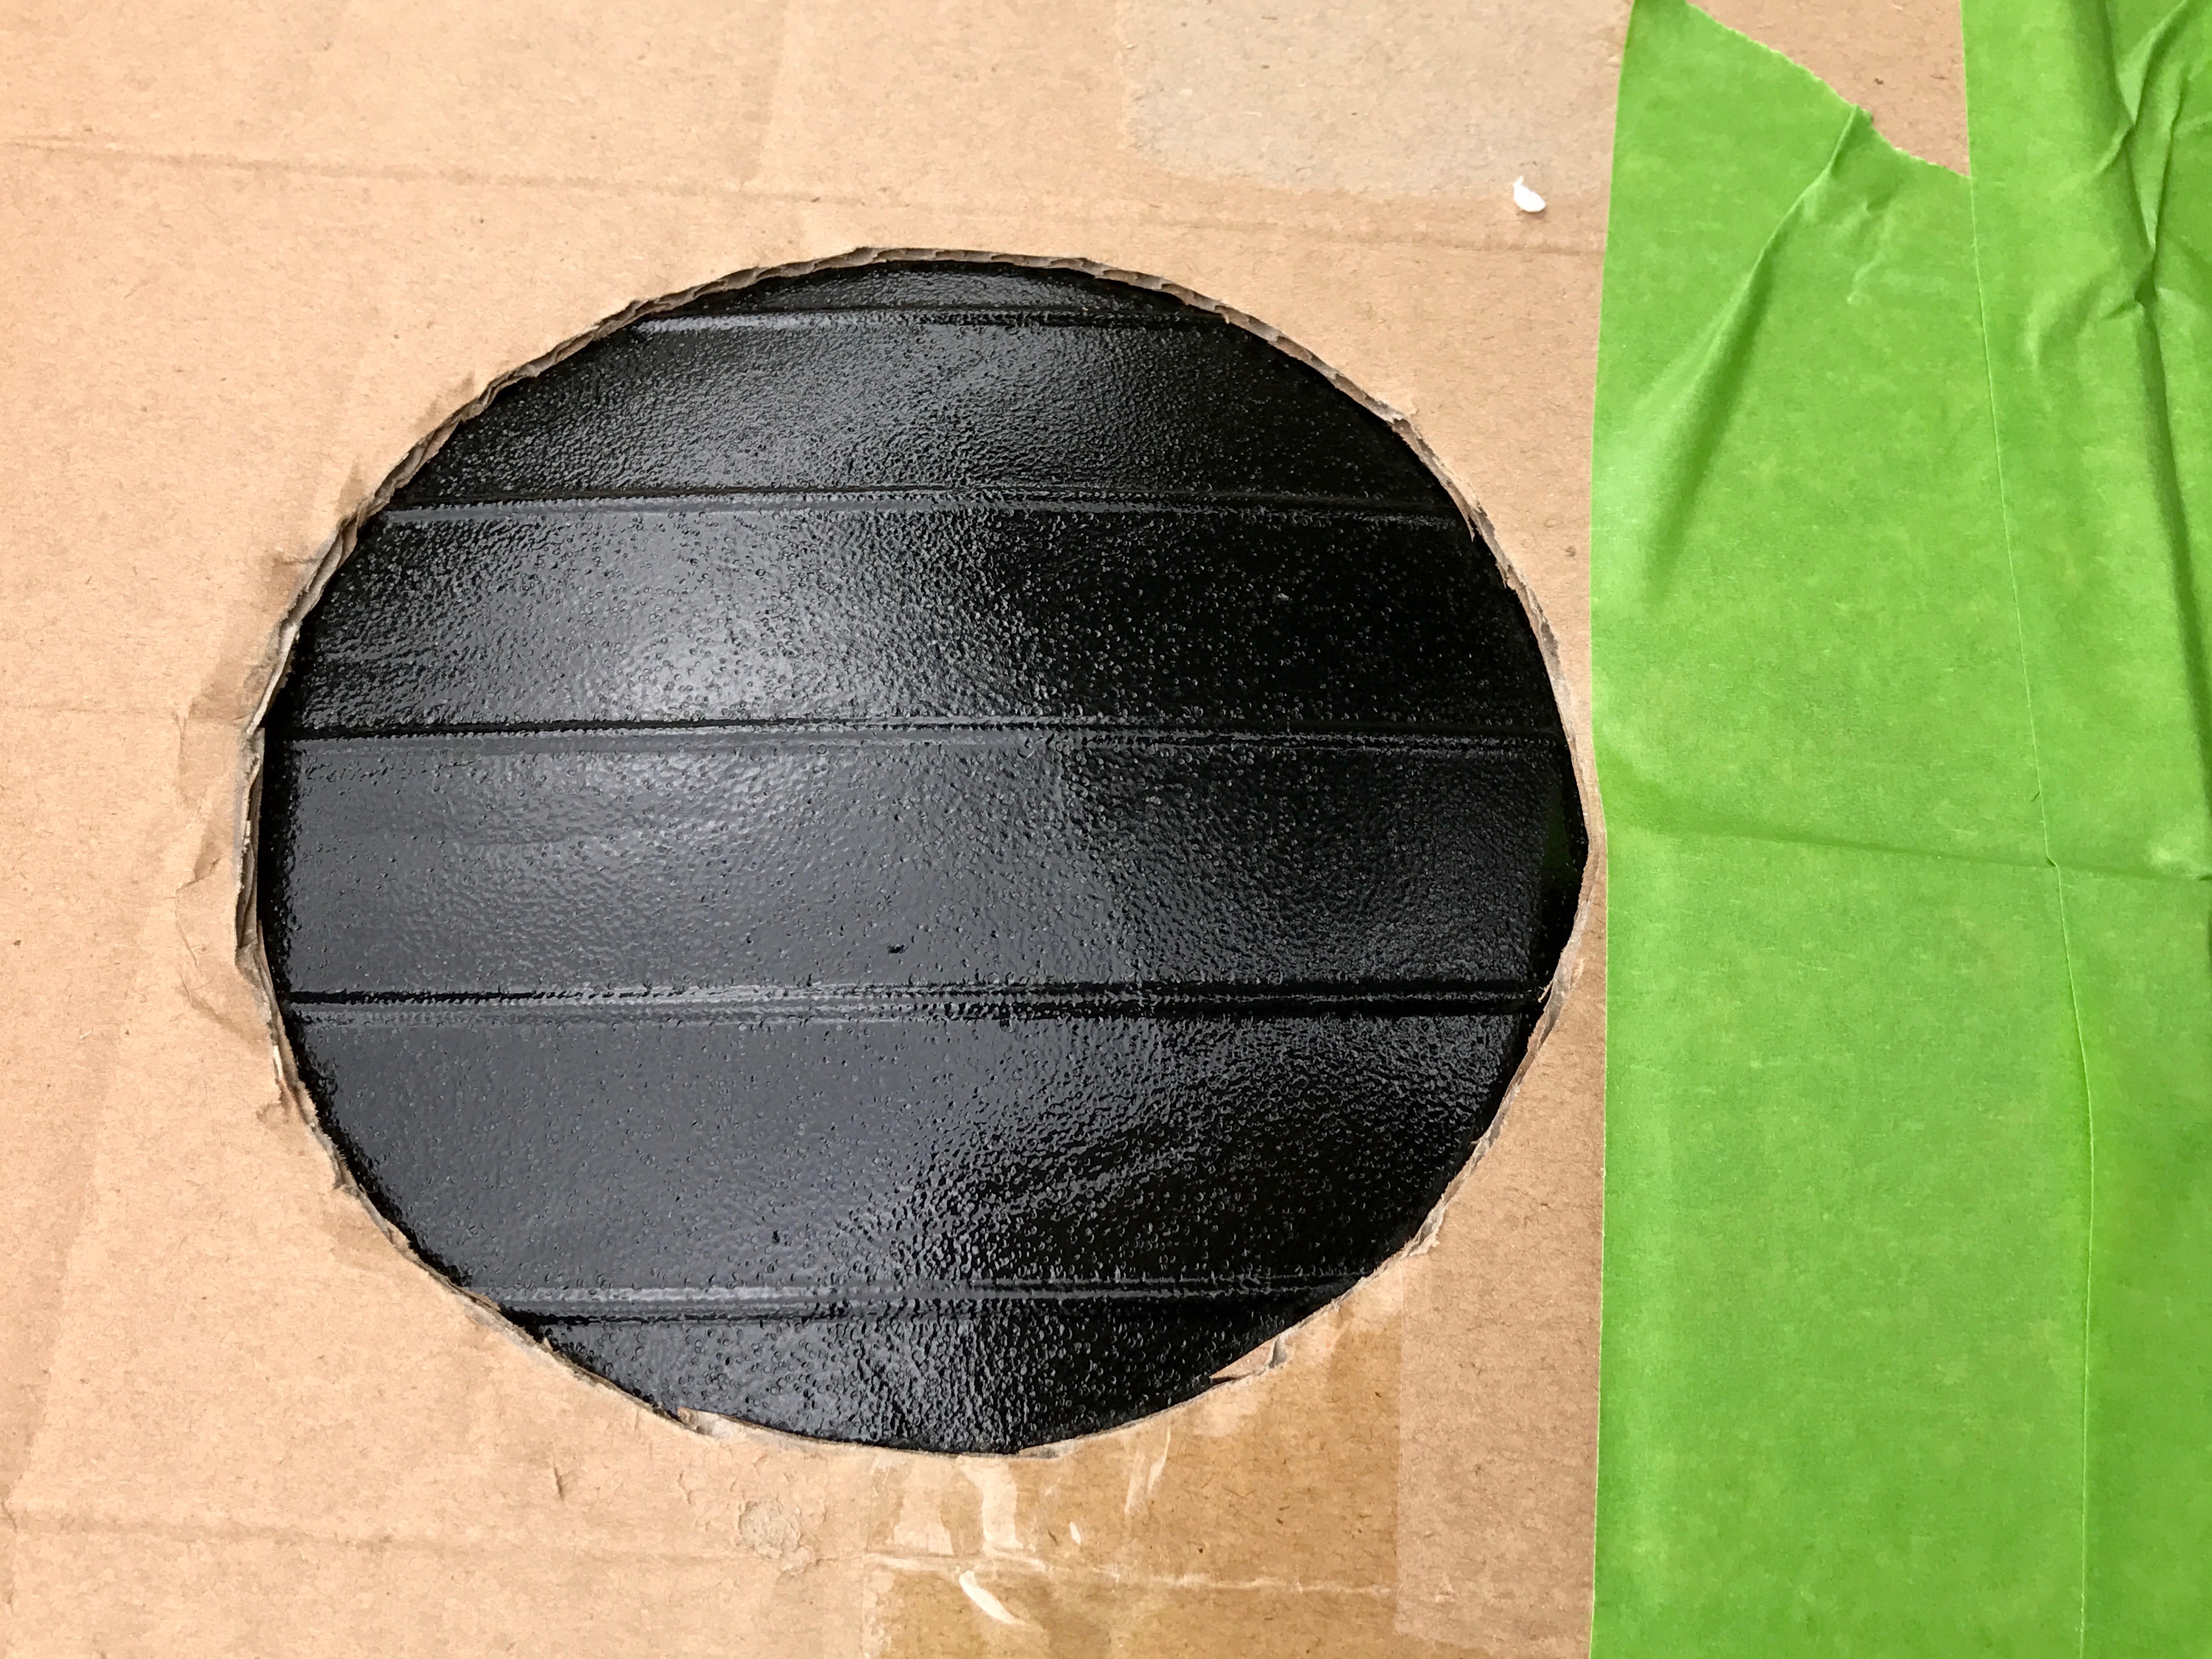
I taped over the slit I made in the templates in order to have a clean line from the paint. I layered the eyes with purple and orange spray paint (Krylon ColorMaster – 25% More Gloss Purple and ColorMaster -25% More Gloss Orange).
To layer the eyes with two different colors, I first dusted two coats of one color inside the cardboard template, and immediately took the cardboard off for it to dry. After the paint was dry to touch, I then used another sized cardboard template to apply the second color inside the first circle of color.
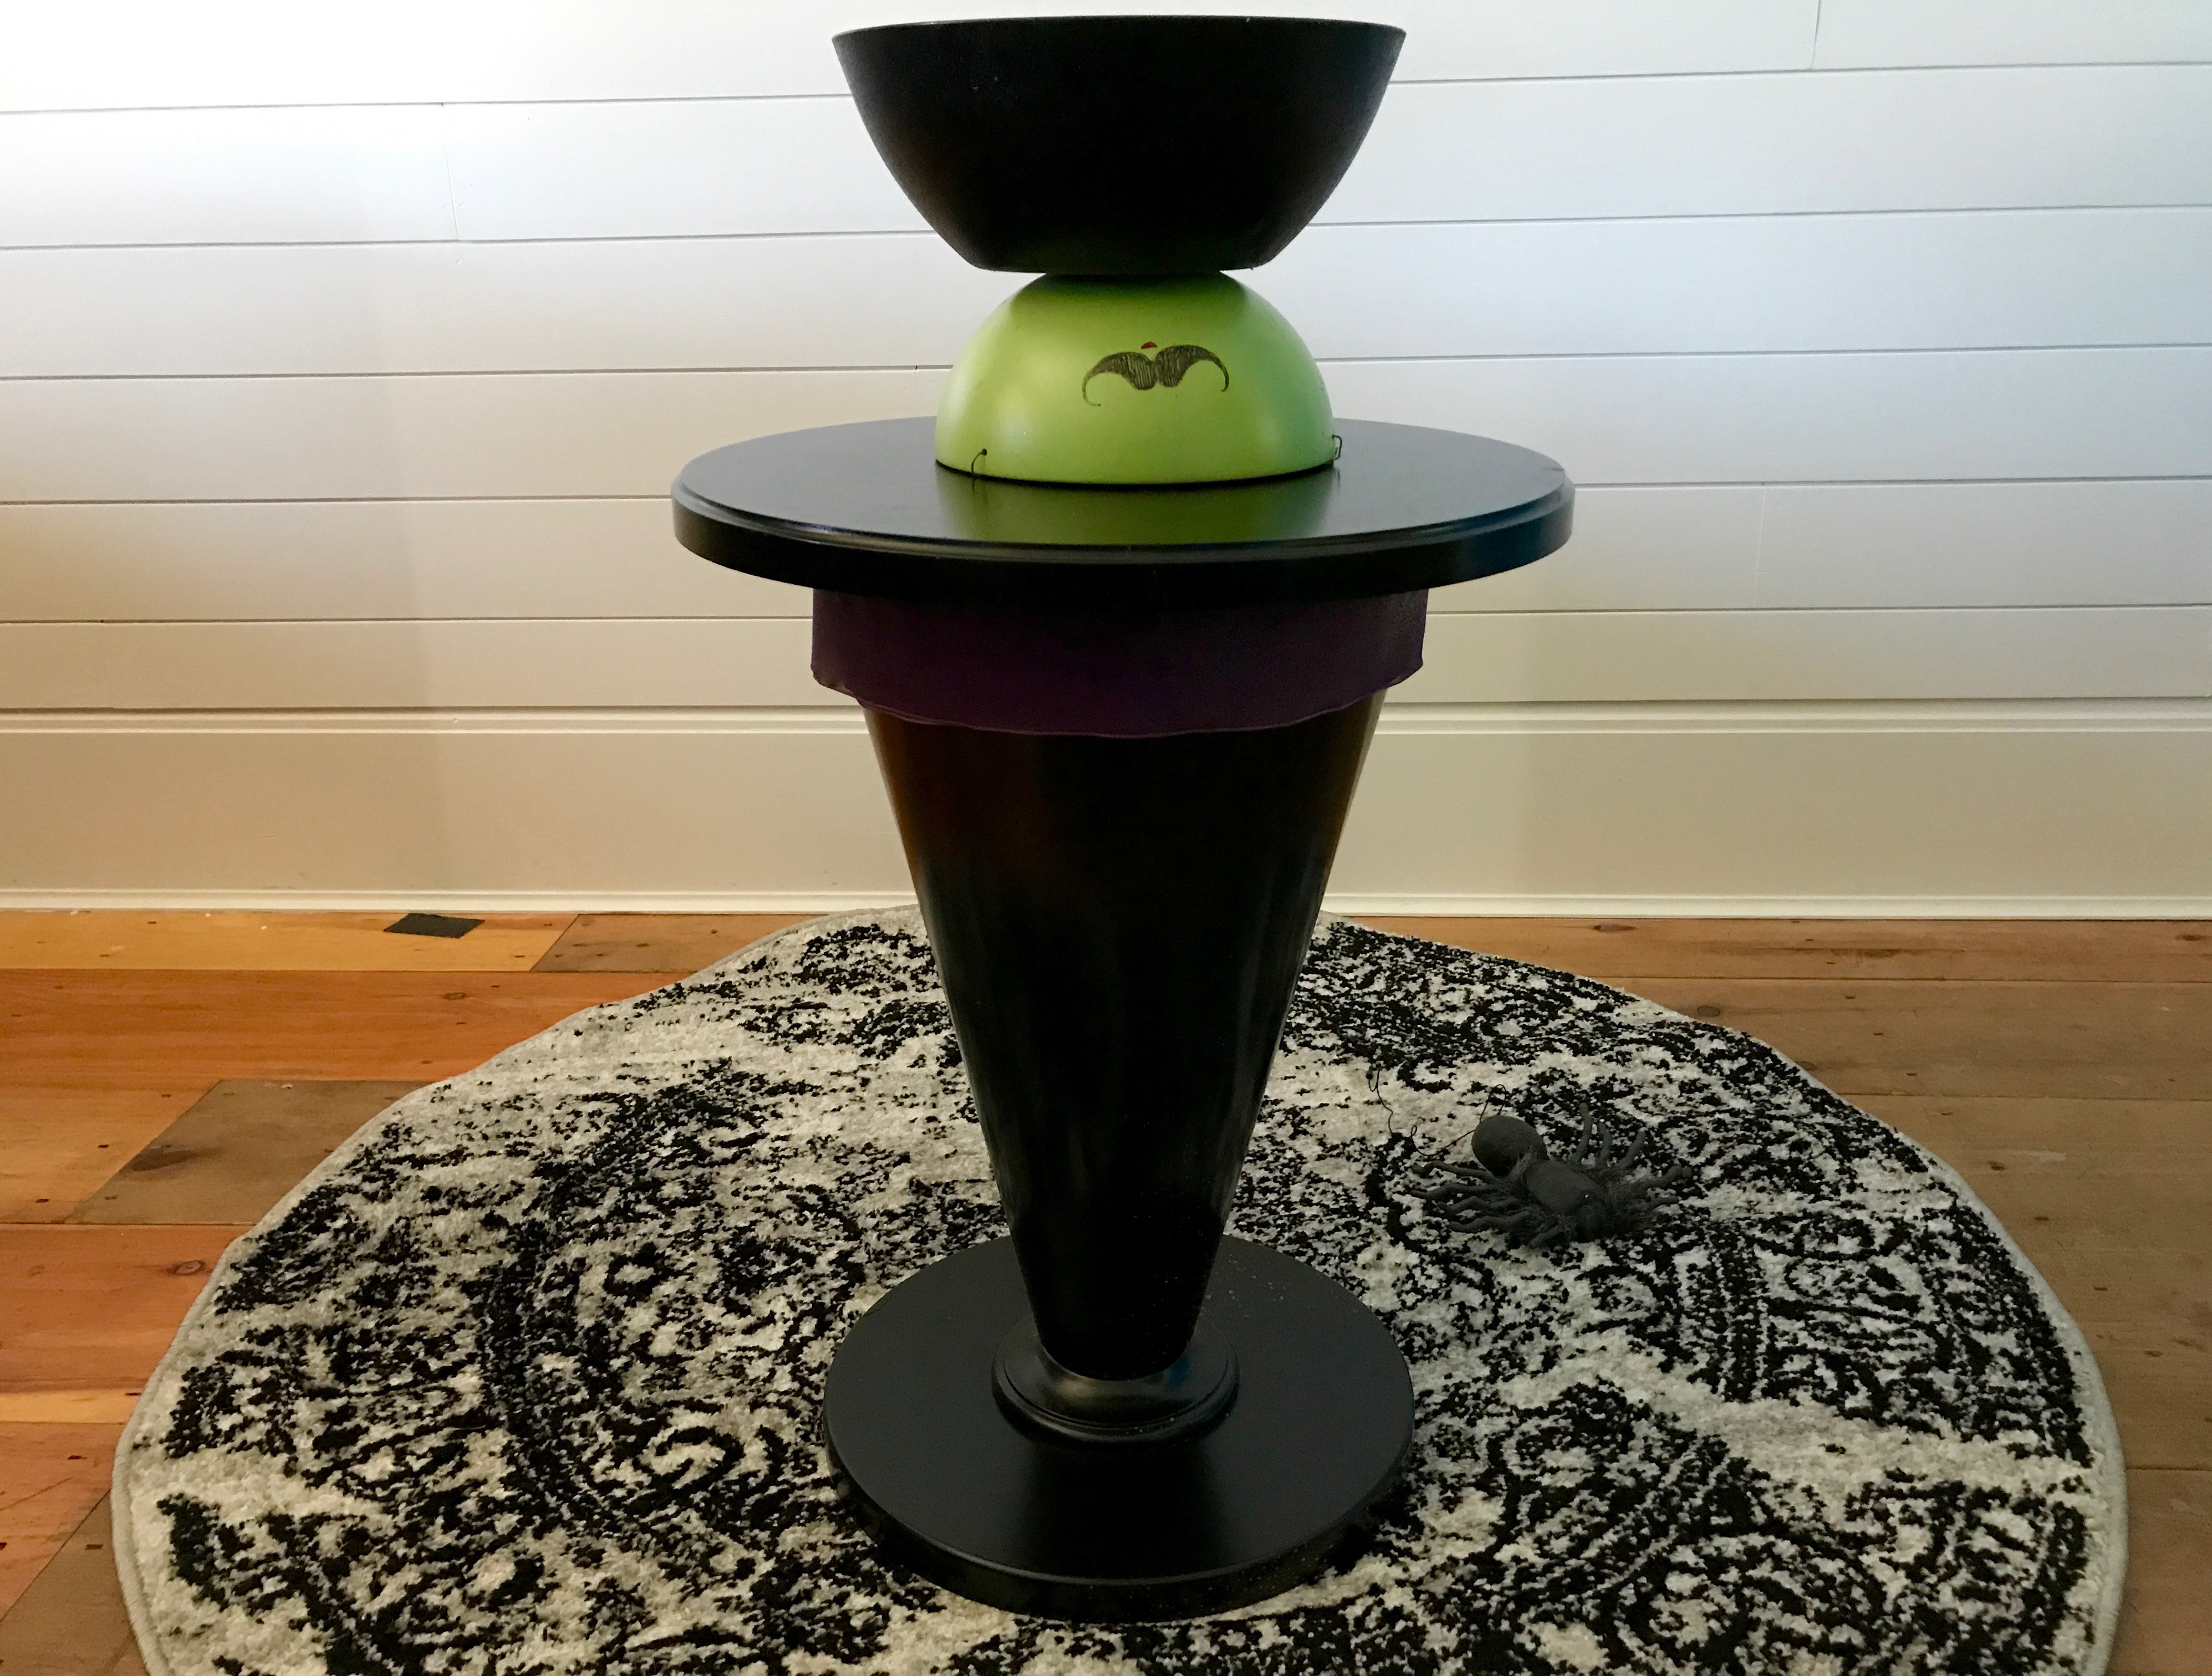
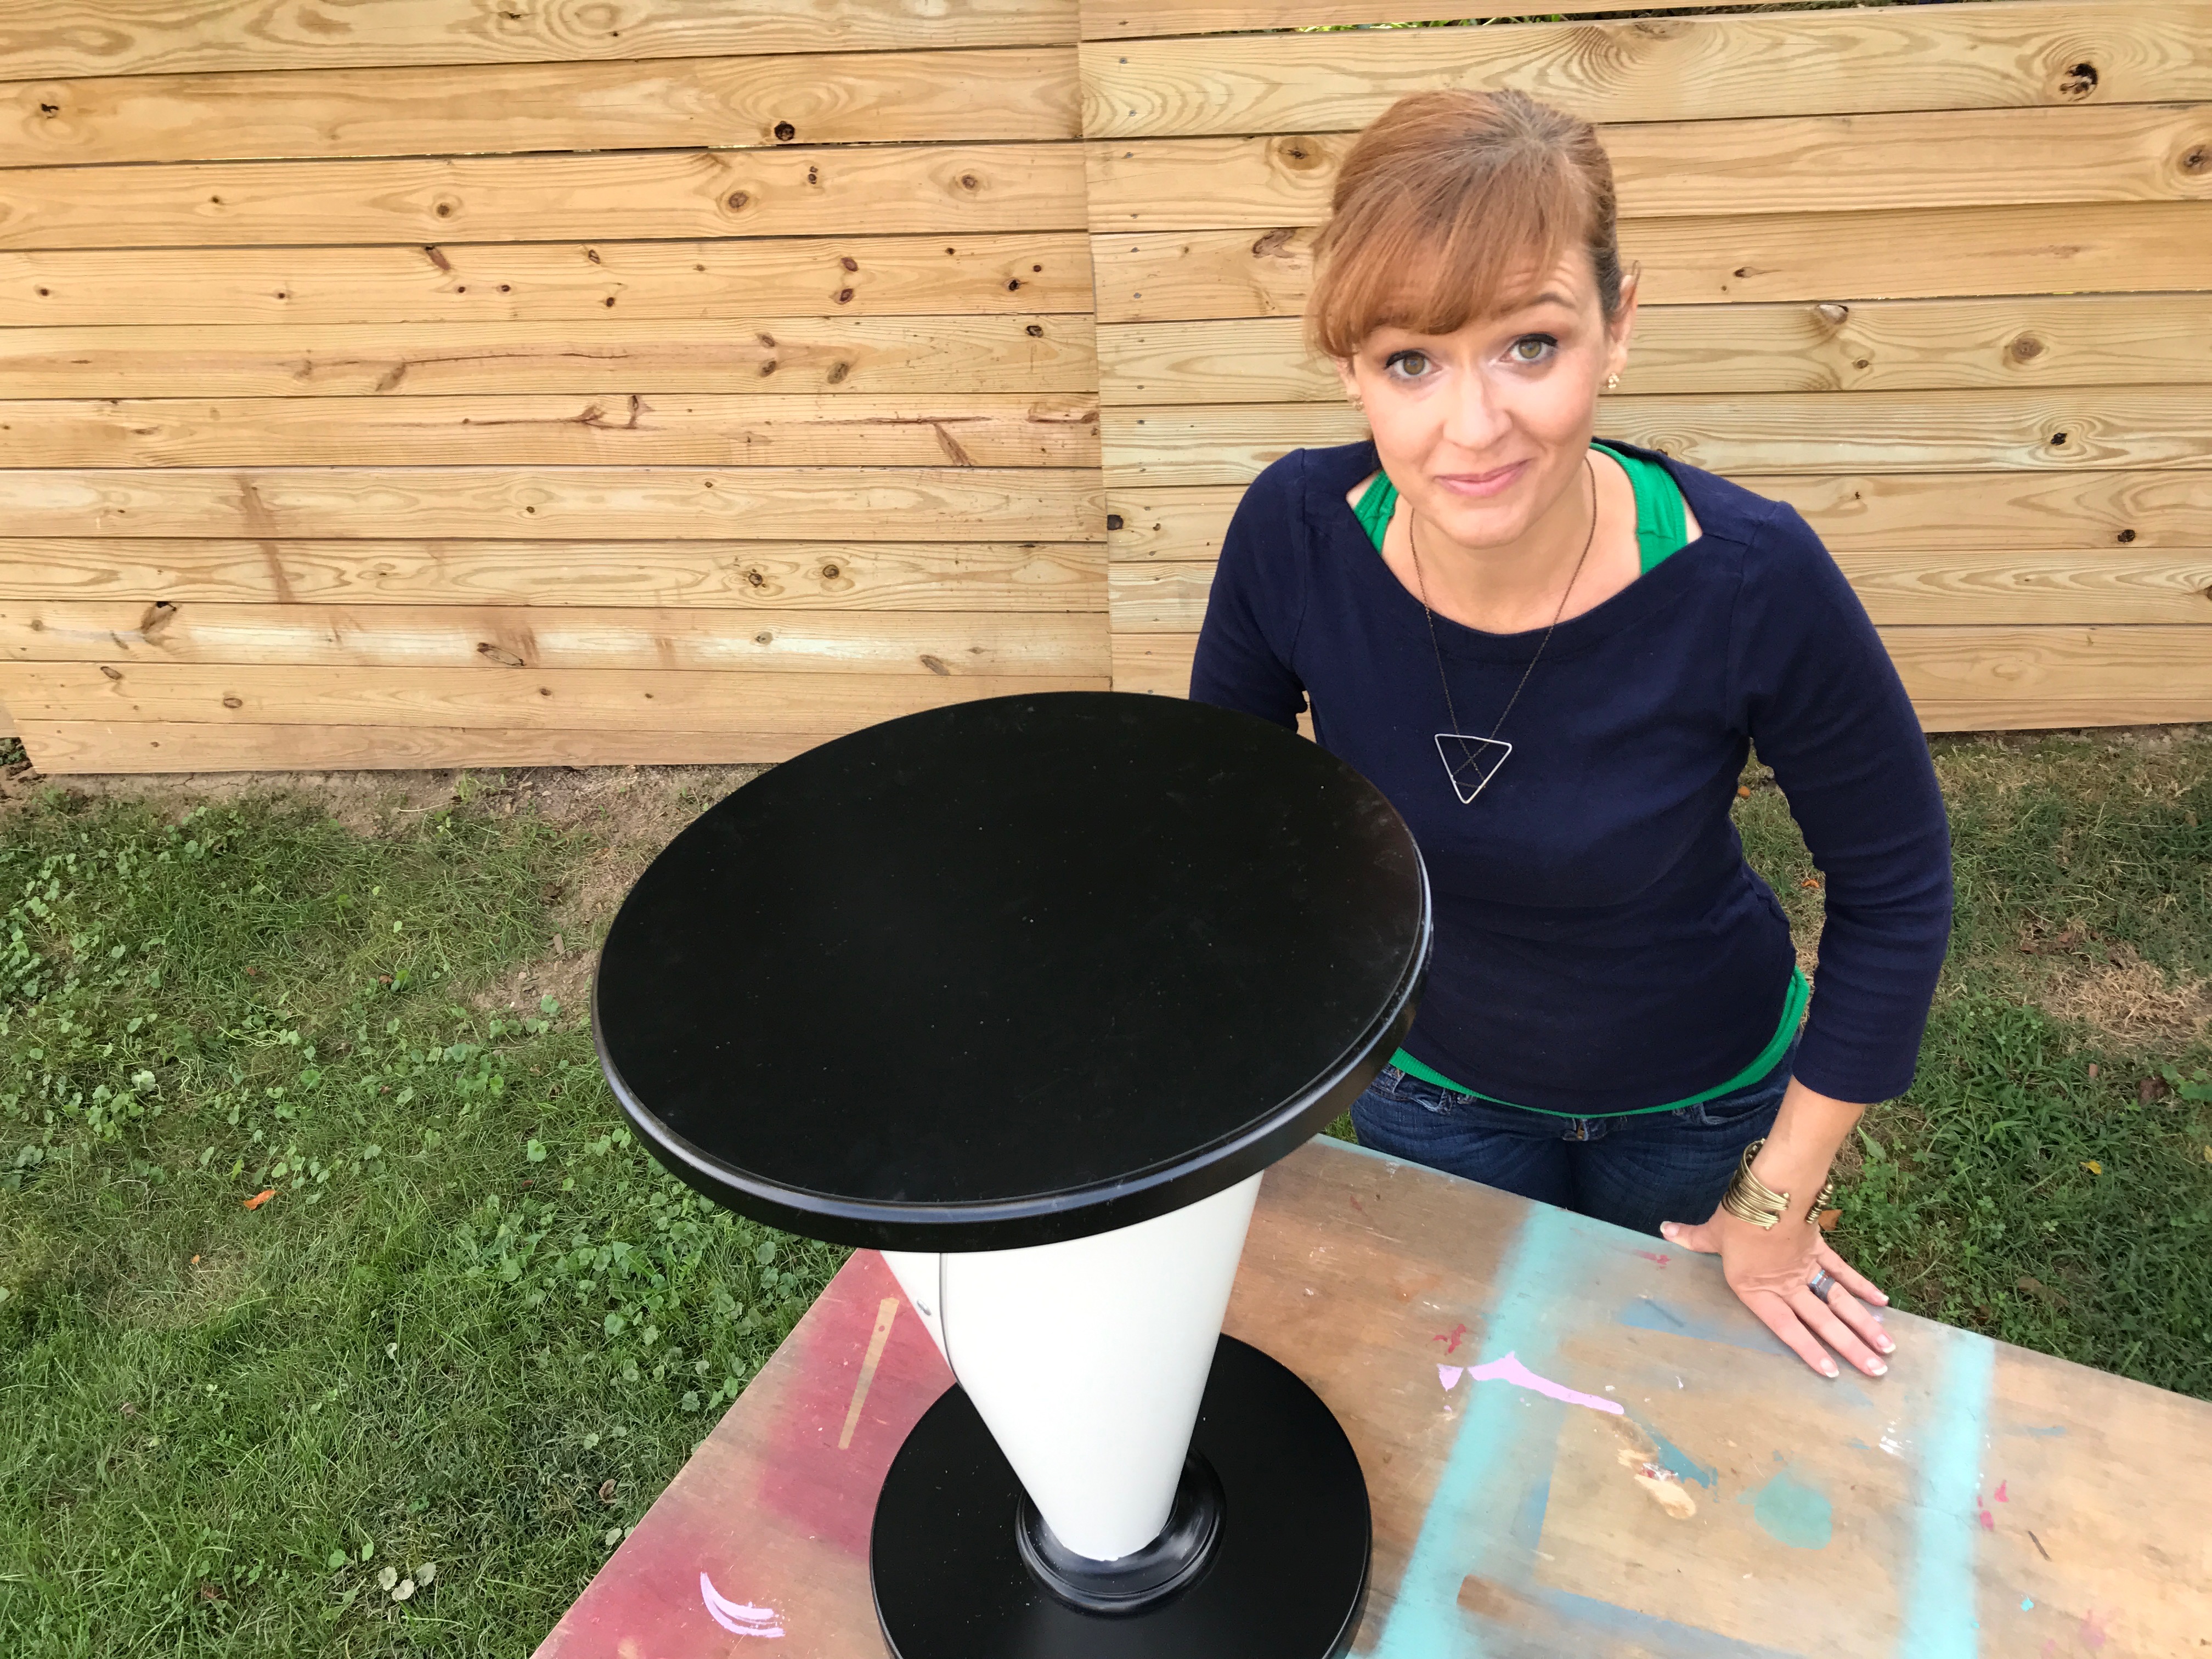
After the cone was dry, I slipped the cone over the table leg and screwed the tabletop back on. Since I had checked it for a perfect fit, there was no need to use any adhesives or fasteners to keep the cone solidly in place.
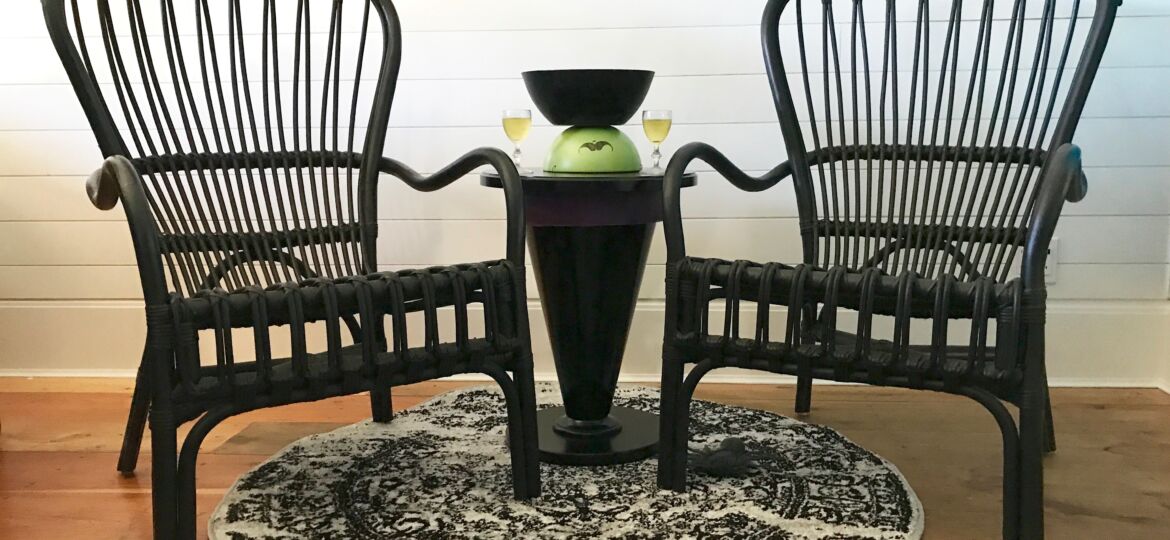
The witch’s hat table is festive, especially with an upside-down bowl face and bowl for her dress, ready to fill with Halloween treats. And it only took an afternoon to create!
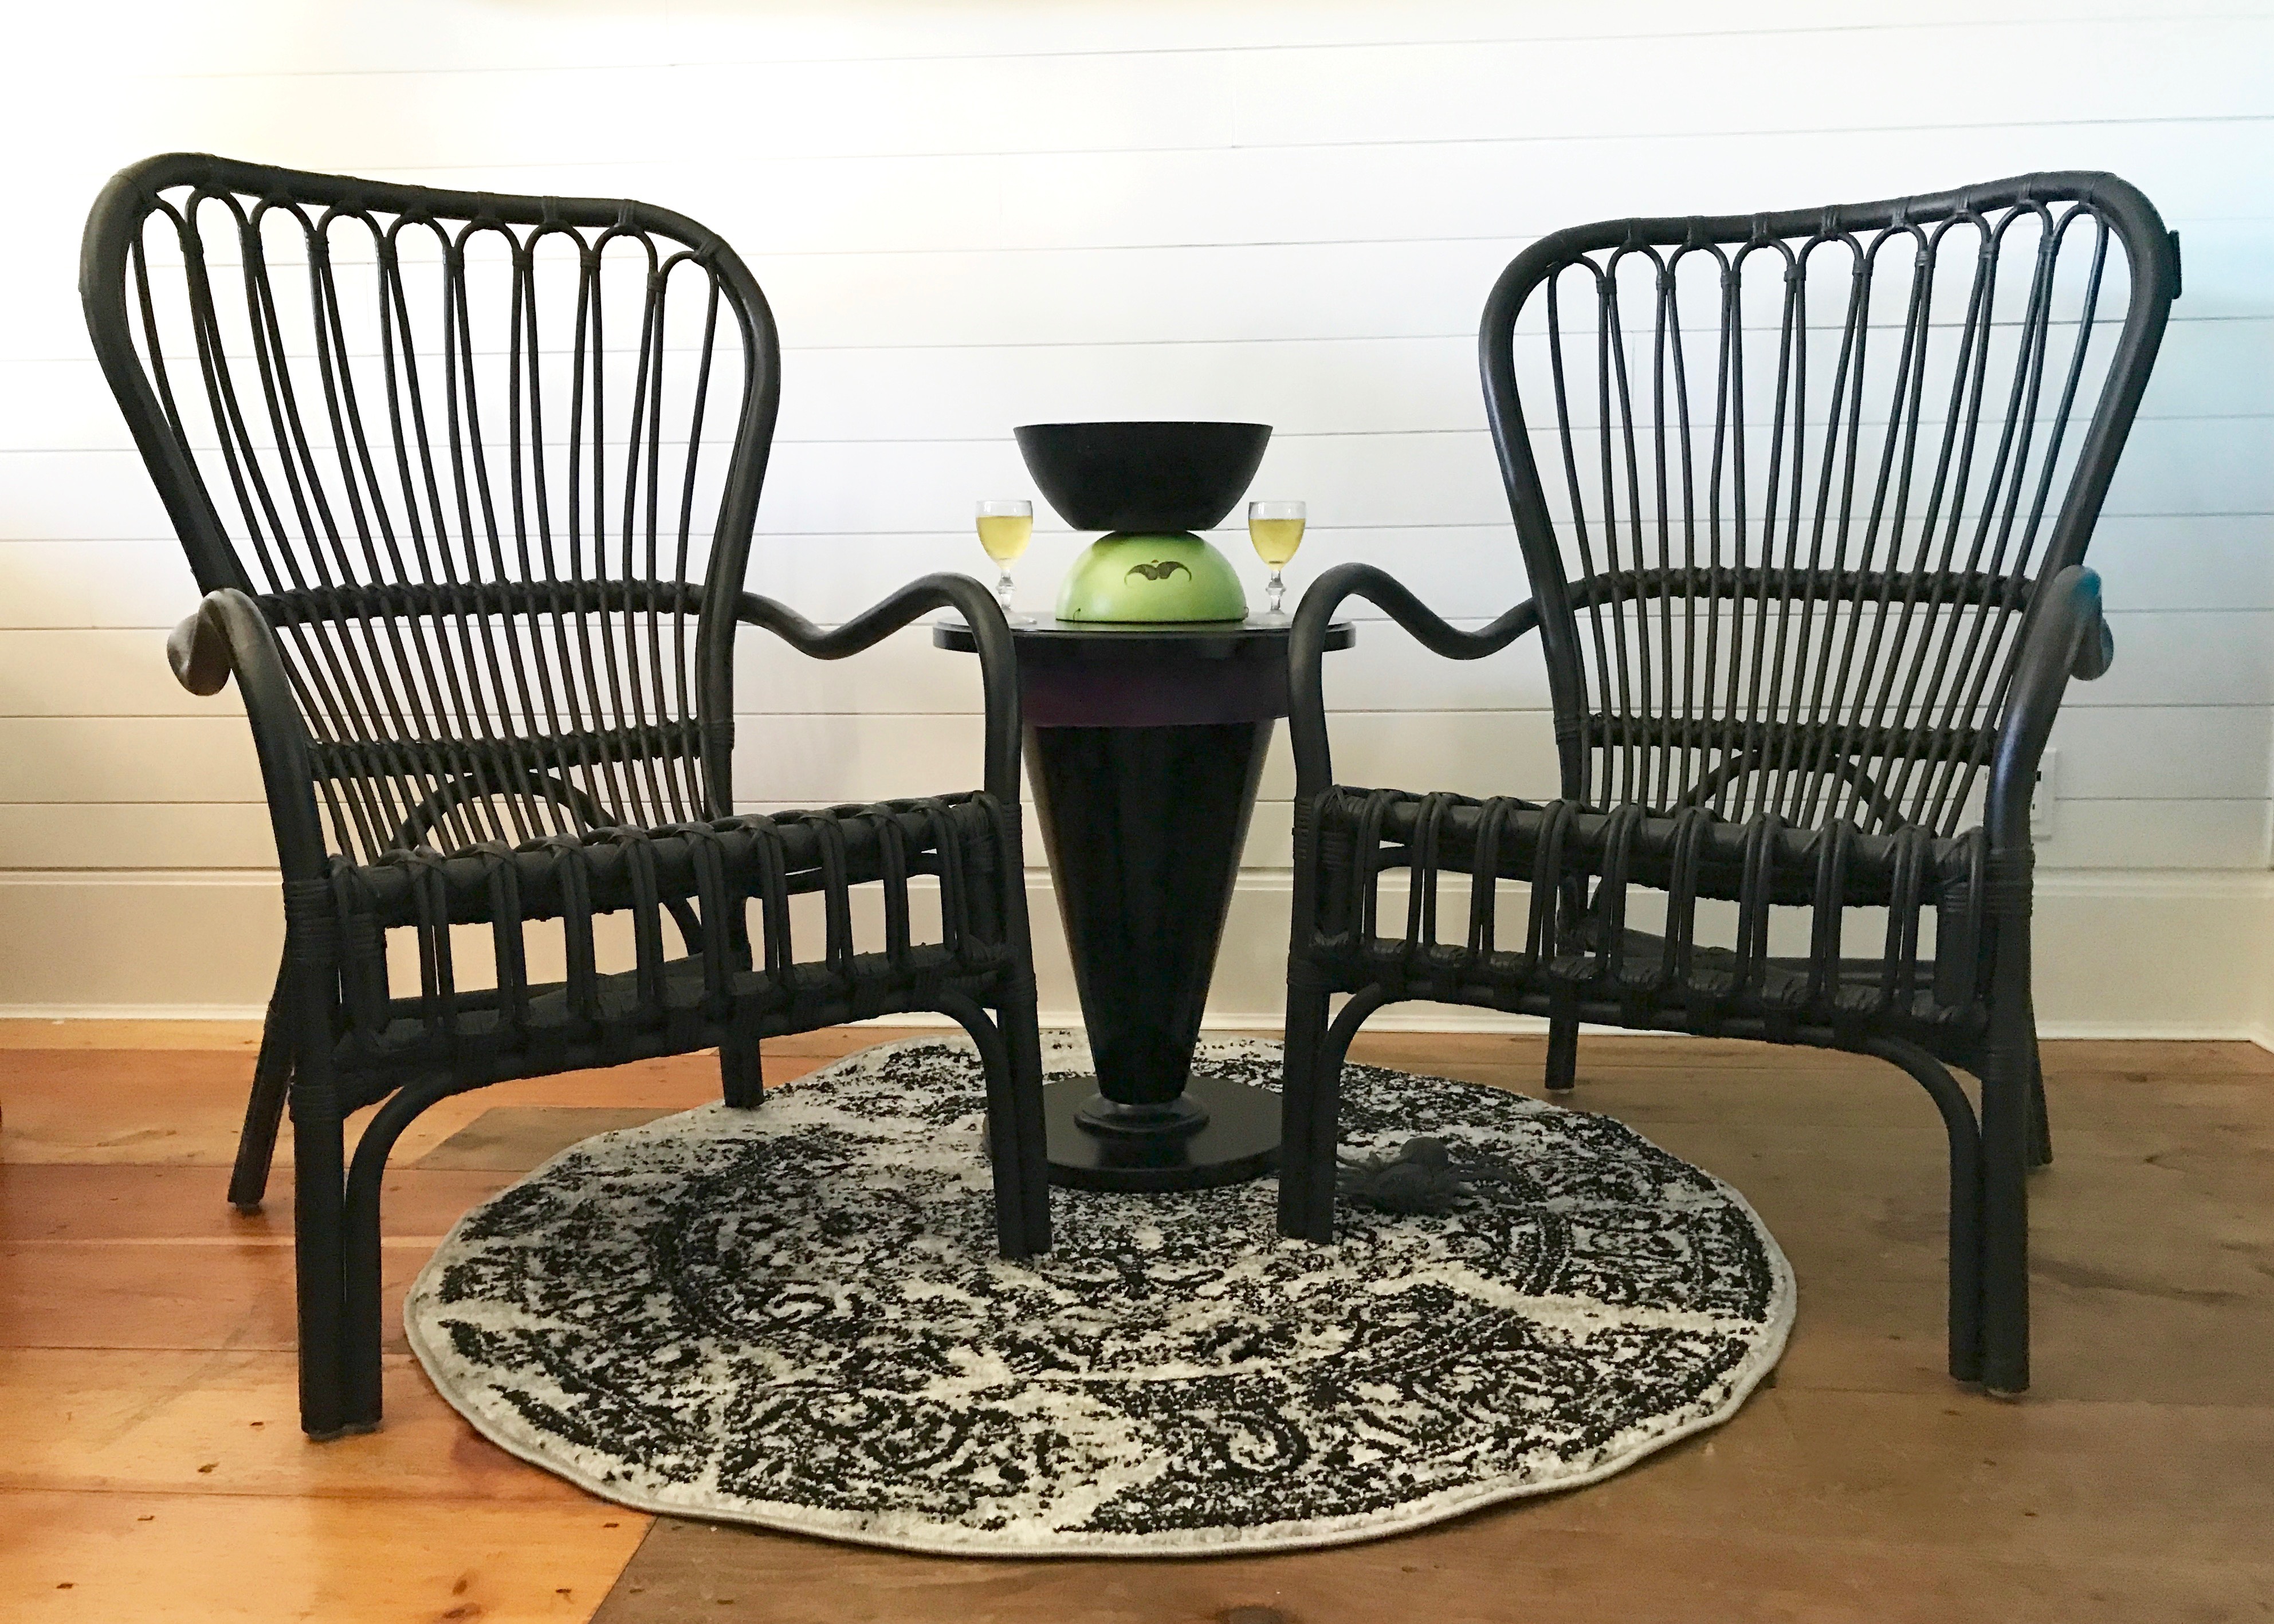
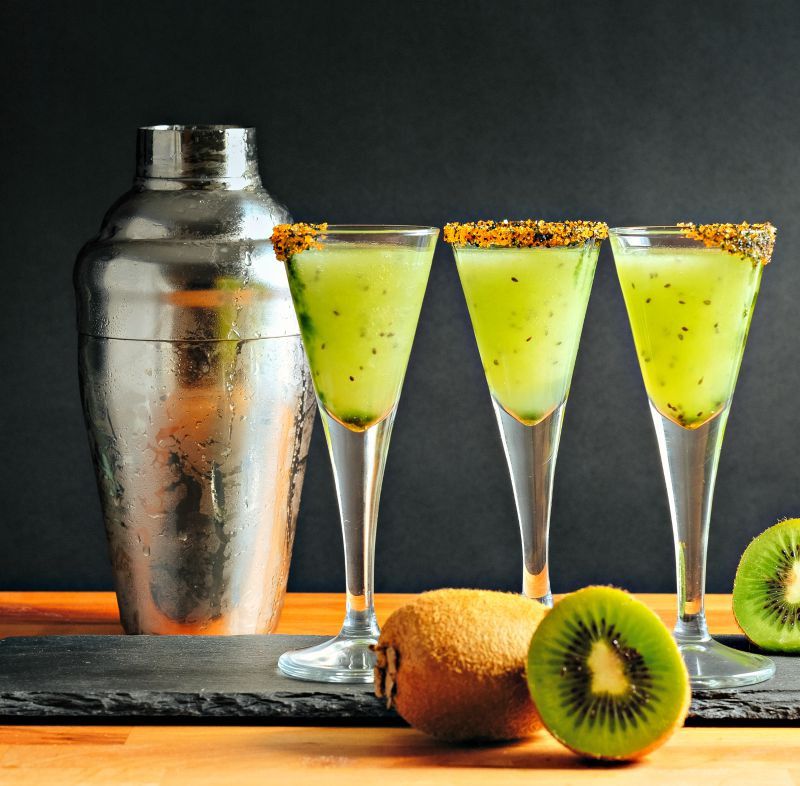
With the table ready, I think it’s fitting to enjoy a Halloween cocktail in cordial glasses.
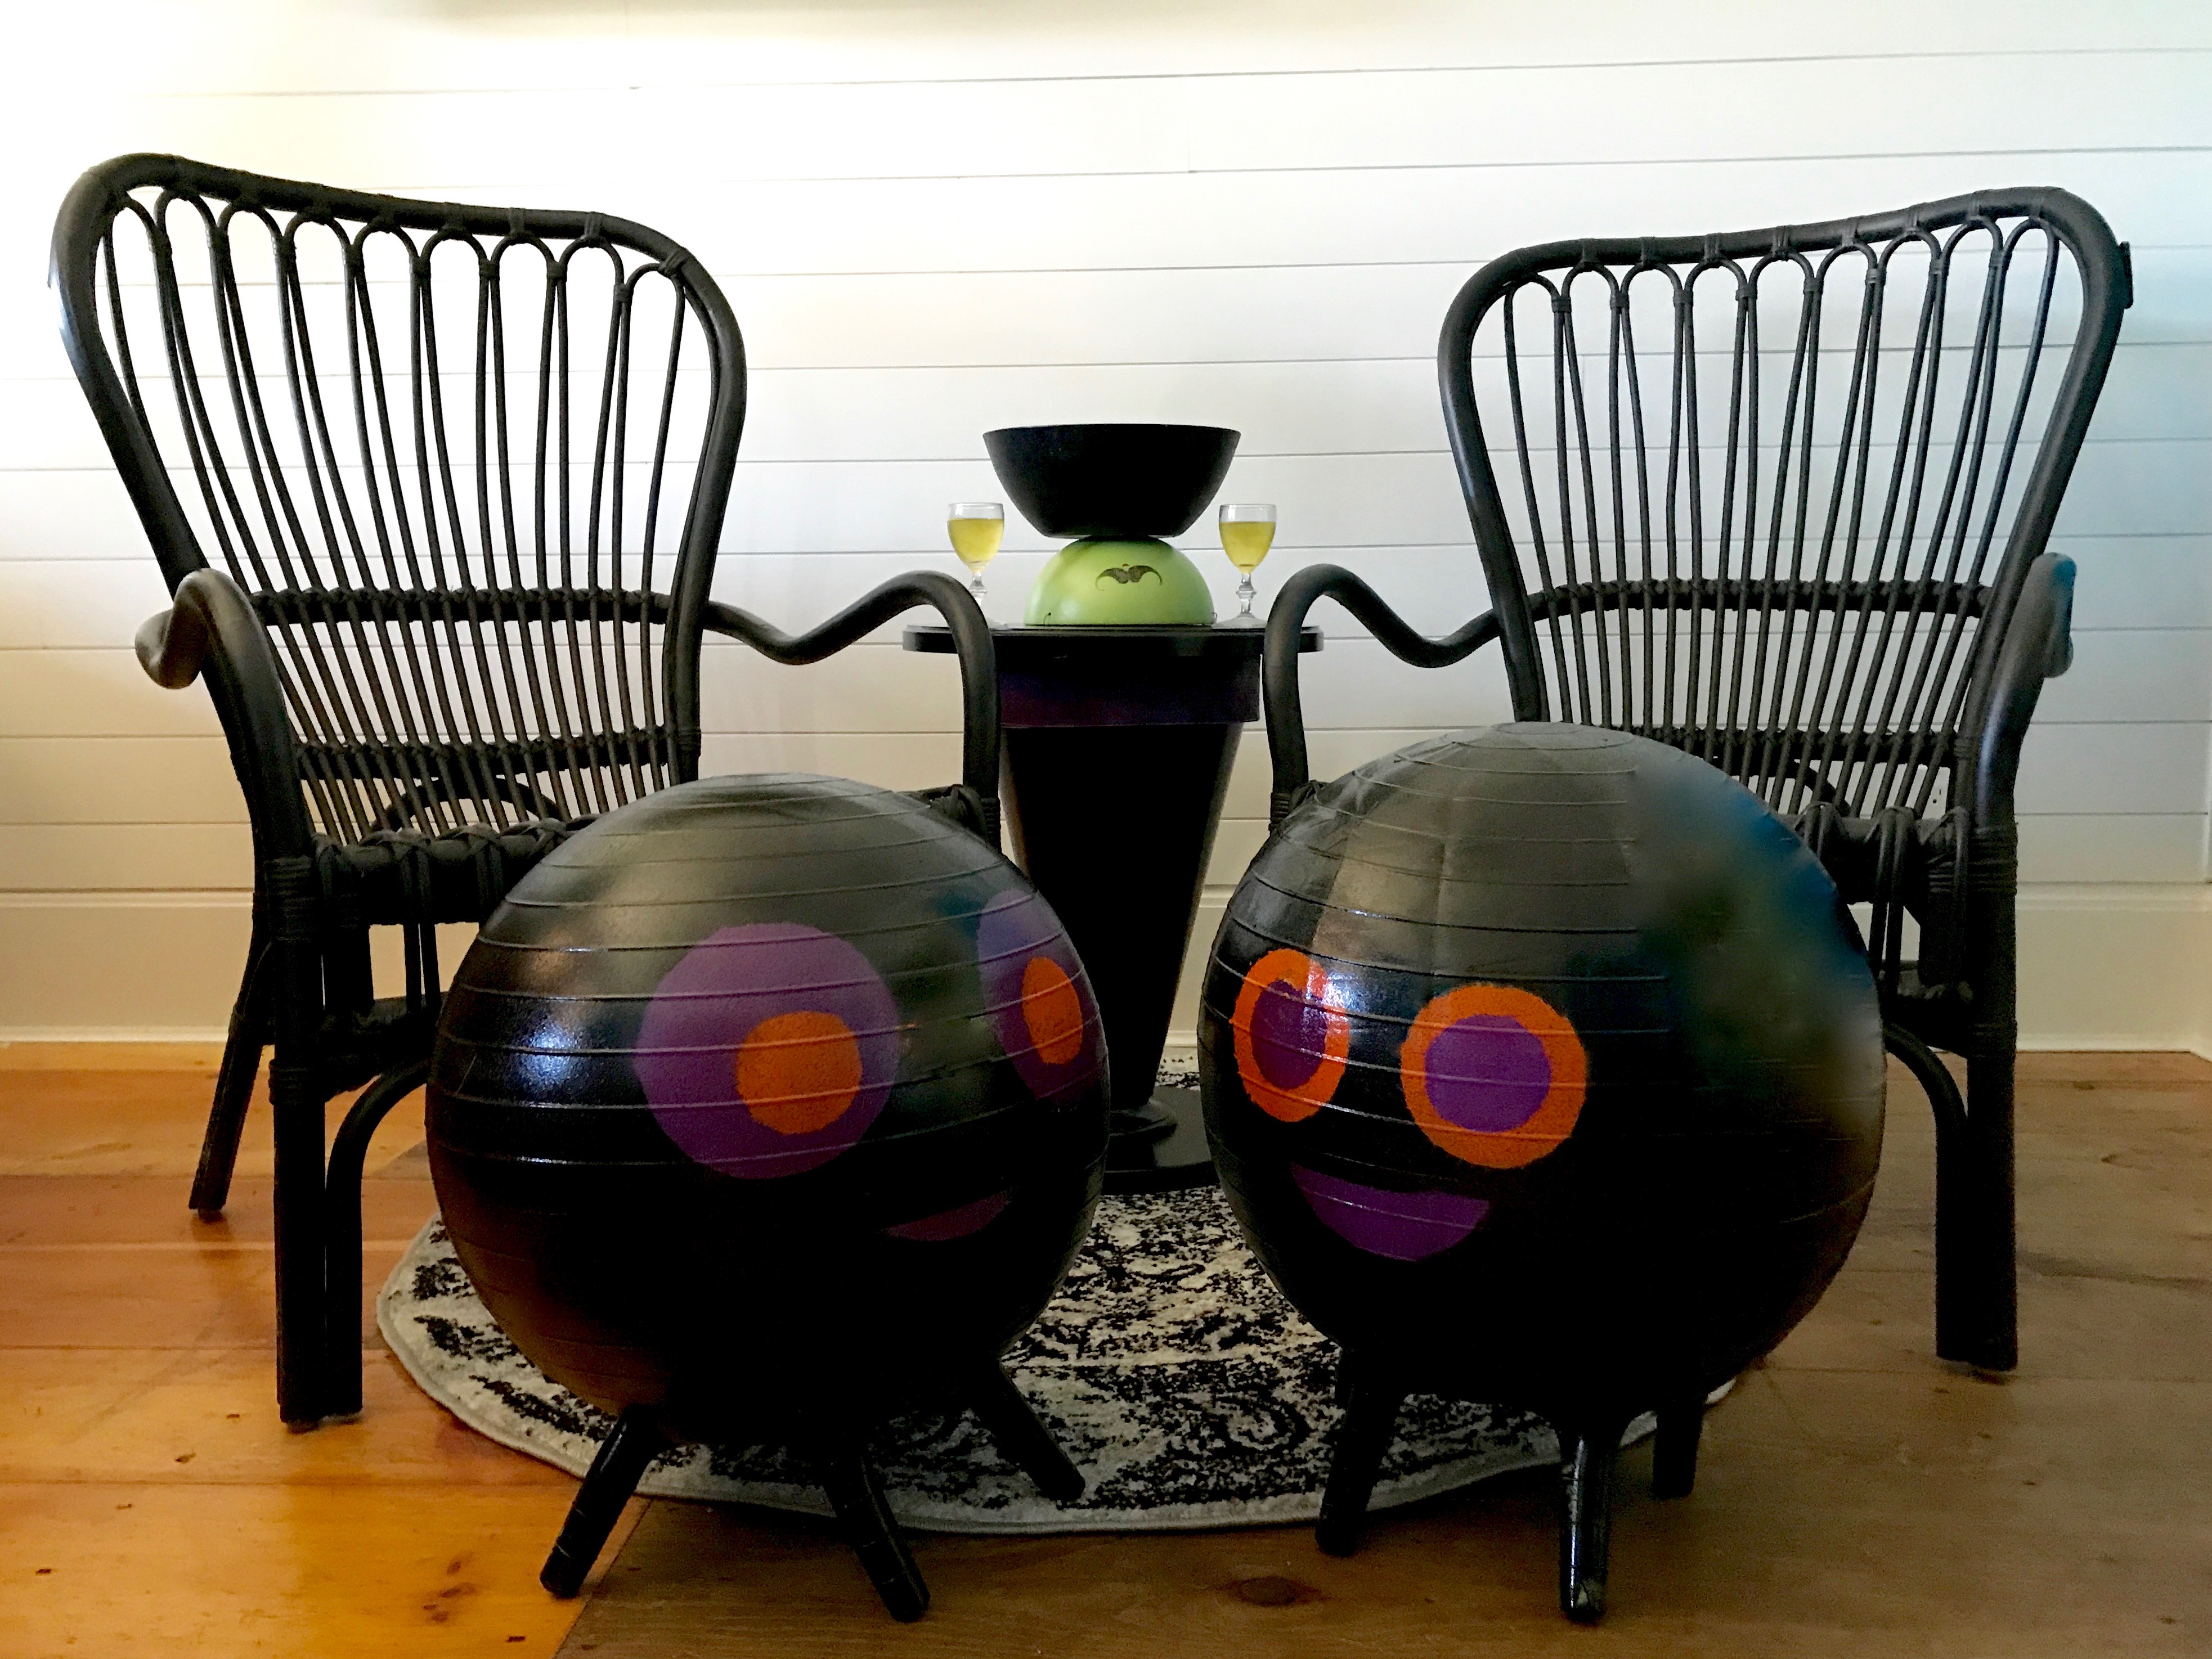
The spider stools make me smile, and are perfect as stools for grown-ups.
And the spider stools are fun for kids as a Halloween party table, too.
Note: Krylon has provided me with some of the products used in this project. I was also compensated for my time and this blog post. All opinions and positions expressed here are my own and do not necessarily reflect those of Krylon. For more information about DIY painting projects, please check out Krylon online.