Find. Finish. Love.
Bold color stain can add personality to any ordinary wood furniture. #MadewithLove

A friend shared a story about a little girl who is using cardboard boxes for her things. She doesn’t have a place to store her things in her apartment. This happens to many of us when we move to a new place or are faced with unexpected life changes.
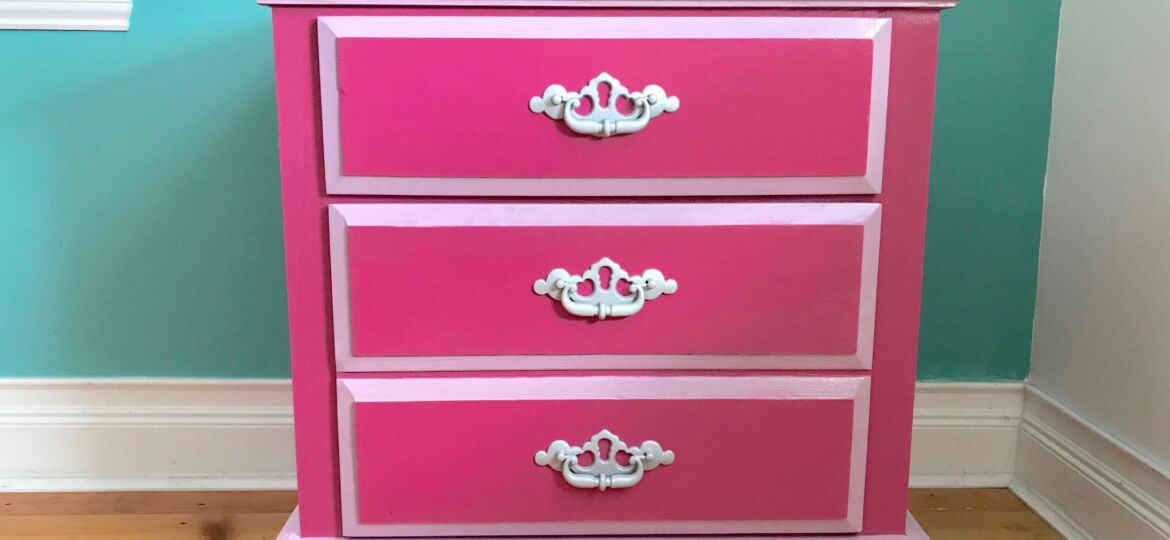
So when I found a little dresser at my local Habitat for Humanity ReStore, I thought it might be a perfect start to making her room feel more like home. In its former life, it was probably a side table for a sofa or bed. But in its new life, it will be whatever she dreams, in her favorite color pink.

Since the little dresser is wood I chose to use stain, and in two shades of pink, which reminds me of the wedding colors in Steel Magnolias. While Shelby (Julia Roberts) called them blush and bashful, the Minwax pink stain colors are Woodrose and Perfectly Pink.
Getting started in a DIY project means gathering supplies. Here’s a list of what I gathered:
- sandpaper in fine, medium, coarse
- oscillating tool with sanding attachment and pads
- cloth for wiping sanding dust
- screwdriver for removing hardware
- paint brushes
- drop cloth
- Minwax Water Based Pre-Stain Wood Conditioner
- Minwax Water-Based Wood Stain in Woodrose and Perfectly Pink
- stir sticks since stain is stirred, not shaken (sorry, James Bond)

The first step in this transformation is taking out the drawers, and removing the hardware.

Now I am ready to sand to open up the grain to be ready to receive the pink stain.

While you can use just sandpaper for this project, I have an oscillating tool that helps make the sanding part go a lot faster.

After sanding all of the wood, which takes a few hours on this furniture, I wipe the sanding dust off the surfaces.


Now I’m ready to apply Minwax Water Based Pre-Stain Wood Conditioner. It will help give a uniform penetration of the water-based wood stain. After about 15 minutes, I lightly sand with fine-grade sandpaper to smooth any raised grain and then wipe off the sanding dust again.

Now it’s ready for color. I chose Minwax Water-Based Wood Stain in two shades of pink.
I stir the stain, and then gently apply the color in the direction of the wood grain. After about 5 minutes, I look for any excess stain in that hasn’t penetrated the wood. If there is, it’s time to wipe it off with a clean cloth. After about 2 hours, I apply another coat.


Usually I would finish applying the first color before opening the second can, but I can’t wait to see how the top will look with these two pinks.

Staining is a zen-like meditative state for me. I enjoy the calm of applying new color and personality to an older piece of furniture.
Three hours later, it’s ready for a protective finish. I used Minwax’s Polycrylic Protective Finish for this project. After waiting two hours, I sanded it lightly sand to ensure an even finish before applying the second coat.

You may want to do another coat, but I think this little dresser looks great. To make sure the finish is set, I waited 24 hours before moving it into its new home.

I transformed this little side table with a fresh stain of pink-and-pink, and I think it’s ready to brighten up a little girl’s bedroom.
If you are looking for inspiration for your home or you want to do a project like this, I hope you’ll check out other fun DIY projects that we’ve shared on our blog.
Note: Minwax has provided me with some of the products used in this project. I was also compensated for my time and this blog post. All opinions and positions expressed here are my own and do not necessarily reflect those of Minwax. For more information about DIY staining projects, please check out Minwax online.