Cat food bowls, in my house anyway, seem to be in constant motion. And then there’s what I’ll discreetly call the ‘halo effect’, as in: How in the halo did their food get that far from their dish?

So to keep some measure of order and to get my DIY on, I decided to make a little something for my (wife’s) cat dishes.
And because they’re really her cats, and because they are decidedly un-diesel, I made an industrial-looking platform complete with solder and rust and steel. If you’d like to know how I made it, here it is. Why I made it—partly—is because I’m a Bernzomatic Torch Bearer and we work together. We design some DIY and how-to for them, like this. I’m not their sales manager, so read on for how-to.
Shopping list
I got everything from the ‘steel’ section at the home center.
- 16-gauge steel welding plate, 6×24-inch
- 1/2-inch x 1/2-inch square tube
- 1-inch x 1-inch punched square tube
How to
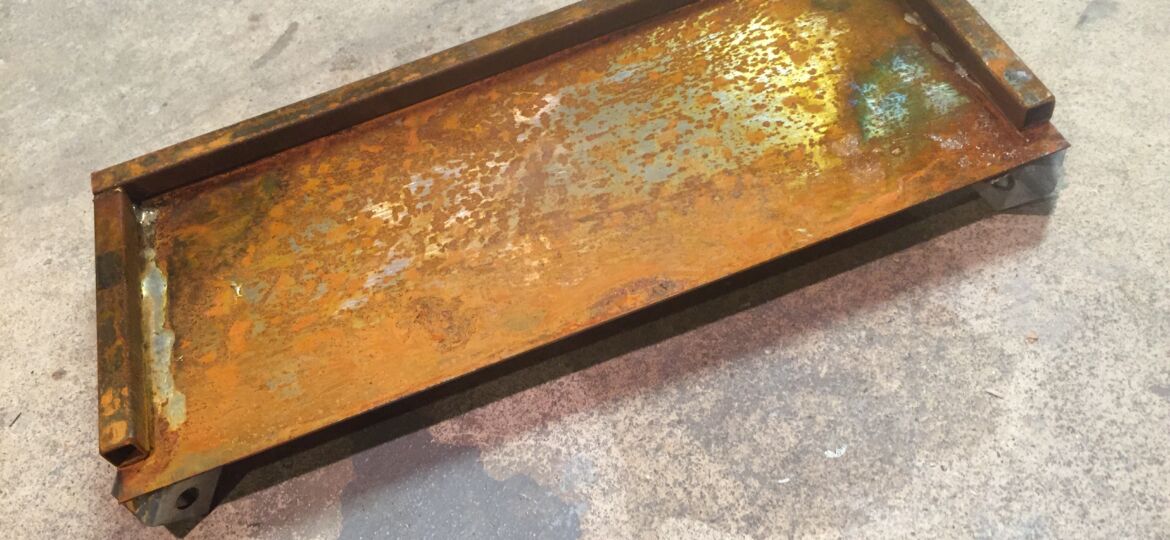
Cut the steel plate. I made my cat food bowls organizer 14-inches long. As I was making it, I got inspired to do some weird feet, or, if you will, paws (ackkkkk…hairball).

I cut the punched square tube at 45-degrees with my angle grinder. An angle grinder is the kind of tool that means business. If you use one, please be careful. Or find another way to cut the steel (gulp, what’s happening to me?!) paws.

Then, instead of putting them flat side-up, pointy-side down, I inverted them for a splayed (and neutered…I’m really not doing well) effect. I lined them up with the corners of the plate and soldered them in place. Tip: When soldering, make sure the steel is clean and you’ve abraded it a little with some aluminum oxide sandpaper. Before heating things up, I smoothed up all the sharp edges left over from the grinder cut on my bench sander. I like to be careful sanding little pieces. Keep a firm grip and move decisively to keep them from grabbing on the belt. Kind of like not petting your cat’s fur against the grain…Gulp.

The plate and the tube heated up at different rates and I burned some flux, but I got it hold. Anyone who works with metal for living would have a nervous breakdown (rightly so) looking at my solders, but it worked for the industrial look I was going for.
Next, I cut my 1/2-inch tube. This is sort of the rim of the cat food bowls organizer, they’re the (please help me) whiskers. I cleaned up the sharp edges left over from cutting on my bench sander and scuffed the side that would be soldered to the plate. Then, I soldered it.
Much like with the feet, the two elements heated up a different rates but I was able to get them to stick.
The next thing I did was leave this little gem outside to get rained on. Rust is a natural surface protectant for steel. Then, it’s chow time. I placed the cat food bowls organizer under the bowls. It’s impervious. It catches most spills and is hard for them to nose around. Clean-up is easy.
Check ME-OW-t
(intervention please…)


