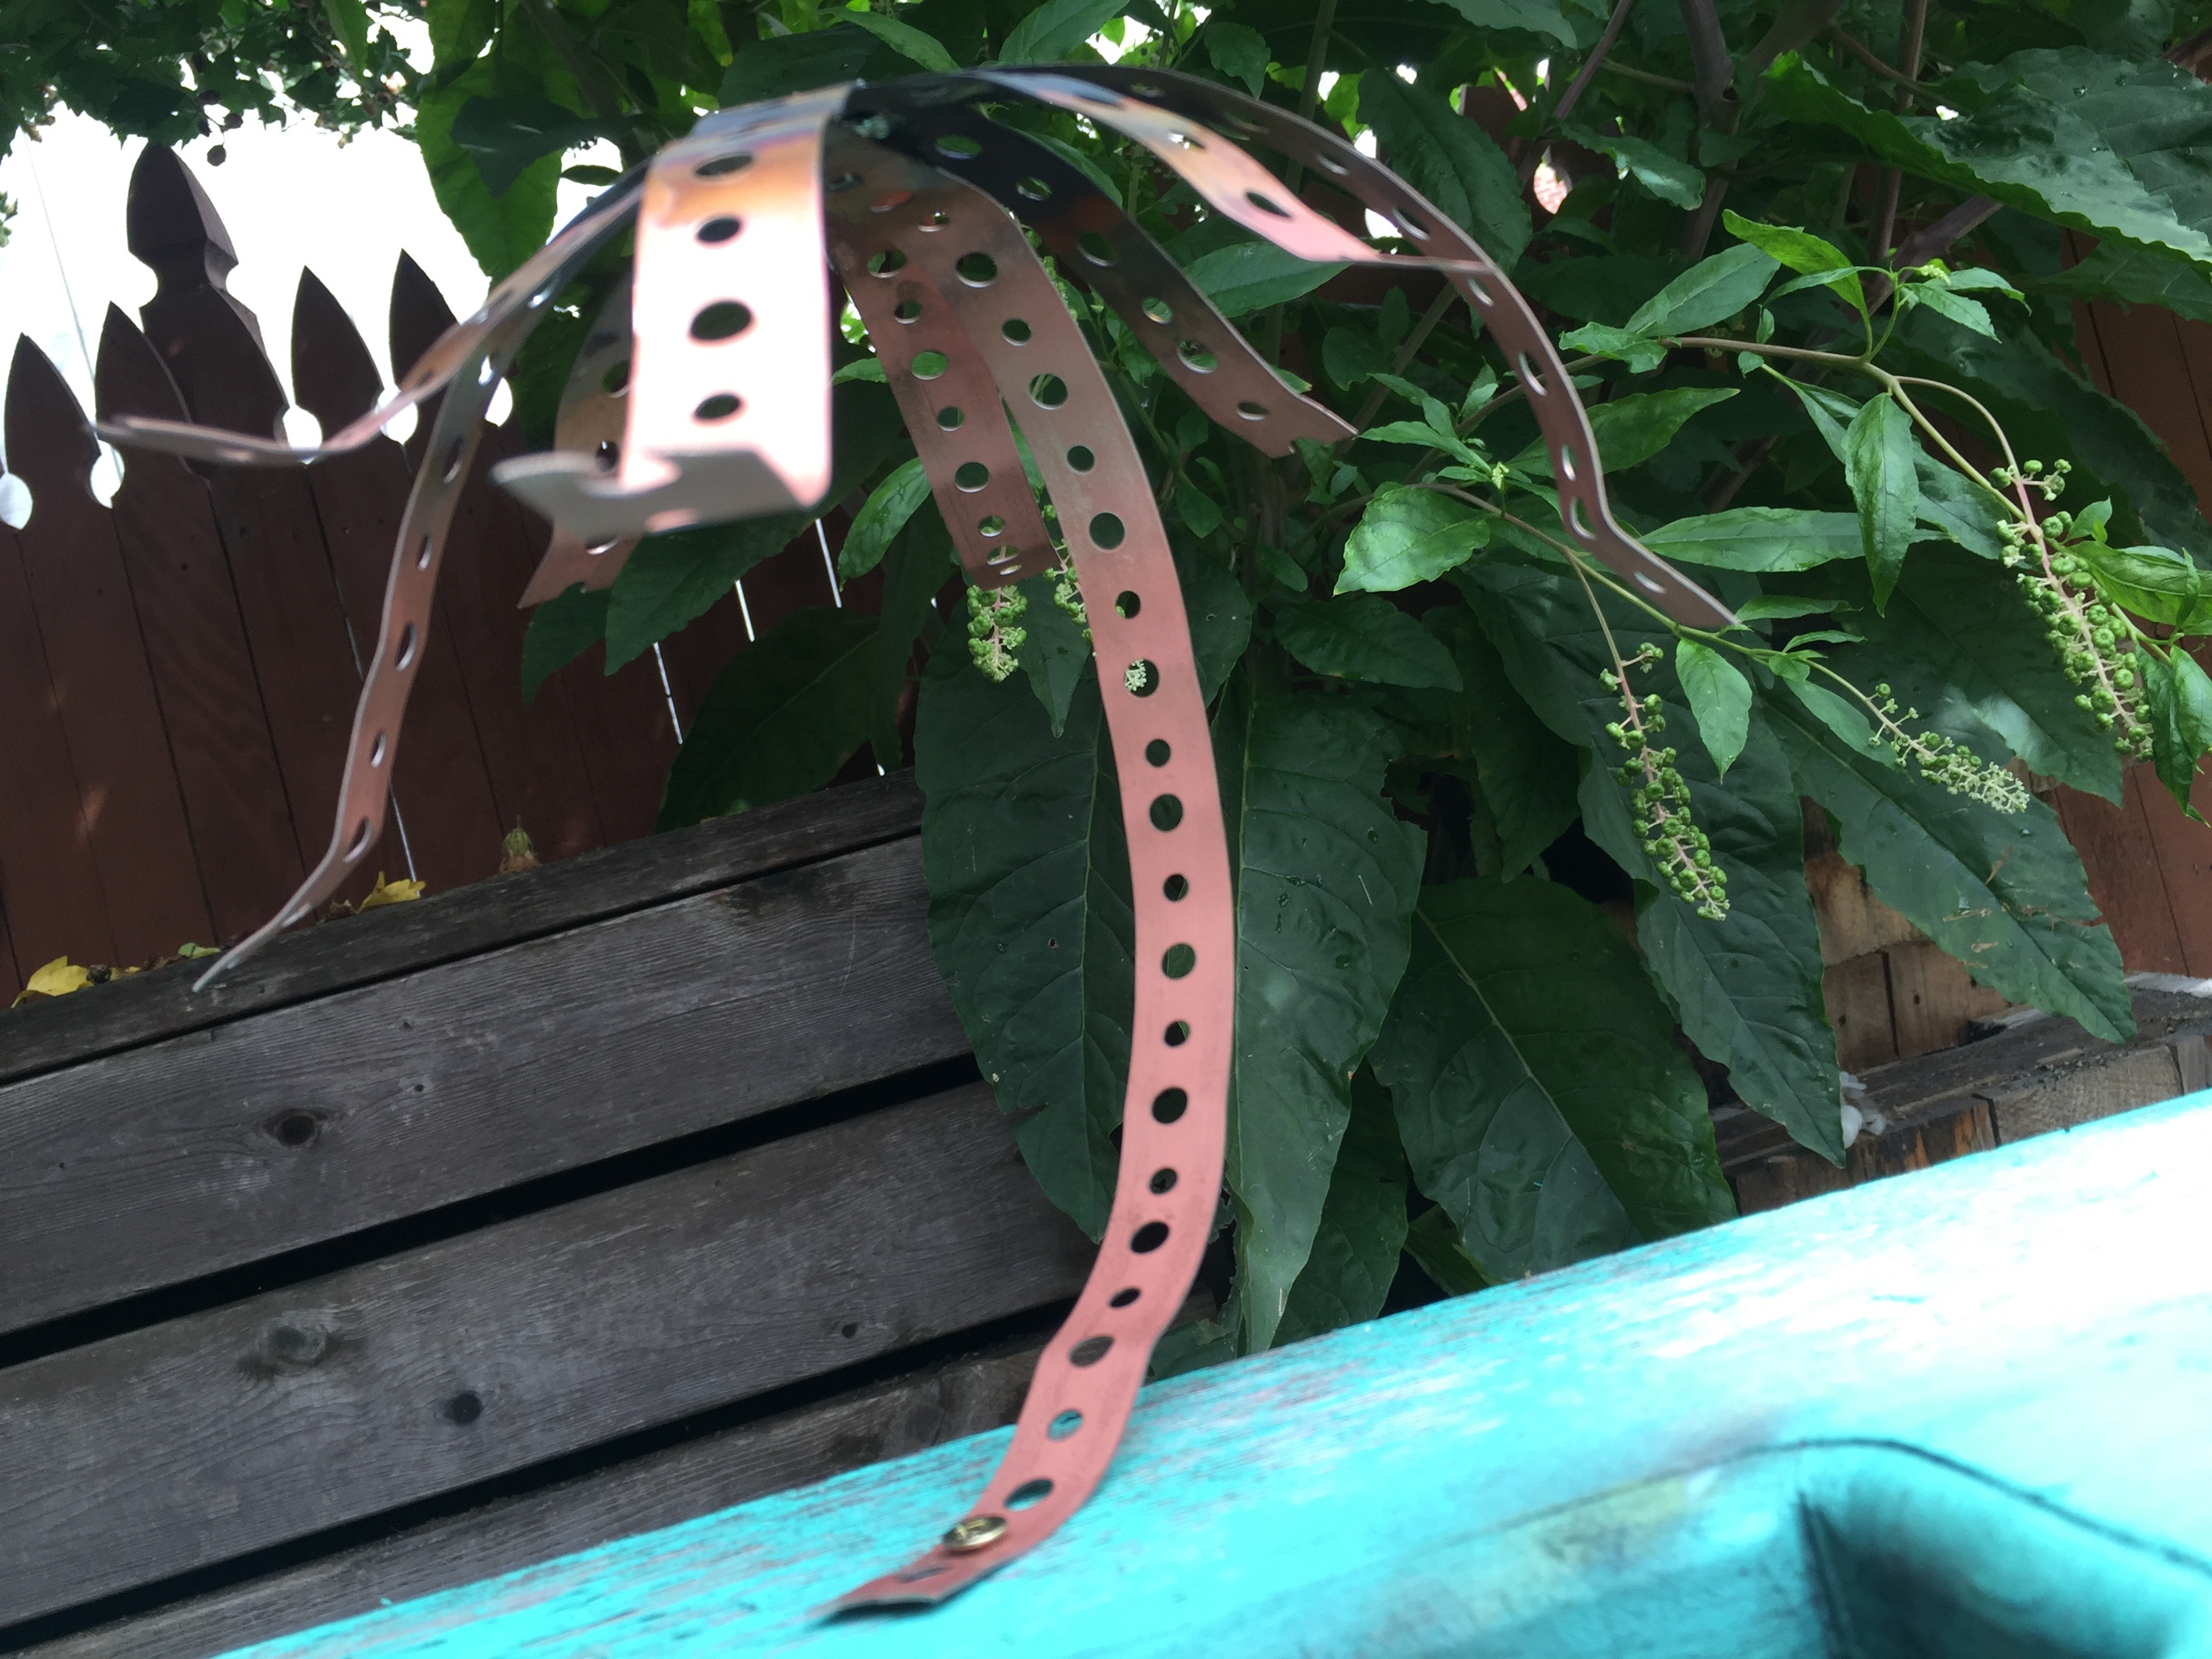
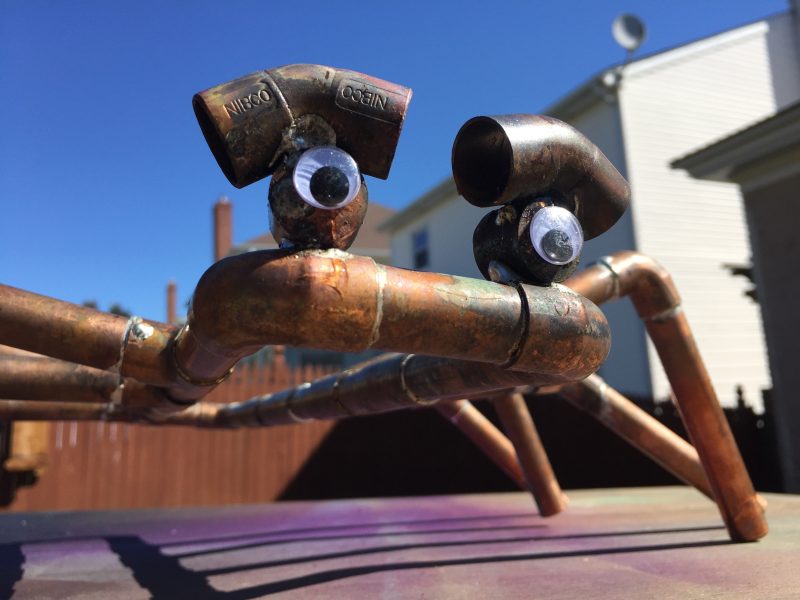
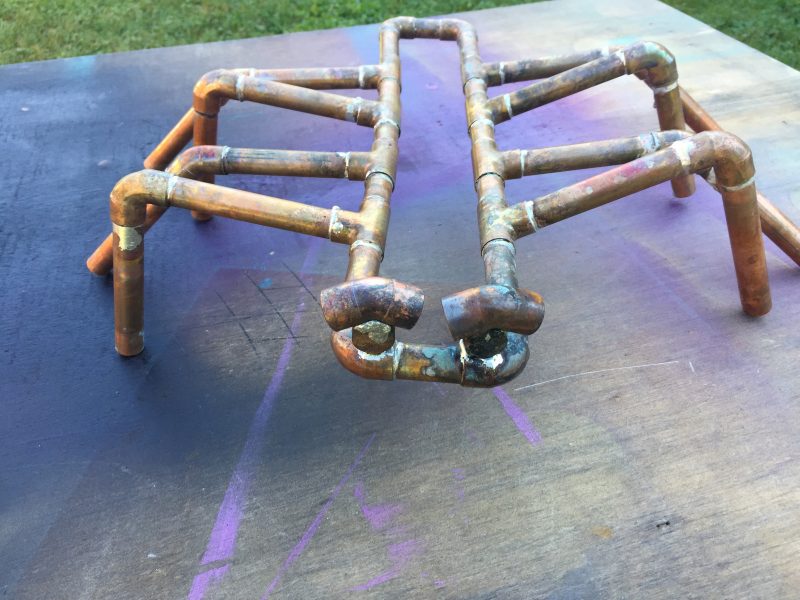
Fred is our new DIY Halloween Spider. We made him from soldered copper pipe and he is now an 8-legged part of the family. Want to make one of your own? We know you do.
Note: We’re stoked to say we’re Torchbearers and partnered with Bernzomatic to produce this post. The DIY, design, how-to, and tinker’s damns are 100% MyFixitUpLife’s.
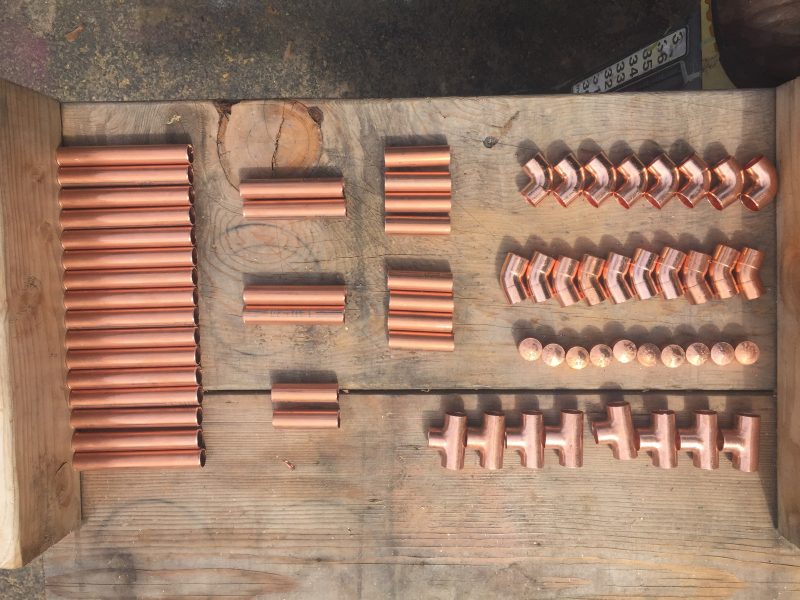
Fred is 16-inches long and 3 1/2-inches wide. Each leg section is 4-inches. The head body section and the tail body section are both 3-inches long and 2-inches wide. The body section between each leg is 2-inches.
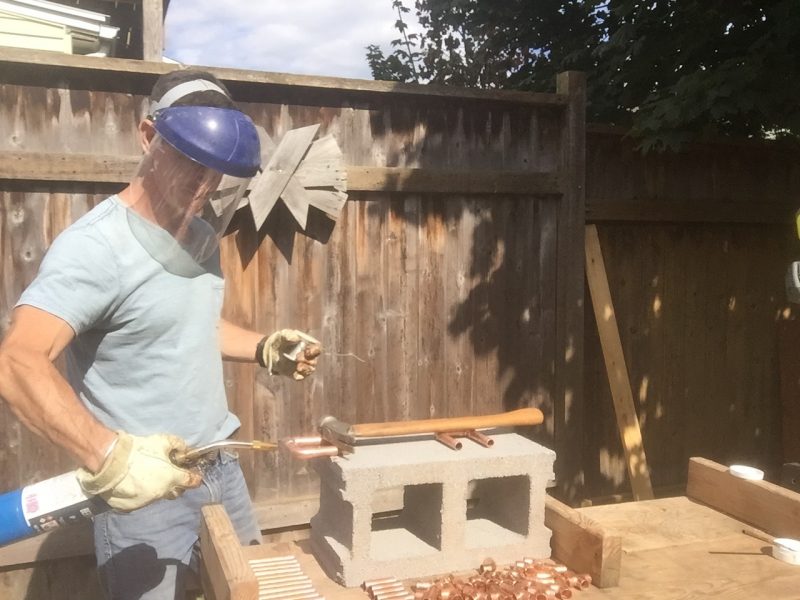
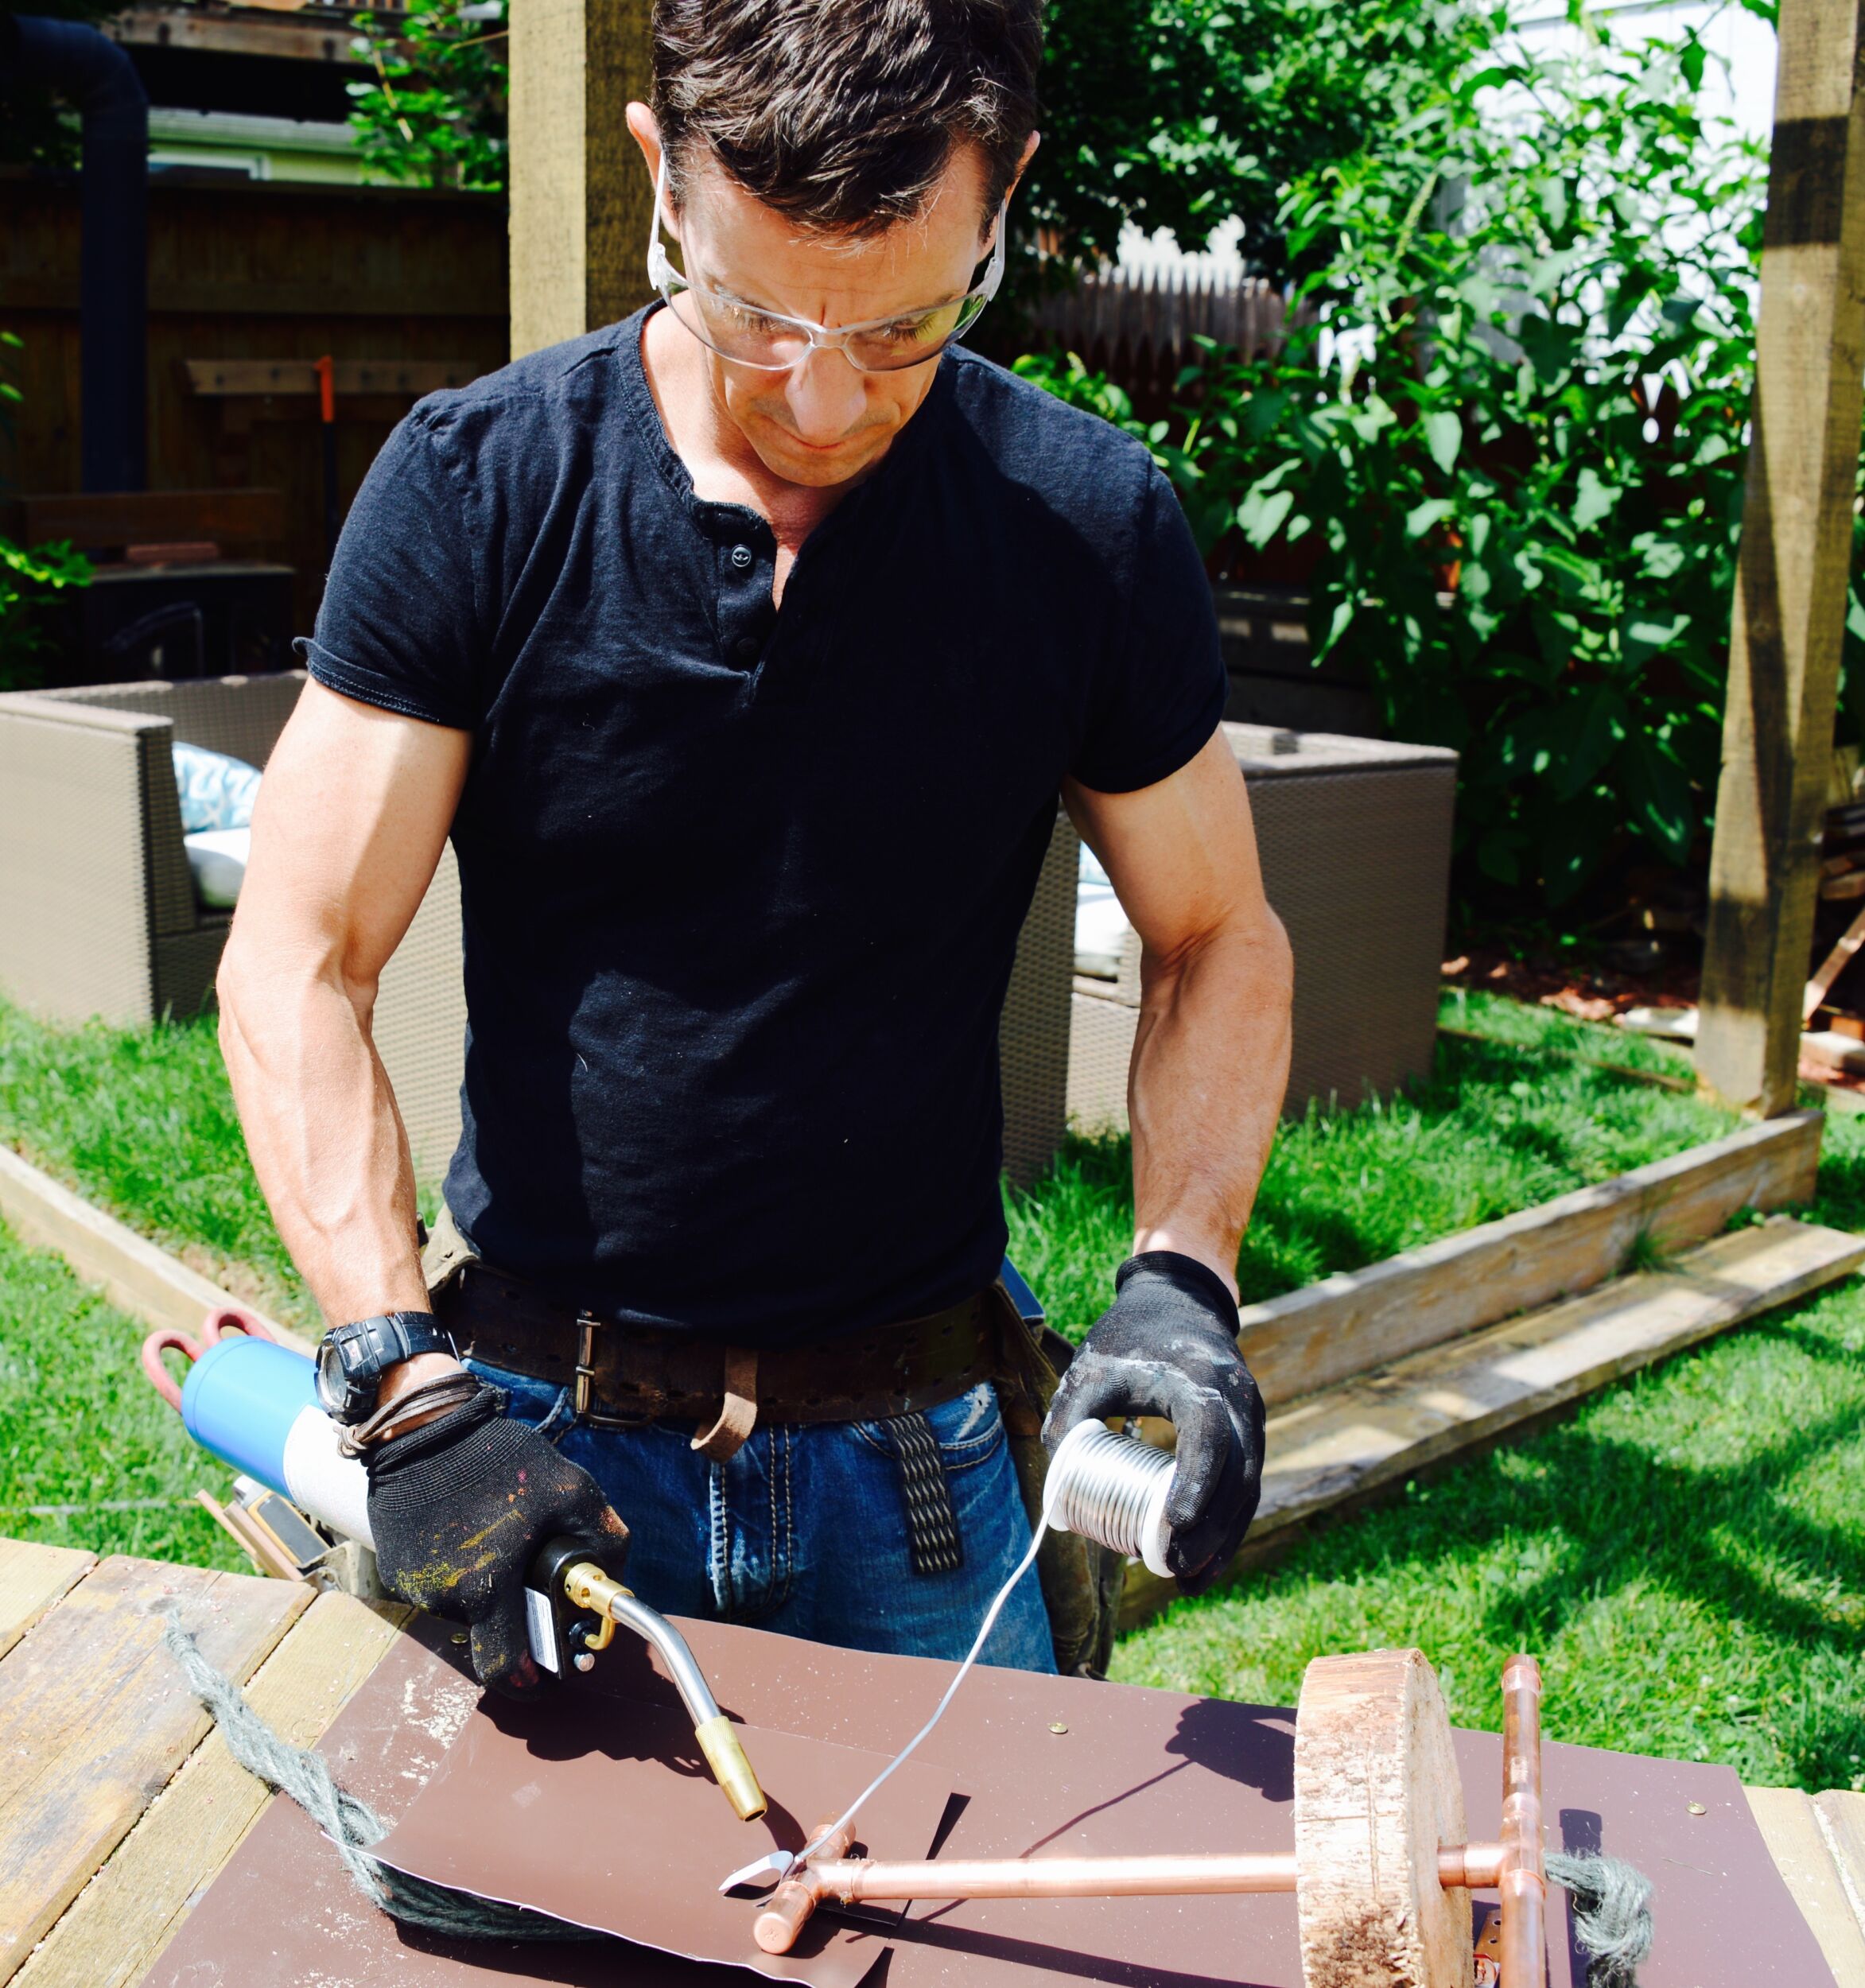
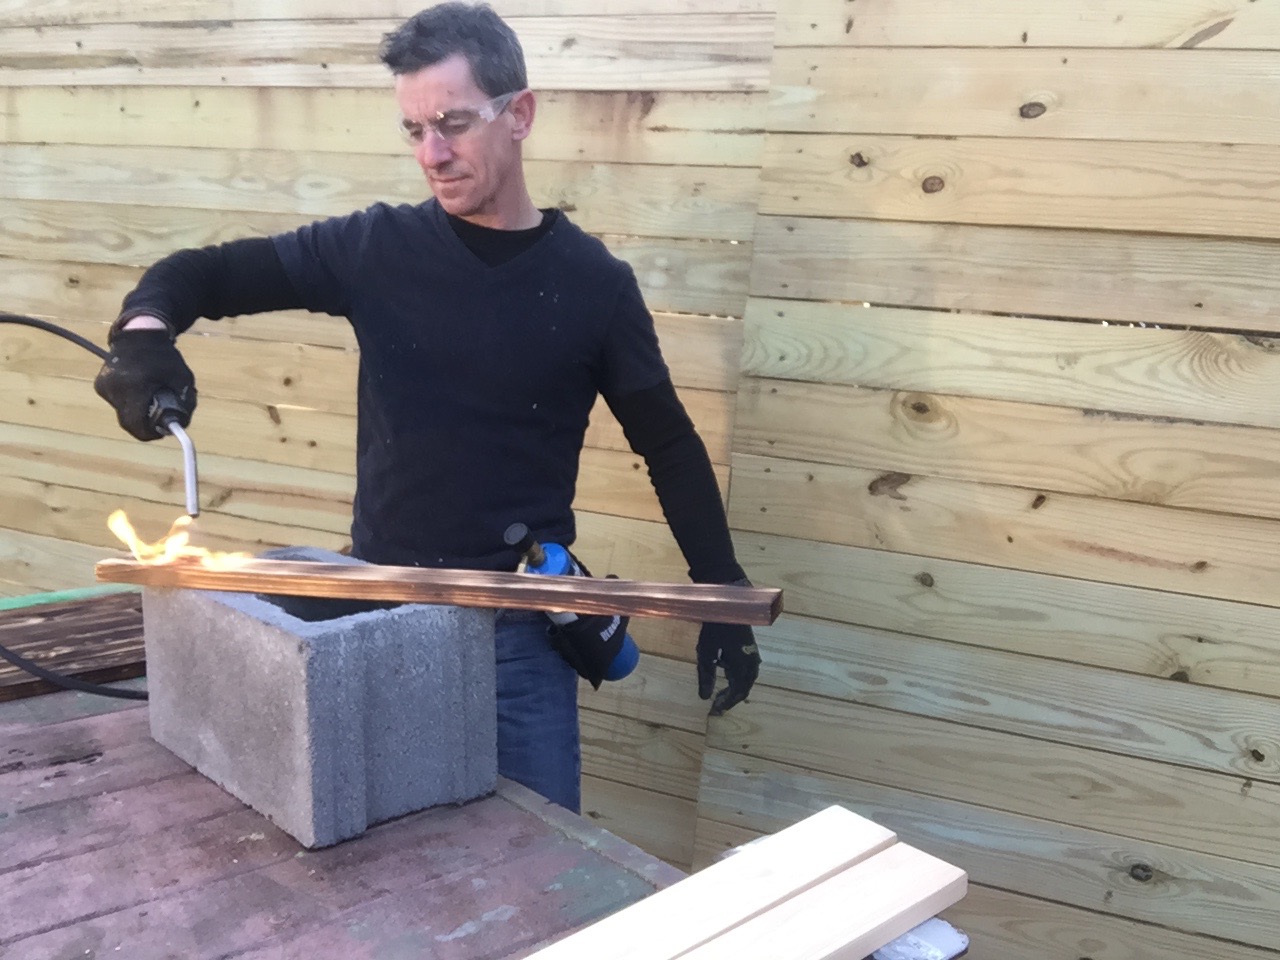
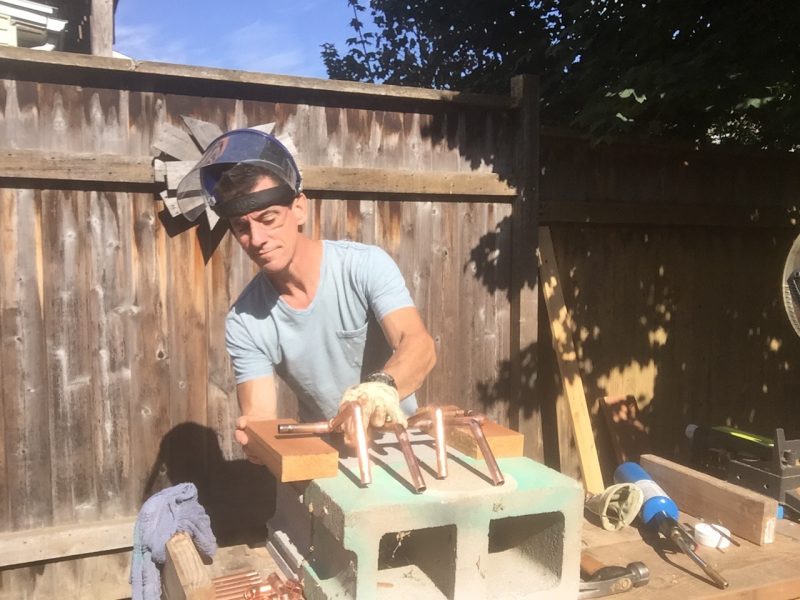
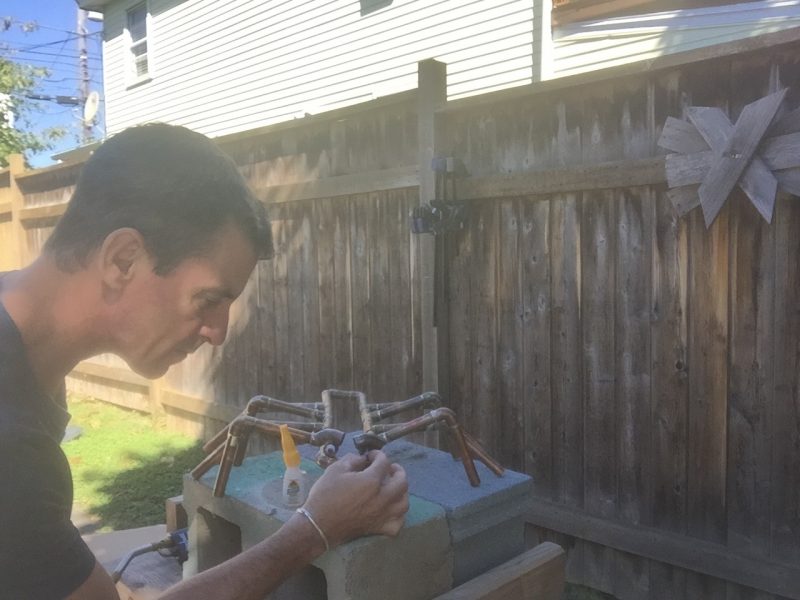
Our DIY Halloween Spider Fred has a lot of little parts in a small space. Rather than going bit by bit, I made assemblies and soldered them together with my Bernzomatic TS4000 torch of awesomeness—no, really, this is a great torch; it heated up the copper evenly and quickly. When parts were too small to hold or sit on their own, I used my hammer as a counterweight.
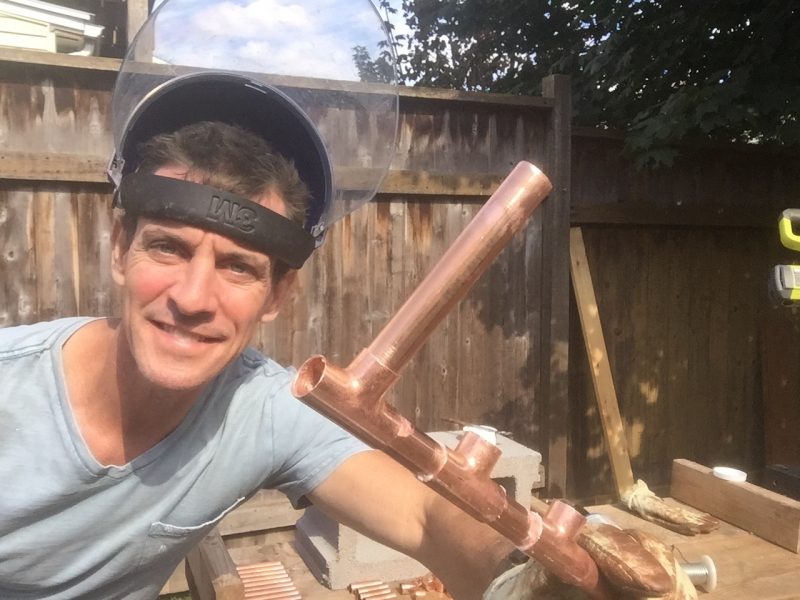
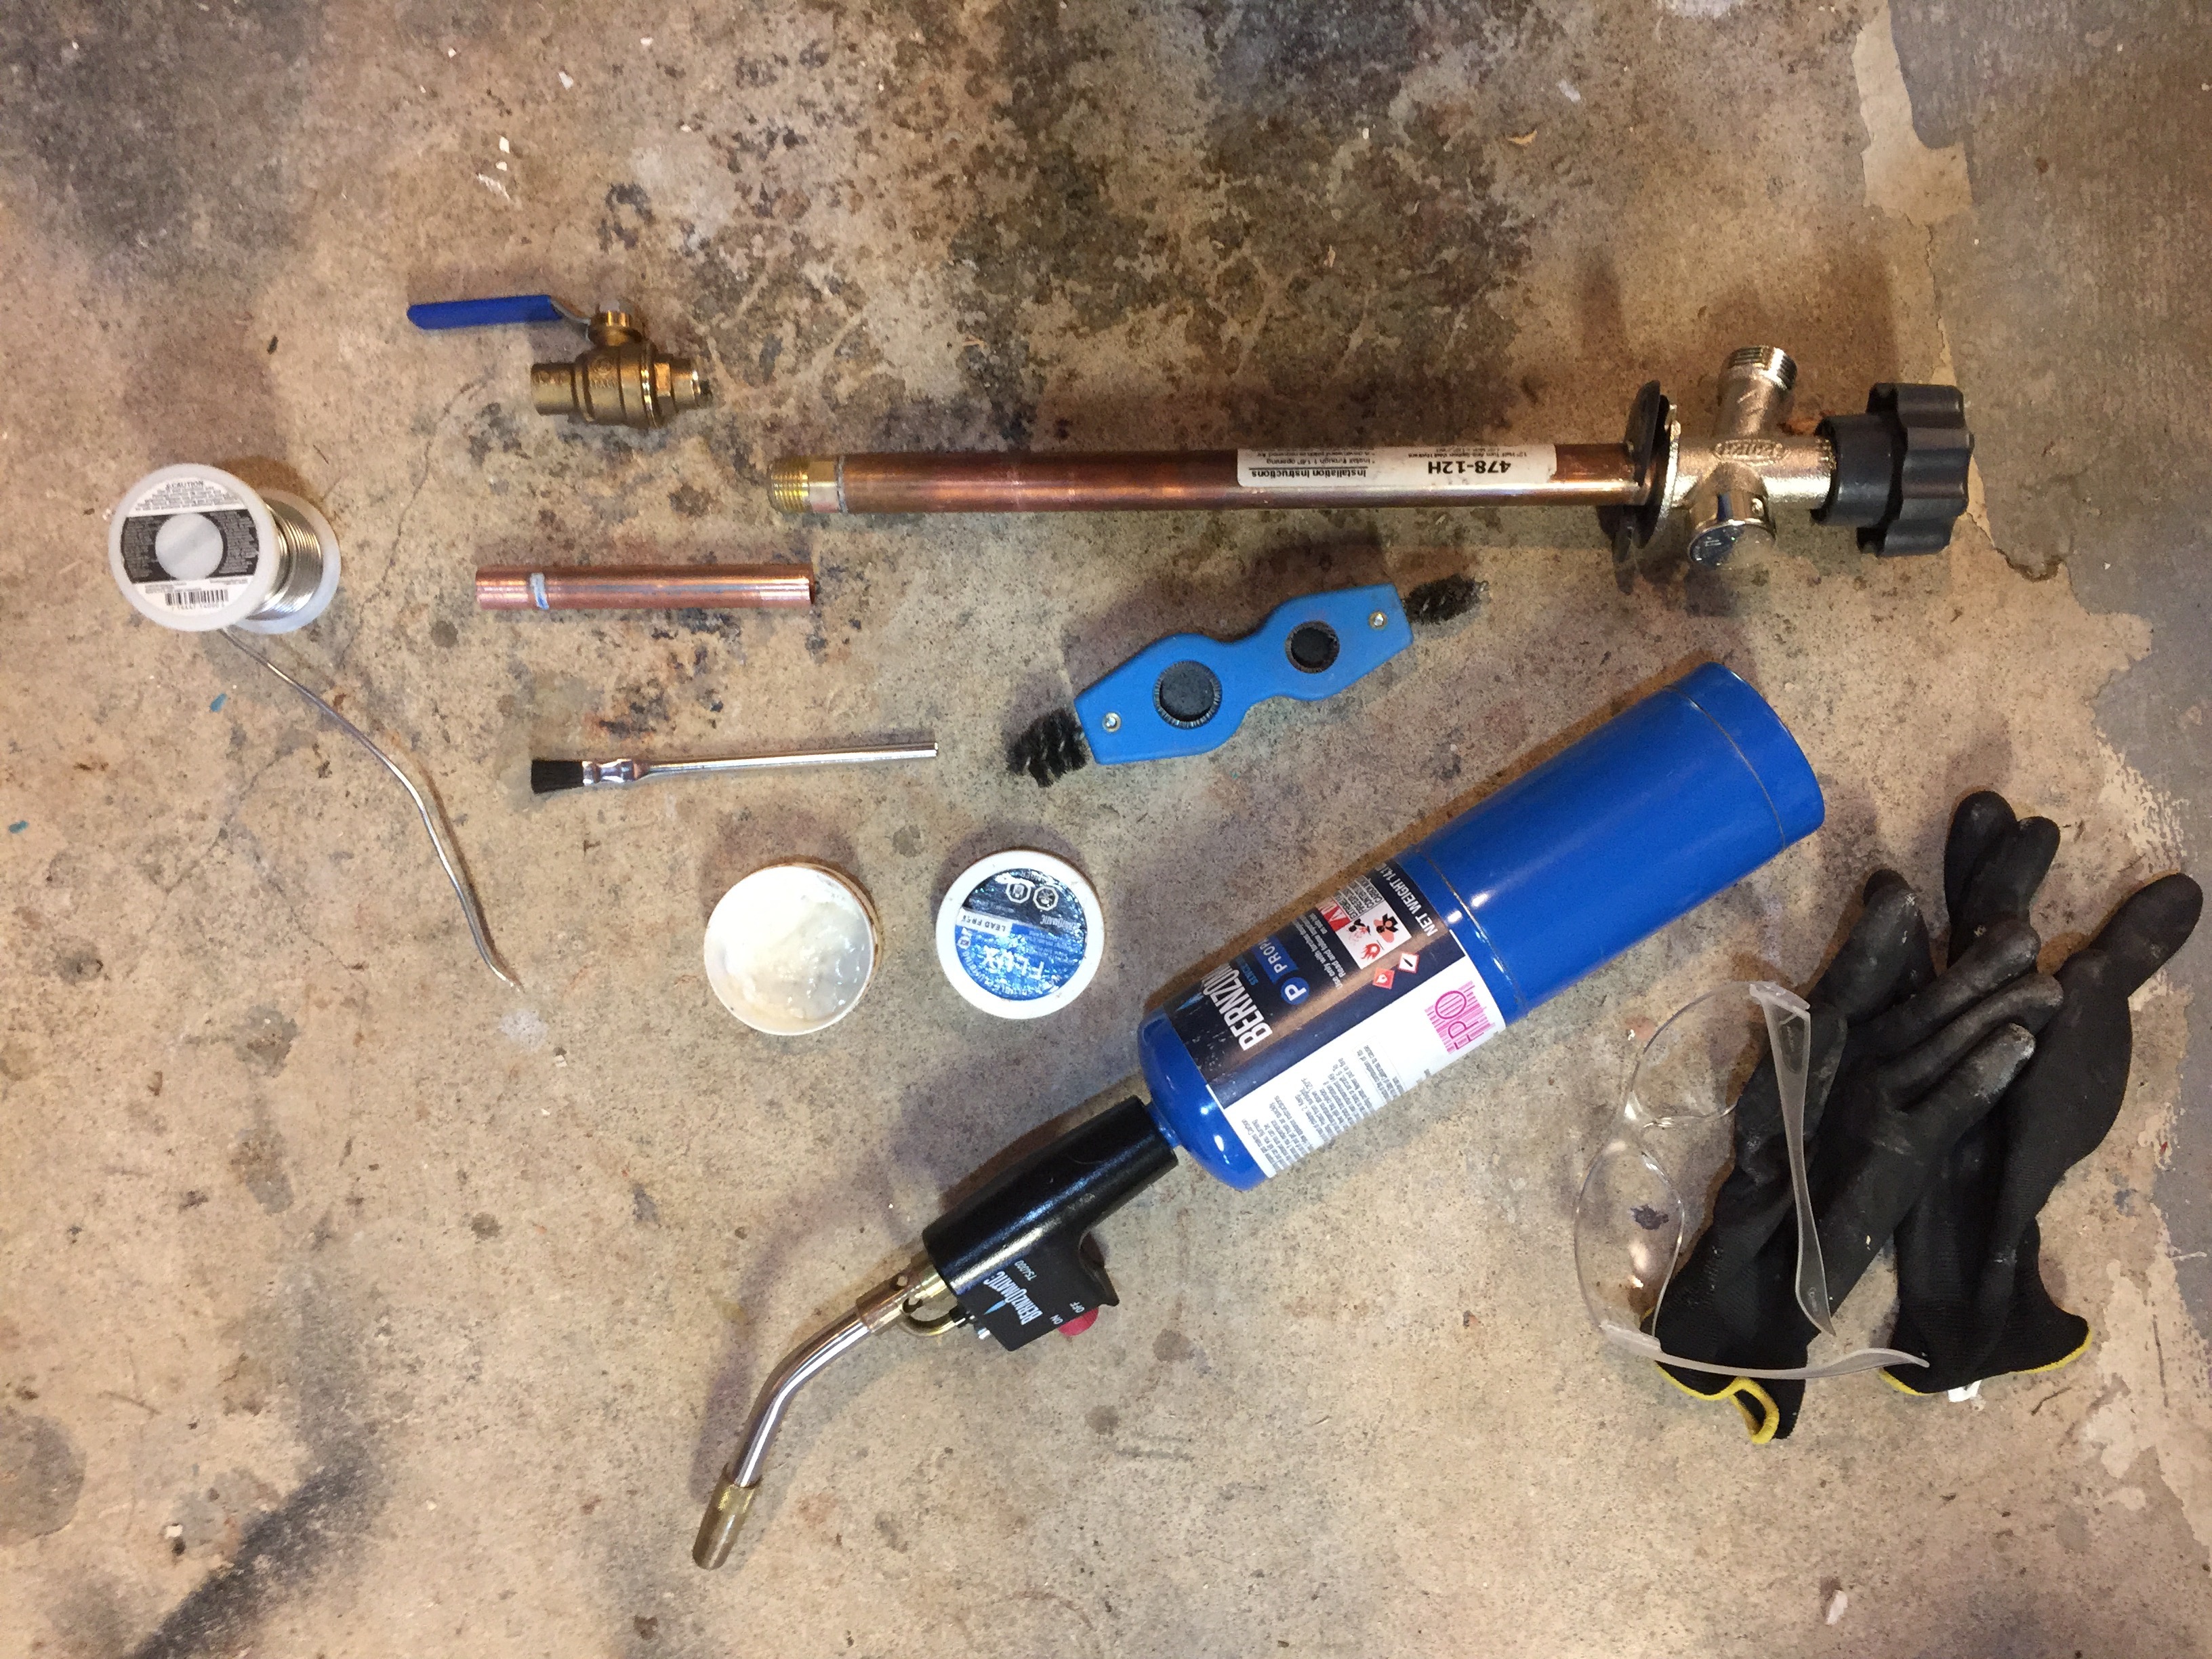
Rather than heat and cool, heat and cool each leg section, I just put the whole thing together before heating. I’m glad I did, too. Reason is, with them all together, I could finagle how they’d all sit flat, like if Fred were resting on the table. Also, I only fluxed the fitting I was assembling so I could handle the pipe a little more cleanly. To get good solders, I used the S4N1B 4-in-1 pipe fitting brush that I use on all the Torchbearer projects. Love that thing.
There’s no specific angle here. Just what looks right-ish. Here, I’m testing out the offsets using my hammer as a wedge to get the right crawly look. After all a DIY Halloween Spider has to look like he’s crawling, right? I also realized that this wasn’t working. At all. So…
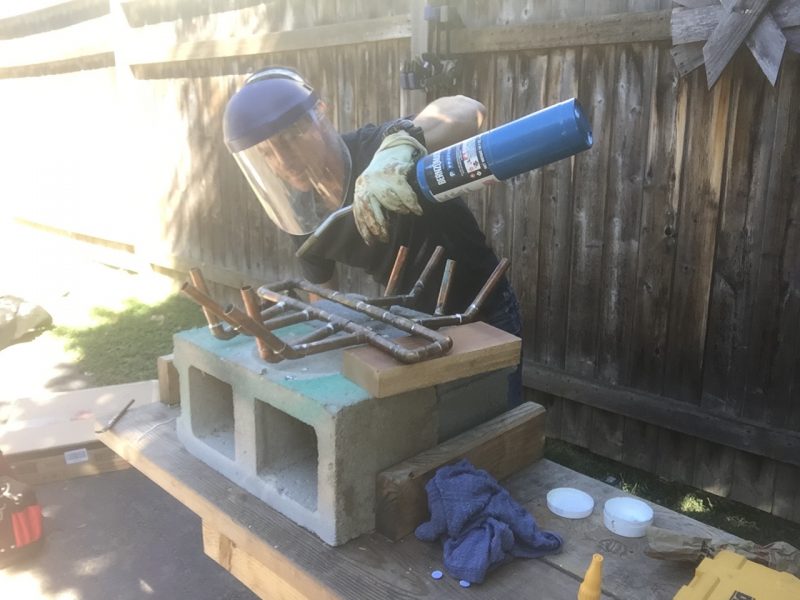
I propped Fred’s thorax up on a couple of wood blocks. Now we’re cookin’ with propane. I could twist and adjust the legs to sit flat on a table. And I have the perfect spot to solder everything together.
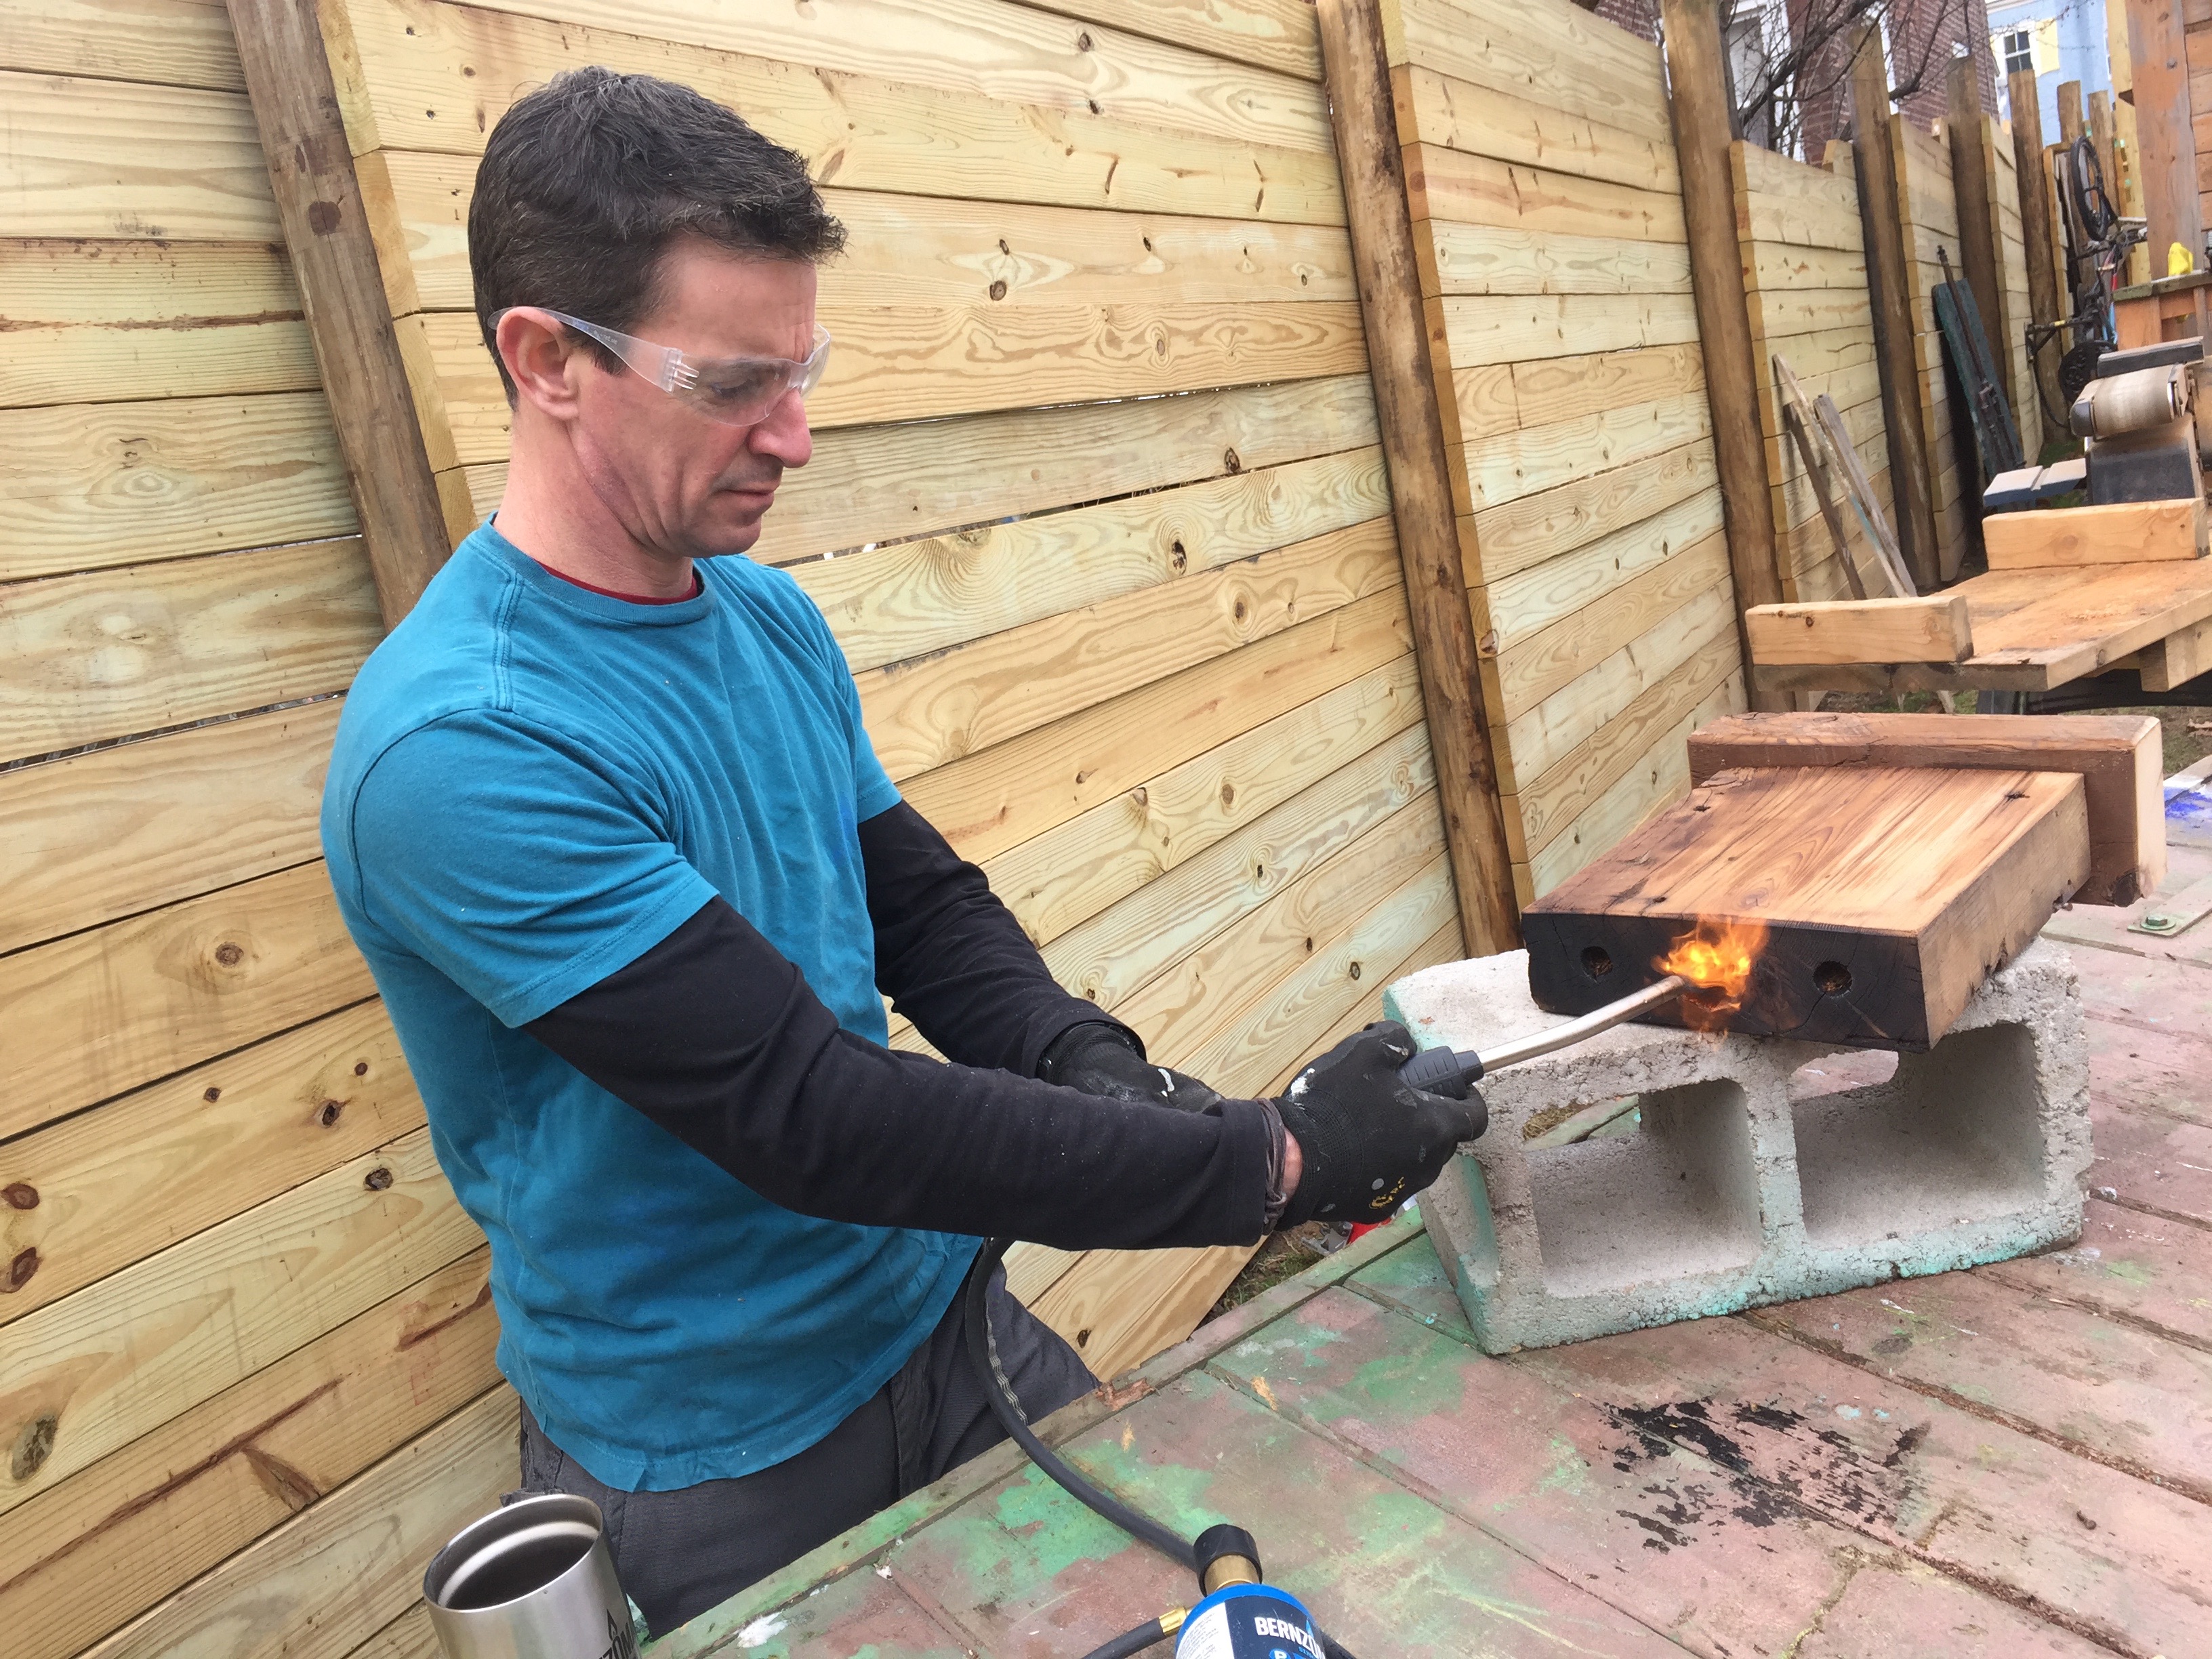
I love using a cinder block as a burn bench for these Torchbearer projects—see another one in this link, and this one and this one—because it’s inflammable of course. But it also doesn’t get hot and it’s easy to store out of the way when I’m not using it.
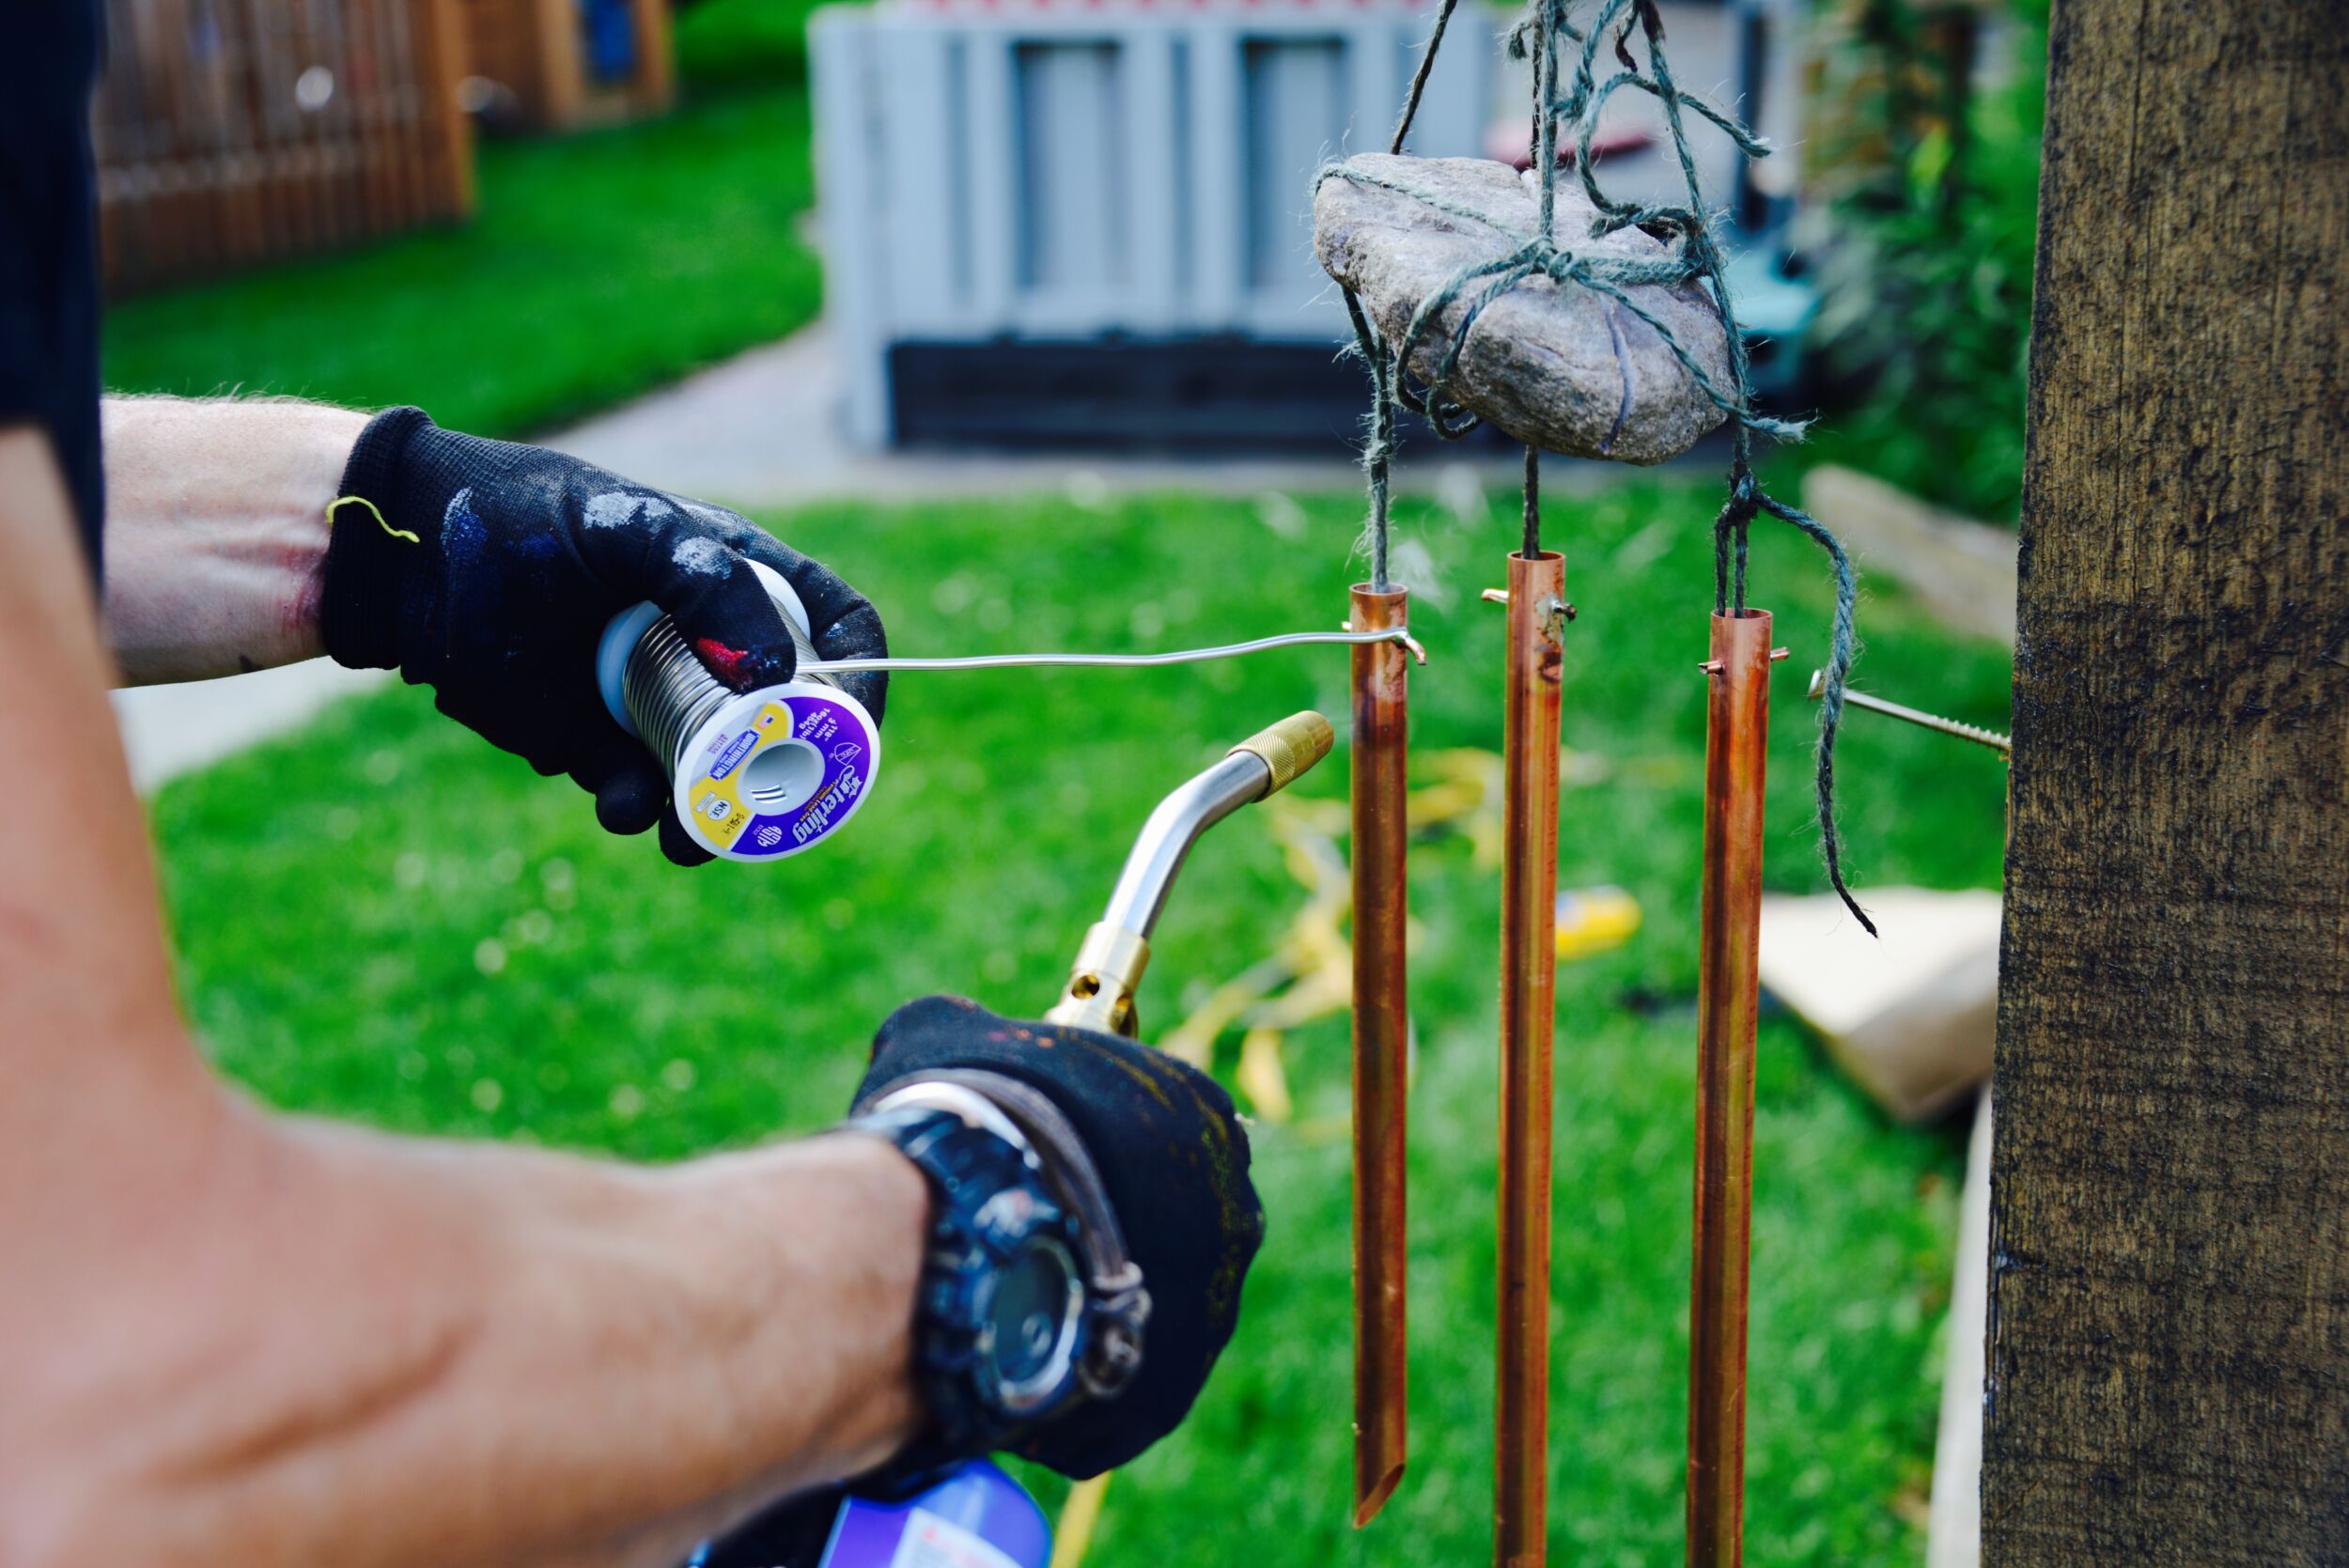
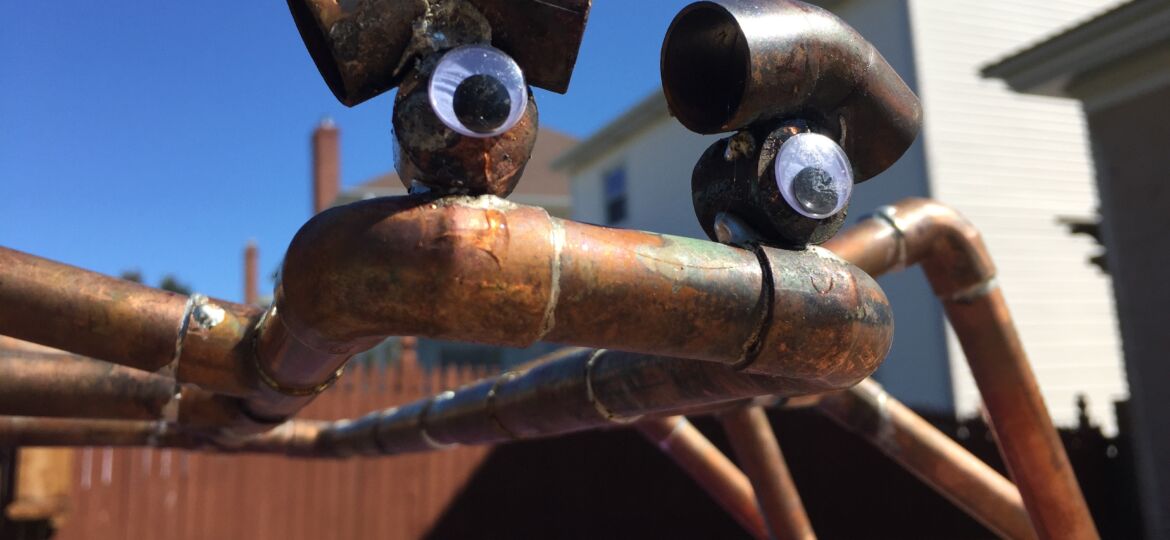
It took Theresa about 45-seconds to both figure out that Fred needed eyes and what leftover fittings would make good ones.
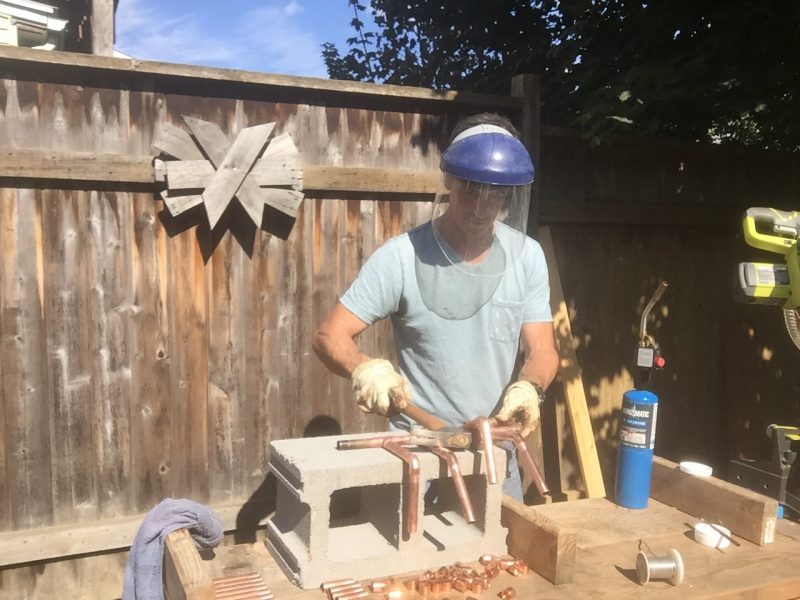
It took me longer than that to figure out how to solder them on. First, I soldered the end caps to the 45s. It took a lot of solder to get these parts not typically meant to be attached attached.
Then, I flipped Fred upside down and put his tail on a block. I put the eyes on the head and Fred’s weight kept them just still enough that I could heat and solder the end caps to the 90s.
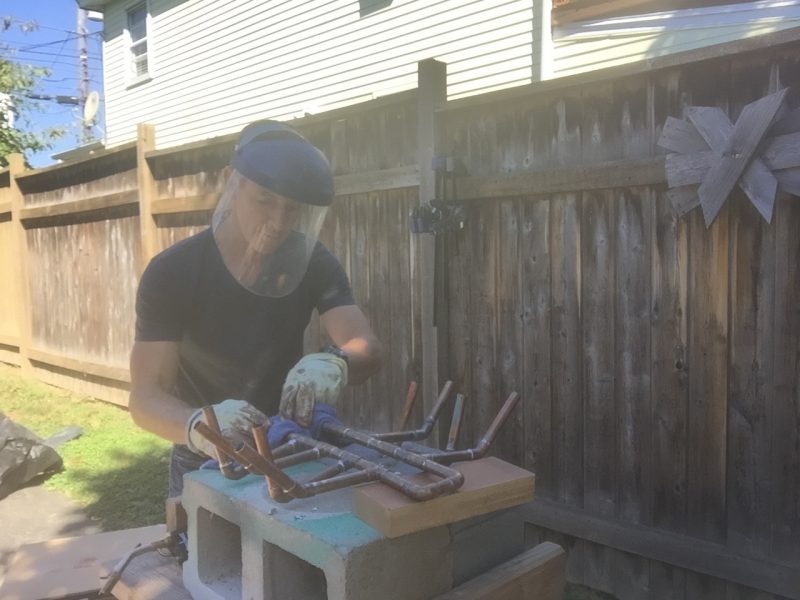
Two things here. First, a damp rag cools the joint down quicker so you can keep working. I don’t know if it helps the bond hold better, but I do know that cleaning off drips and blobs of solder makes me happy. Clean work is almost always good work.
Second, the face shield. There is nothing dangerous going on here. Just the common sense of gloves and eye protection when doing projects. For me, I can flip the shield up (like a welder’s helmet) when I don’t need it and flip it down when I do. Faster than the “where’s my safety glasses” shuffle I often play. This shield is one of the best 8-bucks I ever spent on a tool. I use it all over the place.
I used one of my favorite glue / bottle combinations from Gorilla Glue to stick Fred’s eyes on. He lives!
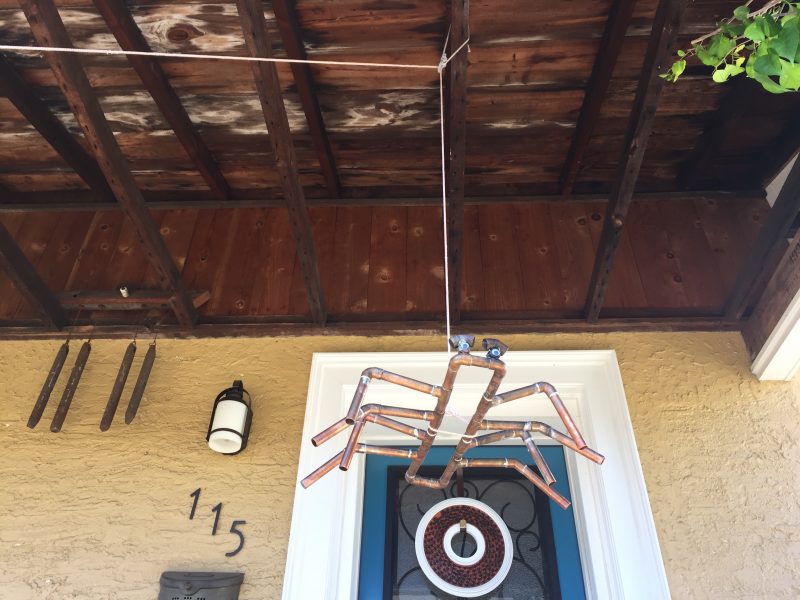
I give you: Fred. The flying, friendly, creepy, soldered Torchbearing DIY Halloween spider. Will his legs get glow sticks? Yes, they will get glow sticks.
Happy, safe, fun Halloween everybody.