
If you’ve got grand backyard landscaping ideas, then how to build a pergola with seating–that rocks—should be on your list.
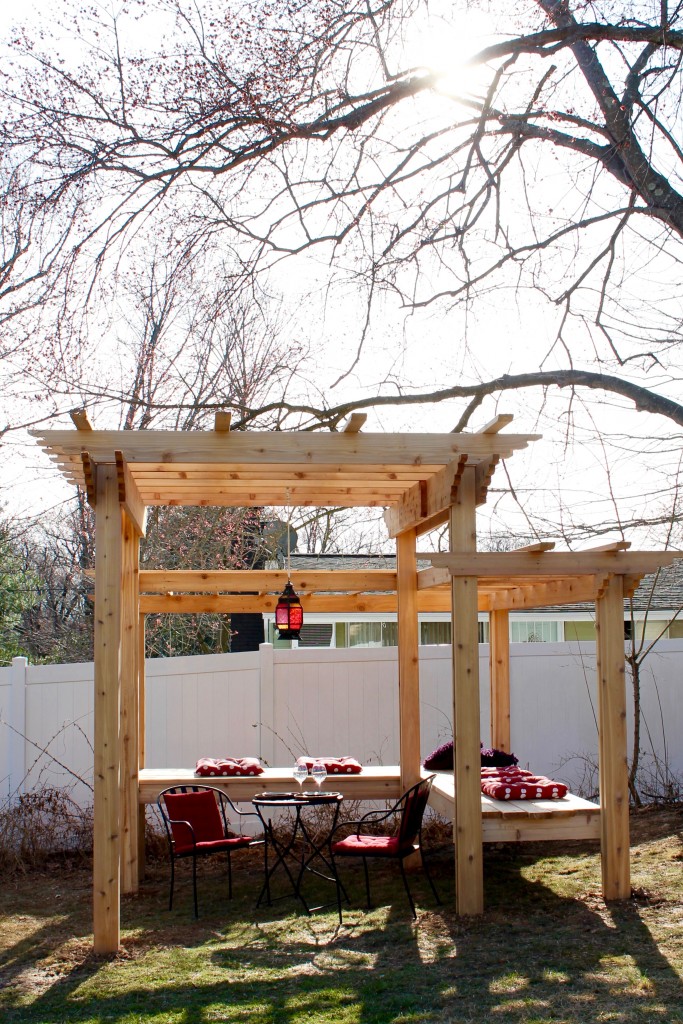
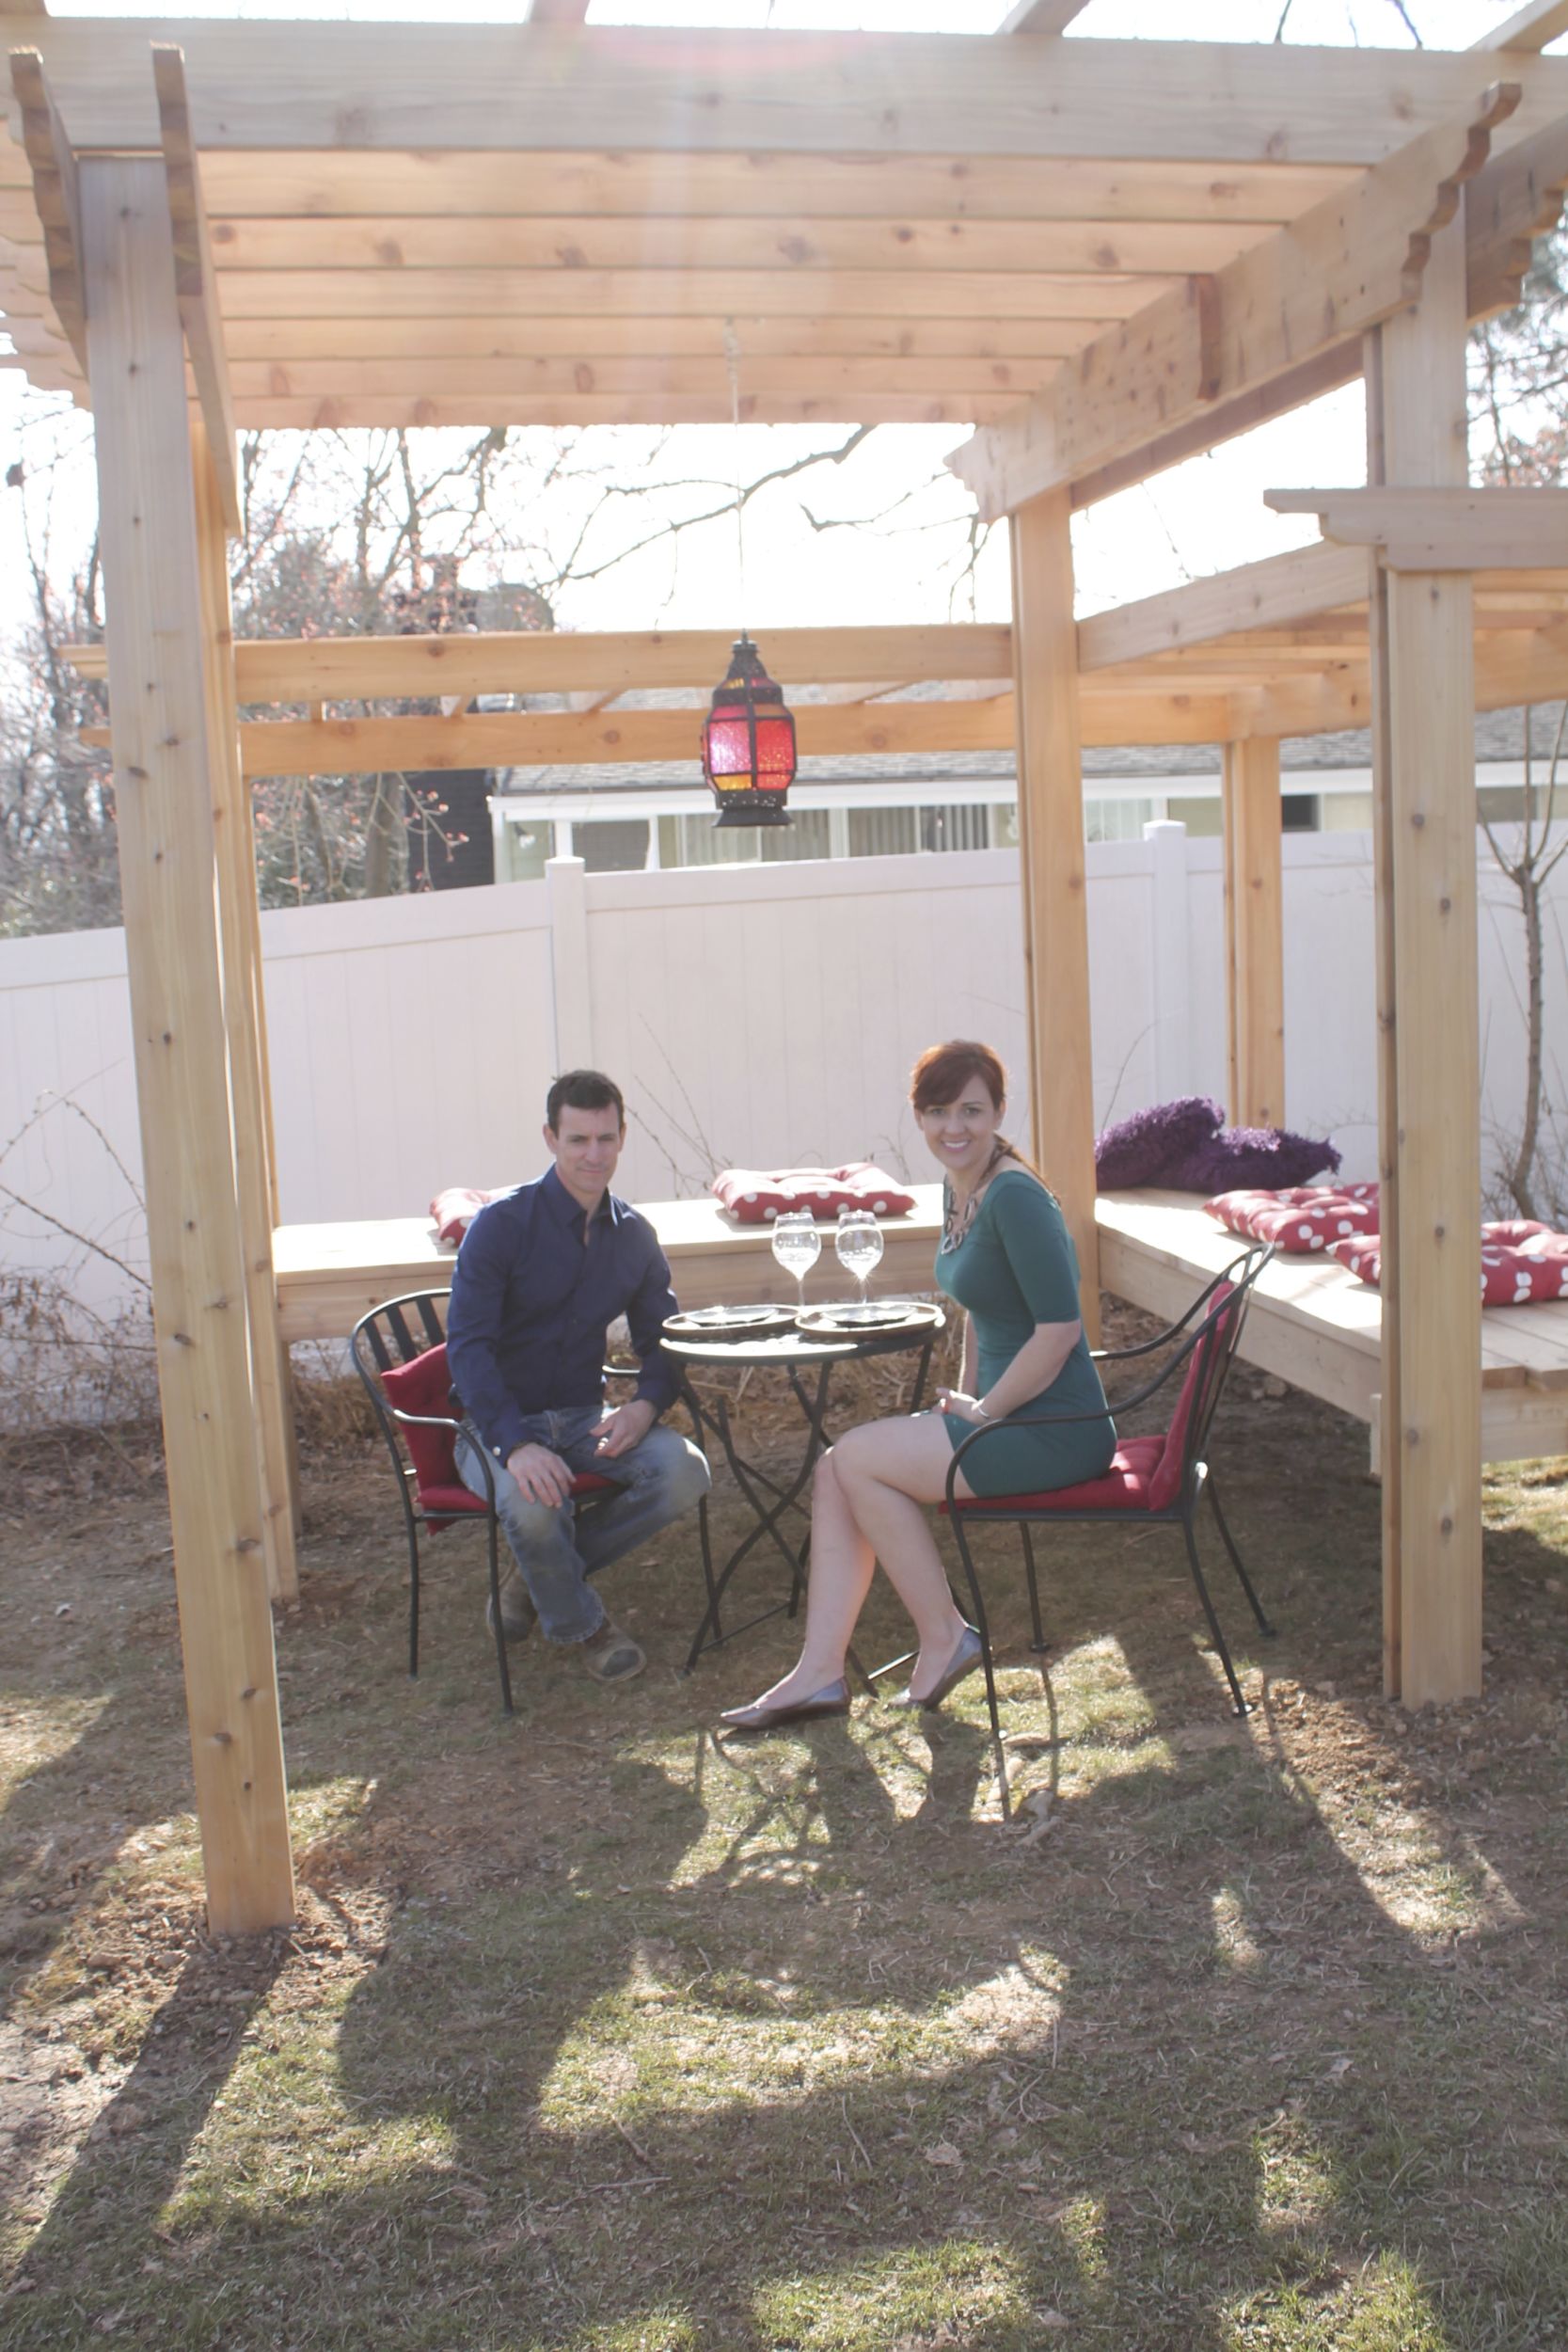
This pergola is a one-of-a-kinder with a multi-use space for seating and serving. We hope you love it as much as we do.
Decide the pergola shape and layout
After picking the perfect location and determining a size that fits the space we make the best how to build a pergola buddy going: A box.
It’s not just any box. It’s a ‘full-size template’ and it rocks. We use it for layout, assembly and it can even be the starting point for a wood deck floor.

Design the pergola posts
The posts are set in a 10-foot x 10-foot square so we built the box 131 1/2-inches x 131 1/2-inches so the posts will fit inside the box at a 10-foot spread. Next, we install bracing on it to keep it square and so we can lift or drag it easily.
Dig the post holes
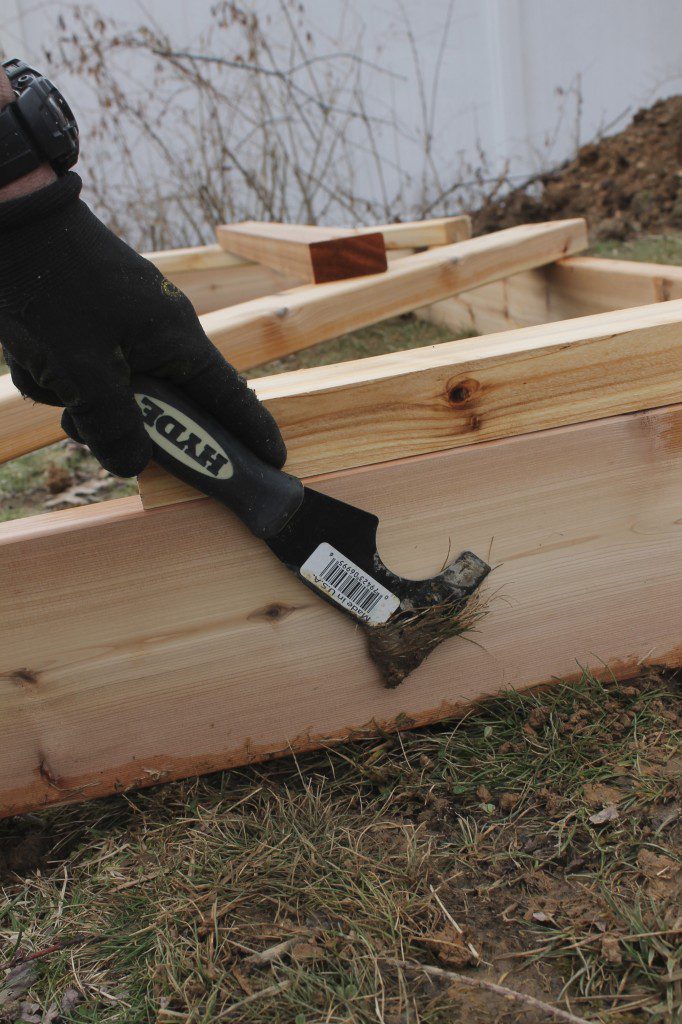
We place the box on the exact spot where we want to dig our posts and use it to mark the post hole locations. Then we move it and dig the holes. Before moving the box, we found yet another use for our Hyde multi-tool—marking the ground so we knew exactly where to replace the template.
Place the posts in the holes
With the holes dug, we replace the template and then and use it to help hold the posts as we set them in the holes. Make sure the box is level before installing posts.
On this pergola, we fancied up the posts by making them from two 2x6s and one 2×4. It creates a cool, custom look we enjoy. And when it comes to how to build a pergola that’ll last and look good doing it, we used Western Red Cedar. It lasts outdoors and brings a great, natural feel to an outdoor space. And, cedar 2-by stock is great for ground contact.
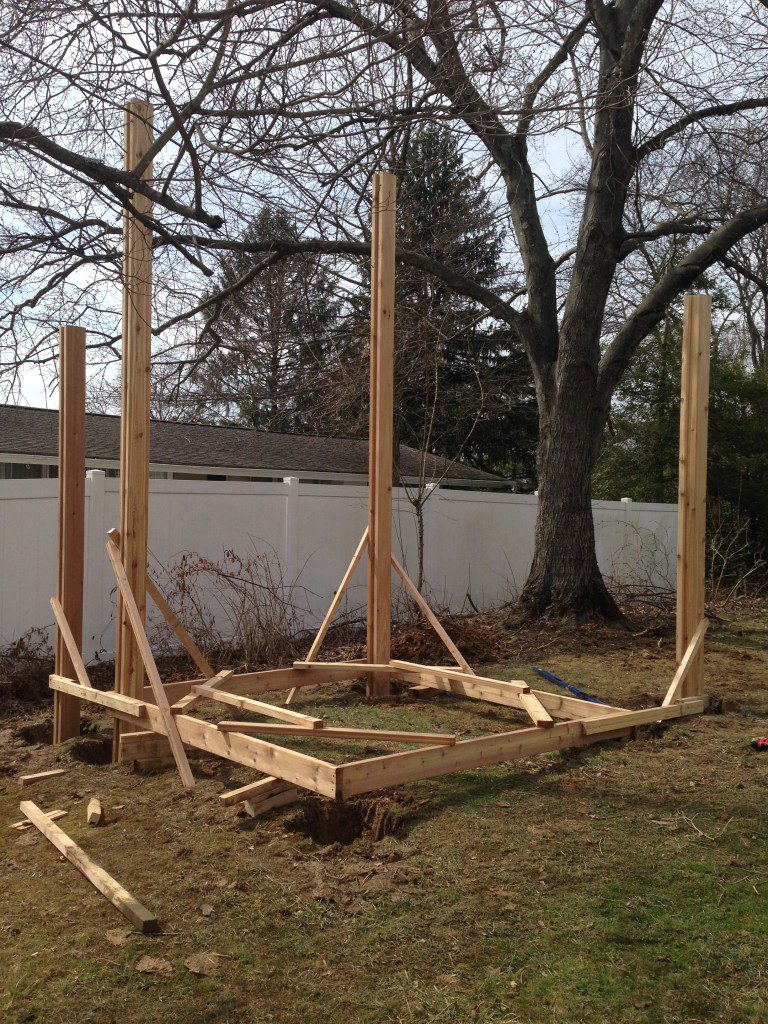
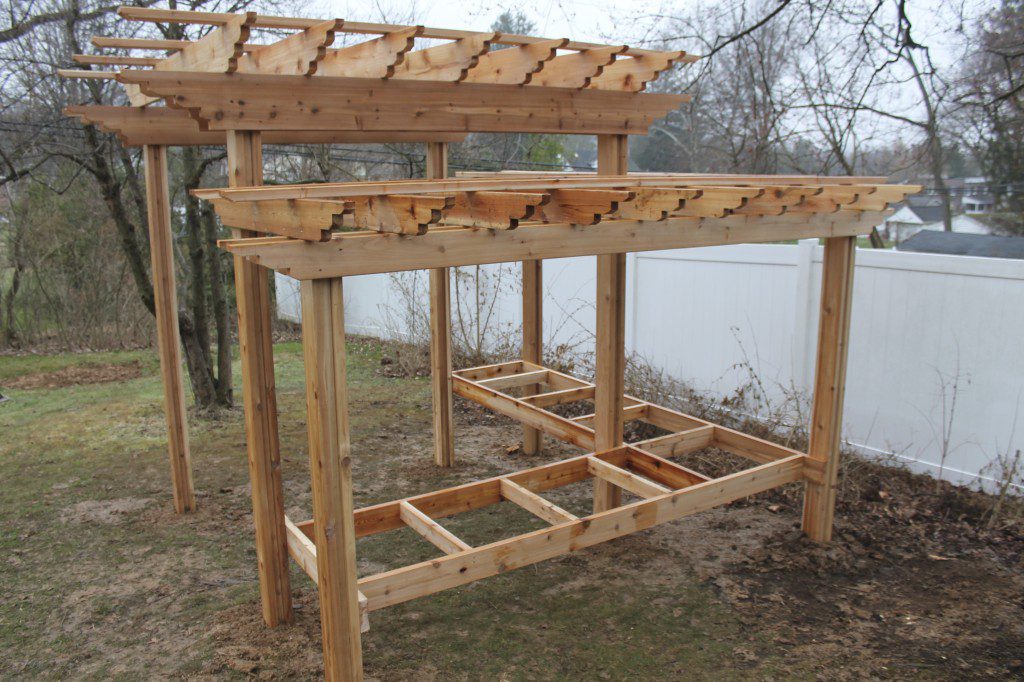
Set the girder and rafters
We set the girder at about 9-feet above the ground. It makes the pergola feel comfortable. The rafters cross the girder. The purlins cross the rafters.
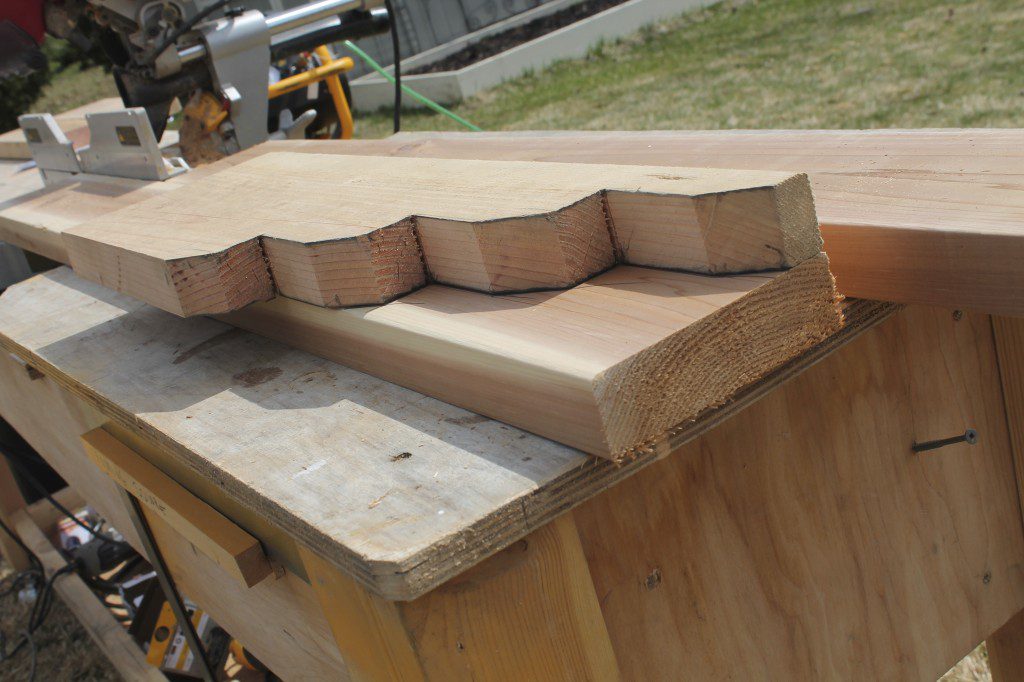
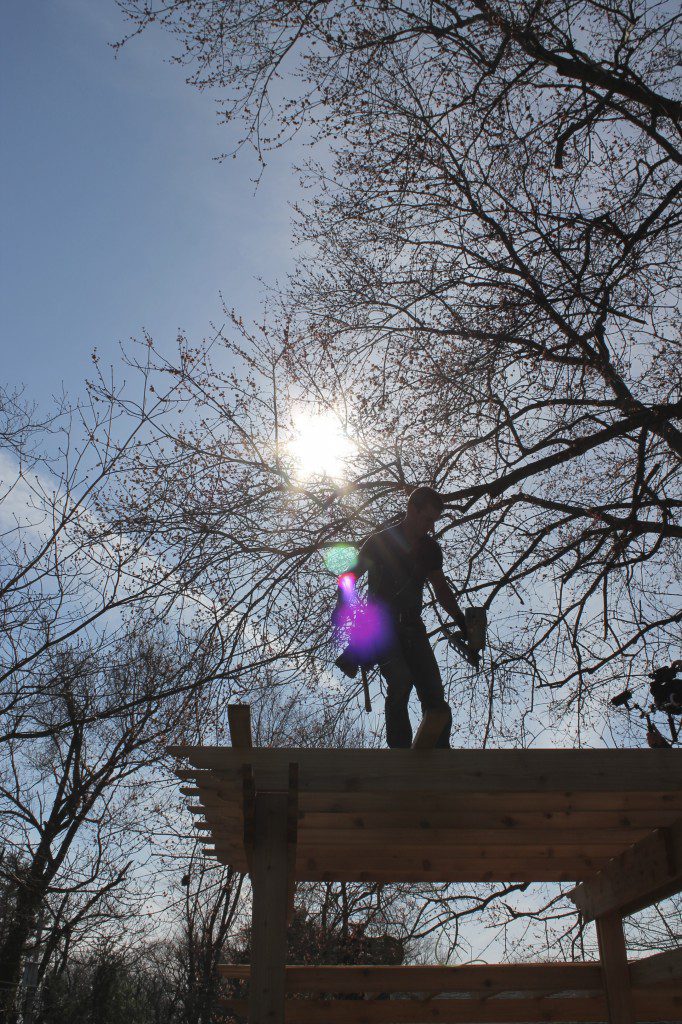
Before we started building, we settled on a funky rafter tail design that we love and that fits the house style.

Add a built-in seating and serving area
And Theresa’s dual-purpose seating/serving area might just be a pergola-first. It’s low and wide enough to use as a couch, but also high enough to lay out plates, cups and platters for a cookout.
What kinds of fasteners and tools did we use?
We used a combination of deck screws (posts), gun nails (rafters and purlins) and structural screws (girder connections) to hold it all together for backyard fun.

About the Author