How to laugh and have fun building a loft bed for your little princess or prince.
I also like that this project—by nature it has an expiration date—is inexpensive. We gave it a rustic and built-for-life look with basic ‘wood boards’ (that’s what we call them with our kids). Realistically you could build a loft bed like this one in a weekend or two. But you’ll only want to keep it fore ten more years if you like the design. So…Question #1:
Does it fit? While the full-size tree fort images you uber clicked on a Pinterest rampage might be awesome, take a closer look at the ceiling heights in those rooms. Many look like they were built at the mall. Most of us have 8-foot ceilings and a tape measure tells the truth:
Measure the wall height. Twenty-four inches of headroom above the mattress was good for Lexi until she hit her teens. So…
That’s how much space there is between the bottom of the bed assembly and the floor. Too low to the floor and it really doesn’t do much past a regular bed. Too close to the ceiling and, well, you can figure that out…
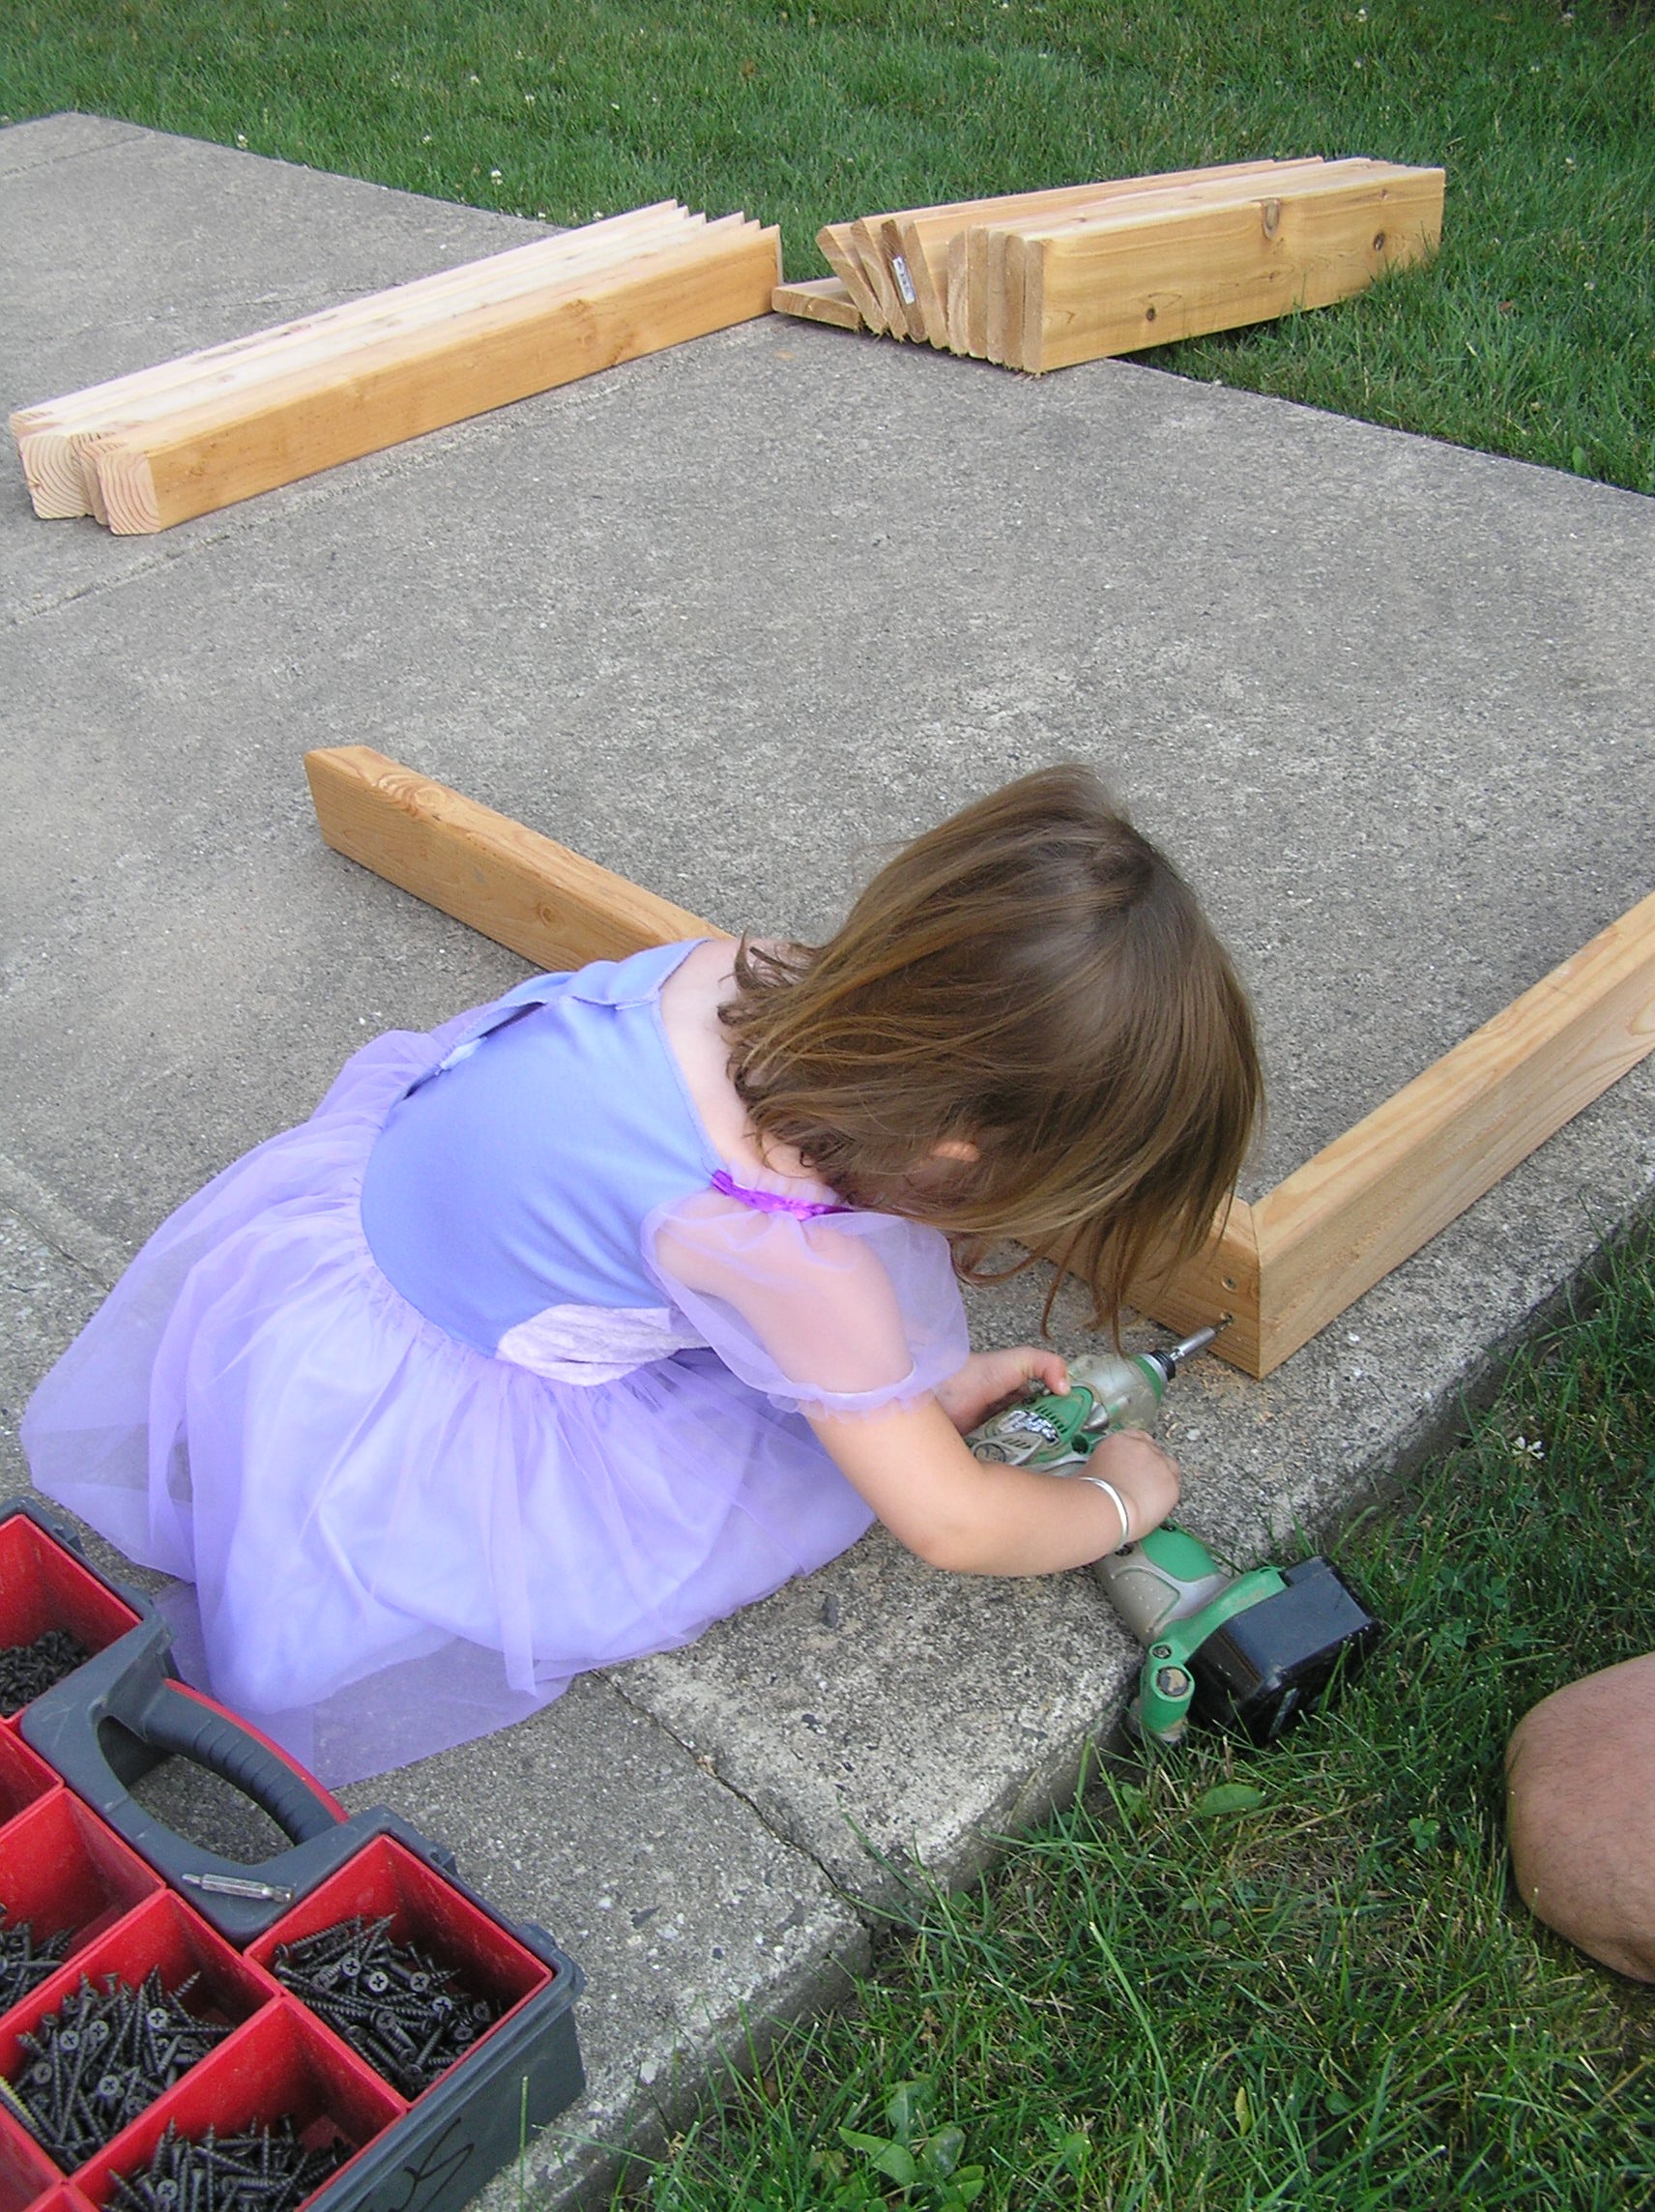
Cut the pieces. We used framing grade 2×6 studs for the bed frame and ladder. When we bought them we looked for the gnarliest, knottiest—but most importantly, straightest—pieces we could find. We love knots for their rustic, reclaimed feel.
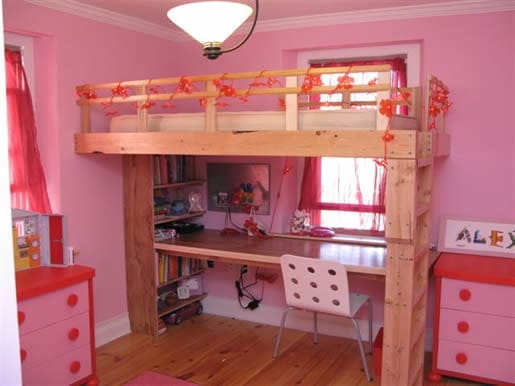
How you decide to build a loft bed is up to you—every room is different—but we decided to build ours a little bigger than the mattress so Lexi could have a little place for books, a flashlight (no reading in bed!), and stuffed animals. And so that we could make the bed. Turns out that’s a sheet of 3/4-inch sanded plywood: 4′ x 8′.
Fasten. Technically, the piece that fastens to the wall is a ‘ledger board’. And if there’s ever anything you want to make sure you fasten to the wall studs, this is it. Precious cargo. We built ours in a corner, so we struck a level line on both walls, found the studs and fastened with cabinet screws.
Ladder. The ladder holds up the outside corner. If I had to build a loft bed again, I’d run the bed frame wall to wall and place the ladder differently. To make sure the ladder stayed stock still for years of use and playing, I toe-screwed it to the floor. Probably overkill since the desk, below, is attached as well.
Bed platform. I used my pneumatic stapler (love this tool) and stapled a 1-inch cleat to the underside of the bed frame. This is the support for the bed platform—¾-inch sanded plywood.
Railing. We glued and screwed a railing inside the bed frame. We stole the spacing from deck building railing code and made it so that a 4-inch sphere can’t pass through it and get caught.
Windows. You may have to bridge a window. Since I know people sue other people for spilling hot coffee on themselves, I won’t go within a hundred miles of telling you anything about that other than to use good parenting judgment and check with your local building department about what they recommend.
The desk. Similar in construction to the bed frame.
Fun. Now make it extra-yours. Fun lights, a magnet board, cool furniture and a prince or princess paint job ties the whole thing together.
And Hallmark hoo-ha aside, build a loft bed that is safe and smart. And that’ll last for all the years of childhood. Because even though the days can go by kinda slow, it’s the years that go like lightning.
Check us out on Instructables!
Tangled up hoses can be frustrating and time sucks. So here's how to quickly uncoil…
Here's what really happens at an Extreme Makeover Home Edition project from my view as…
Need the best table saw for a mobile jobsite or DIYer? Look no further. Here's…
Selecting the right kitchen materials and appliances is essential so that your kitchen performs well…
Envisioning your goals for your kitchen remodel is a priority before you even consider getting…
We want you to be ready to take on your kitchen remodeling project confidently. Check…
View Comments
Hey Mark! You did a commendable job. I loved this DIY project. Thank you so much for sharing the details. I hope your daughter liked the bed.
This is awesome James. Love that you're getting her in the game.
Looks awesome Mark!
Funny I have a pic of my three year old daughter with my impact driver as well helping me fix some draws, and it looks like they share the same love of pink!