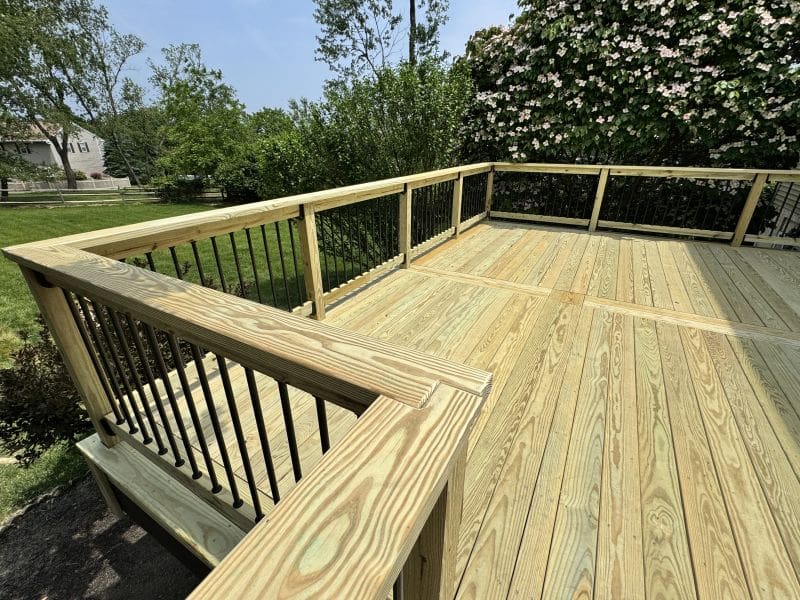
While you can miter the corners on a deck railing top cap, it’s not the only way to detail it. Over the years, I’ve used upped my game using my router and I’ve had success with stepped miters. On this deck, I went for a curved top cap joint. When we posted a short video of the detail on social media, we weren’t expecting the blow-up. So we’re taking an opportunity to share why this curved deck railing top cap detail works and how we made it happen.
Watch the video
Here’s a detailed look at the how-to and why-to behind this guard post top cap detail. Watch the video.
In this video we discuss a method to transition corners in pressure treated wood decks. I’ll be the first one to say that it is unconventional. It uses Tab A / Slot B radius cuts to (literally) round the corner.
After 8 weeks or so in service–plenty of time for evaporation to occur and water to leave the wood, the joint was not only tight, but may have been tighter that when I installed it.

Why curve the deck railing top cap at the corners?
A few things to know, before we get started:
I’m sure there are exceptions, but for the most part, Pressure Treated Southern Pine arrives at the jobsite ~~20% moisture content. The chemical that treats it–i.e. makes it unpalatable to wood destroying microorganisms; it is NOT simply water that decays wood–is waterborne. The material will never reach that moisture content again. As it acclimates–dries out–it mainly shrinks across the grain.
Wood deck builders–myself previously included–use mated 45-degree miters to transition outside corners. I mean, who wouldn’t, right? We do it with interior trim, we do it with composite decking, etc. But there’s a problem. It’s not the end of the world, but there’s a problem. Many wood deck builders don’t know, others know and don’t care.
The problem is that the miters open up as water evaporates from the material. As the lumber changes shape, so does the miter. It collapses at the long point and retreats at the short point. It only take a couple 3-weeks.
To hedge my bets against this, I’ve successfully used what I call a Stepped Joint.


Here, I thought I’d try a radius–a curved top cap detail. It takes some finagling, a little sanding and I use a round over bit to create deep shadow lines, but the joint stays closed.
Check out more deck building tips, how-tos, and design inspo.


