

To install a porch light successfully there are a few things I advise that make life a little easier and the project go smoothly. A few tools. A decent ladder. And some patience all smooth the road in front of you. Here’s how I do it.

First step is to shut off power at the breaker panel. Next, set yourself up with a place to put everything. I like to lay everything out on my utility mat so I can see it. Then, I read the directions. It’s amazing the kinds of stuff they put in there.


Remove the brackets and hardware holding the old fixture in place. A screwdriver works just fine, but a cordless really makes quick work of the long screws you sometimes find in these things. And then there’s my step-ladder lecture. How do you know you need it? If you’re first thought is ‘I can stand on a chair’. I used a four-footer for this one. My ladder go-to for most projects.

Even with the power off, before I expose the wires I give them a tap with my wire tester. It’s a beyond simple double check to make sure you got the right breaker switched off without having to run back to the panel.

Install the new porch light hardware. For most porch light projects I’ve done—even on old houses—everything you need is usually in the box the porch light comes in. That said, I always keep the old screws because something in the box (junction box on the wall, not retail box) may be funky and require you to have extra—or usually—a certain type of fastener to attach to what’;s already in the wall. Not that I’ve ever sifted through a garbage can to find old screws. I just know this by magic.

Match up the wires. Just like jump starting a car. Black-to-black, white-to-white. Ground (bare or green)-to-ground screw. I twist the porch light wire around the house wire clockwise. Then when I twist on the wire nut, everything is going in the same direction. Righty tighty.

Now add the awesome. Place the housing (the awesome part) over the protruding screws. This can be a little tricky to hold the tiny little bolts, align the screws and holes and be able to reach everything. Snug the bolts up. No need to go crazy tightening them.

The last part of the porch light assembly is to install the glass. I always put on my favorite gloves for this. Probably over-kill, but I want to keep dirt and smudges off the lens and, more importantly off the bulb—which we rock with LED.

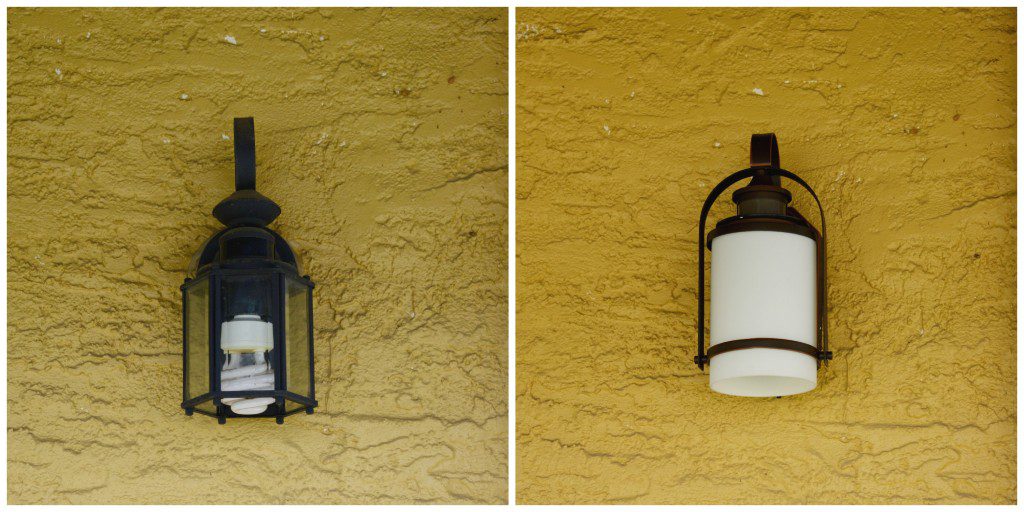
Aaaaaand, awesome. Sweet look. Great light. Two other things. This light is on a porch (i.e., it has a roof). If there’s any chance of your light getting wet, run a bead of clear silicone around the housing to shed water and keep it out of the assembly. Remember to flip the breaker back on. The light works better that way.

