Our primary bedroom was more than ready for a paint makeover. It was not the rejuvenating sanctuary that we needed while managing a busy household, especially with the added pressure of the holidays.
Note: KILZ sponsored this project and provided the paint and primer for the makeover.

What’s the makeover motivation?
I started paint prep during the pandemic, and never actually painted the room. We’ve been living with patched walls for way too long, and it was time to give the room a refresh.
The goal was to create a more sophisticated and modern look with a richer and more soothing hue that exudes a calm and relaxing vibe. By painting the walls using contrasting sheens to create a stripe pattern, I’m adding subtle sophistication through gentle texture that will catch the light from the overhead dimmable lighting.
Select the color.
You’ve probably heard the advice from designers to paint a few samples on the wall before selecting the paint color for a room. It’s such a common tip that paint companies often offer small samples for less than $10. While I agree with this advice, there’s a step that’s missing.
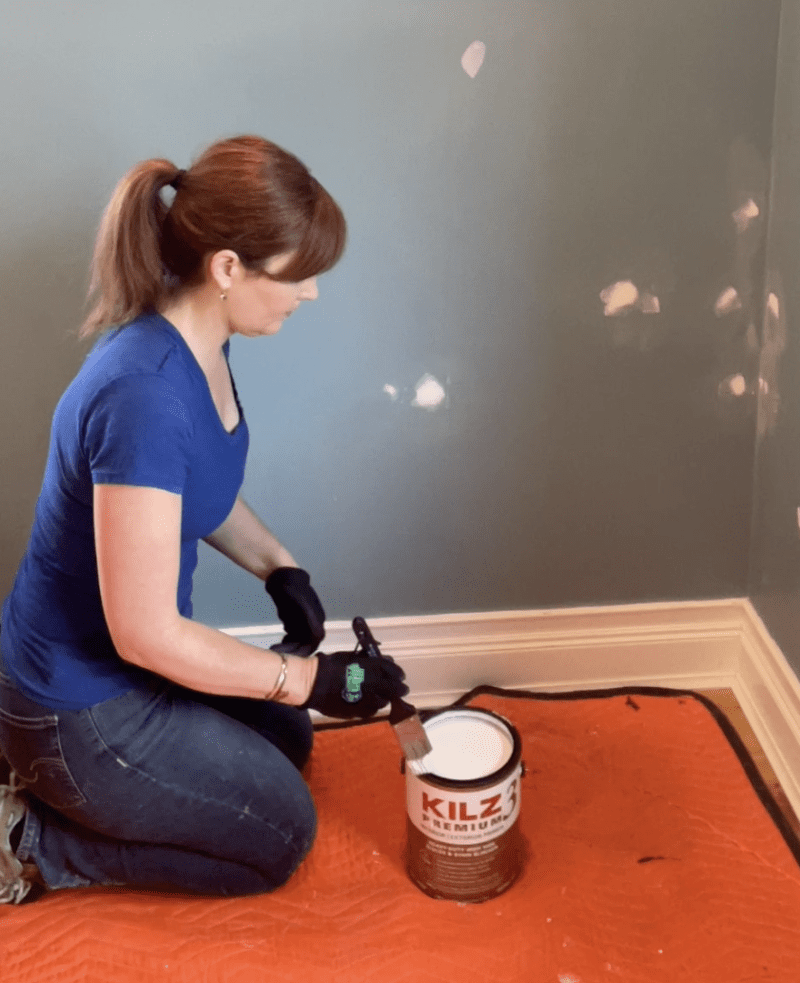
It’s important to prime the wall before applying the sample colors. For this project, I chose KILZ 3® PREMIUM Primer to prime ahead of painting. The current color on your walls can affect how the new color looks to you and whomever else is picking the paint. Then make sure you view the samples during the day, at night, in natural light, and with artificial light, so you have a good idea of what the color will look like throughout the day.
Also, don’t unload the room before putting the samples on the wall, especially if you plan to use the same furnishings in the room after the paint job is complete. The reason? The colors from the other home decor items can affect how a paint color looks to you.
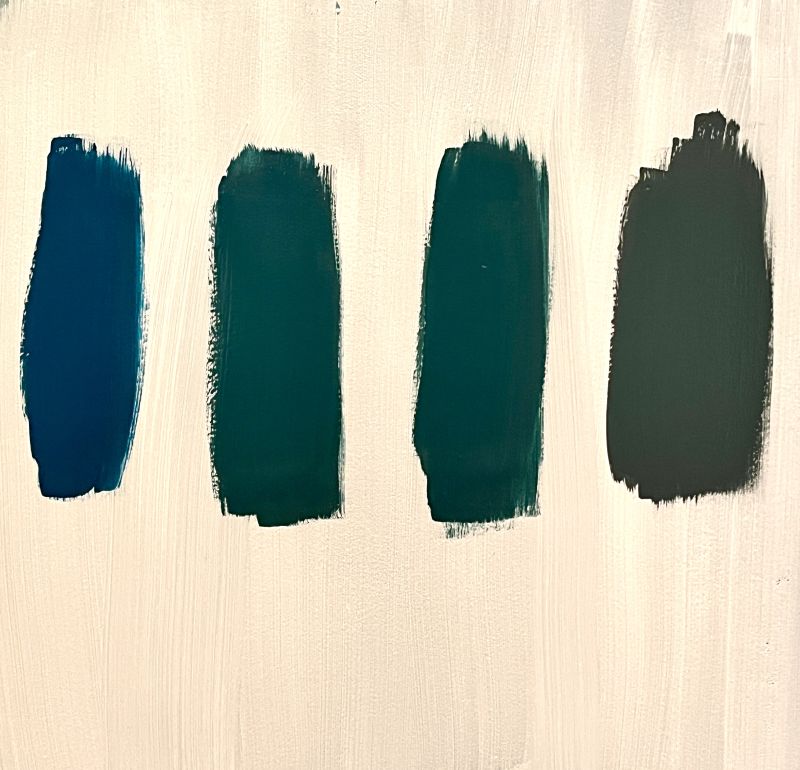
For this project, I chose four colors and asked my husband Mark to pick his favorite. He chose Secondhand Find from Magnolia Home by Joanna Gaines® by KILZ (the color on the right), which is a rich and very saturated bluish-green. An excellent modern color that fits with our goal of a calm and sophisticated vibe.
Select the primer.
While you might be tempted to skip the primer or choose a paint-and-primer in one, we don’t. We always use a high quality primer because it sets the foundation for a good quality paint job and a professional finish. Even though the KILZ brand partnered with us on this makeover, KILZ has been our go-to primer for more than a decade because it delivers long-lasting results for our home and our clients’ homes.
For this project, we chose KILZ 3® PREMIUM Primer because it’s fast drying, low odor, very low VOC, and it has excellent adhesion. The thicker formula also hides surface imperfections, which is ideal for this house that was built in 1903 and has a lot of ‘character’ marks from the previous owner and our busy family.
Gather primer, paint, tools, and materials.
The next step in this makeover is gathering the tools and materials. For this project, I needed:
- Drop cloth (We like to use a moving blanket because it has more weight to it.)
- Multi-tool
- Awl
- Hammer
- Ladder
- 1½-inch angled paint brush
- Paint roller and extender
- Paint tray
- Painter’s tape
- KILZ 3® PREMIUM Primer
- Paint Samples in selected colors
- Magnolia Home by Joanna Gaines® by KILZ Interior Paint in Secondhand Find, Matte Finish
- Magnolia Home by Joanna Gaines® by KILZ Interior Paint in Secondhand Find, Eggshell Finish
Paint the trim.
While many might paint the ceiling or prime the walls first, we don’t. We often paint the trim first, especially if the ceiling has previously been primed and painted white and will be painted white again, and if the trim will be painted white. The reason is that it’s easier to go quickly and over-paint the trim on the first pass, and then cut in the ceiling and wall color later. We find that it gives the trim a crisper line.
I used Magnolia Home by Joanna Gaines® by KILZ Interior Paint in True White, semi-gloss finish for the trim, and gave it two coats.

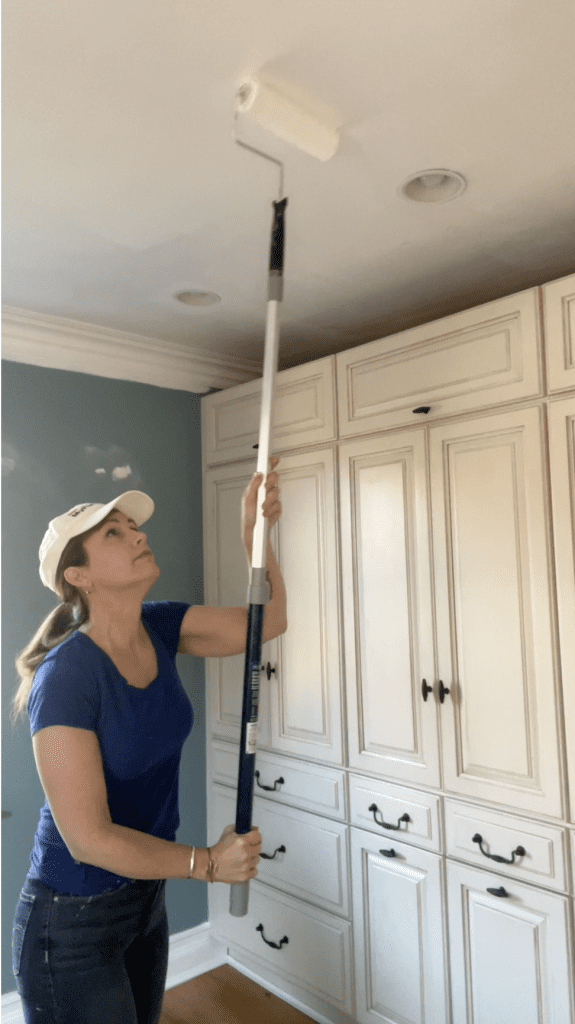
Paint the ceiling.
The next step before priming the walls is painting the ceiling. Since this ceiling was primed before and is painted flat ceiling white, it didn’t need another coat of primer, just a fresh coat of white paint. I used Magnolia Home by Joanna Gaines® by KILZ Interior Paint in True White, matte finish.
If the ceiling was freshly installed drywall, was looking less-than-stellar, or was painted a color other than white, I would have primed it first. Still, I painted two coats.
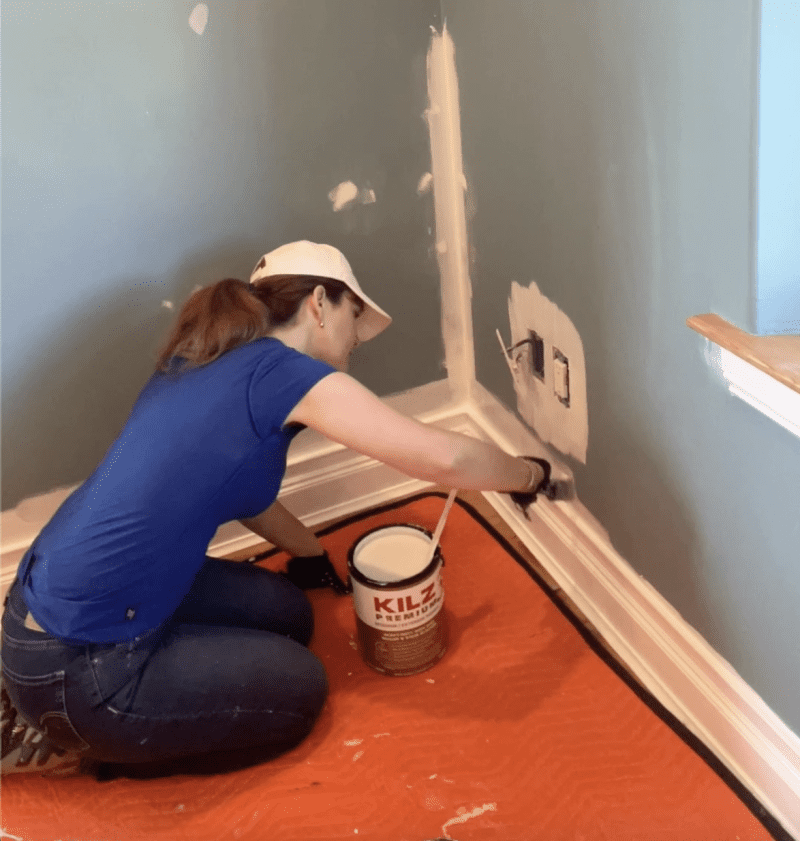
Prime the walls.
After the ceiling and trim were done, it was time to prime the walls. I first cut in the primer using a brush along the painted baseboard, and then the inside corners and other areas that a roller can’t fit: along the window sill, window trim, door casing, and our built-in cabinets
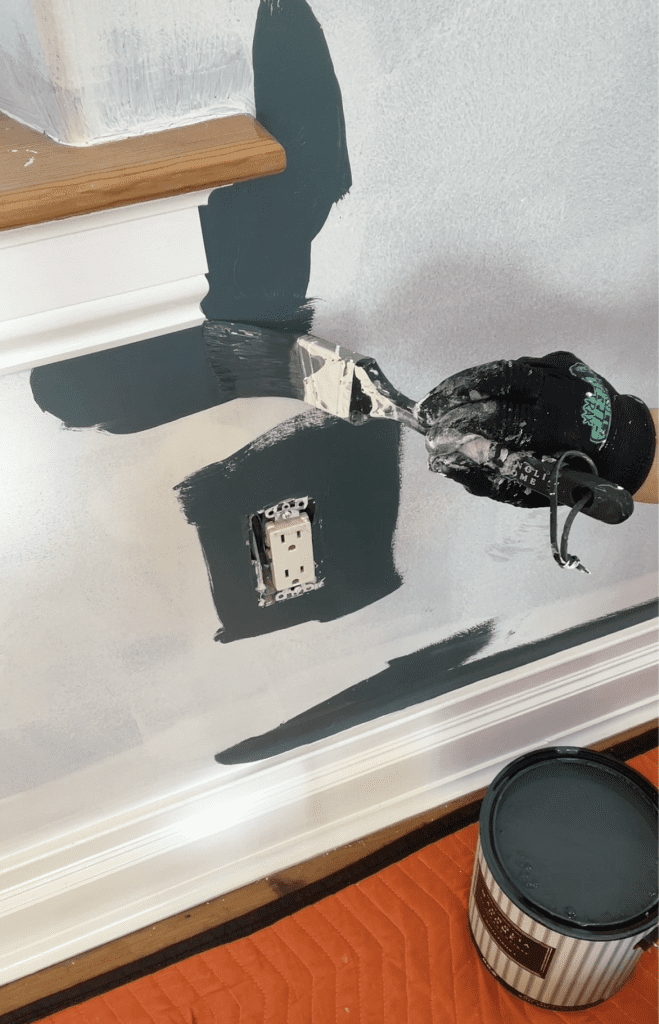
I then primed the joint compound patches all over the walls. While KILZ 3® PREMIUM Primer is thick and hides imperfections, I still wanted to be sure that the patches would disappear after rolling out the primer. This little double primer on the patches is a belt-and-suspenders approach that might not be necessary in your project.
Then I rolled out the field—-the walls—with a paint roller.
Paint the walls.
The primer dried super fast, so I didn’t have to wait long to start cutting in the color on the walls. (I can’t tell you how much of a joy it is to not wait long for paint to dry.) I started by cutting in the wall color along the baseboard, window trim, door casing, and cabinets. And then used the paint roller to finish. The color immediately popped on the wall, which is a sign of a good primer. Still, I painted two coats.
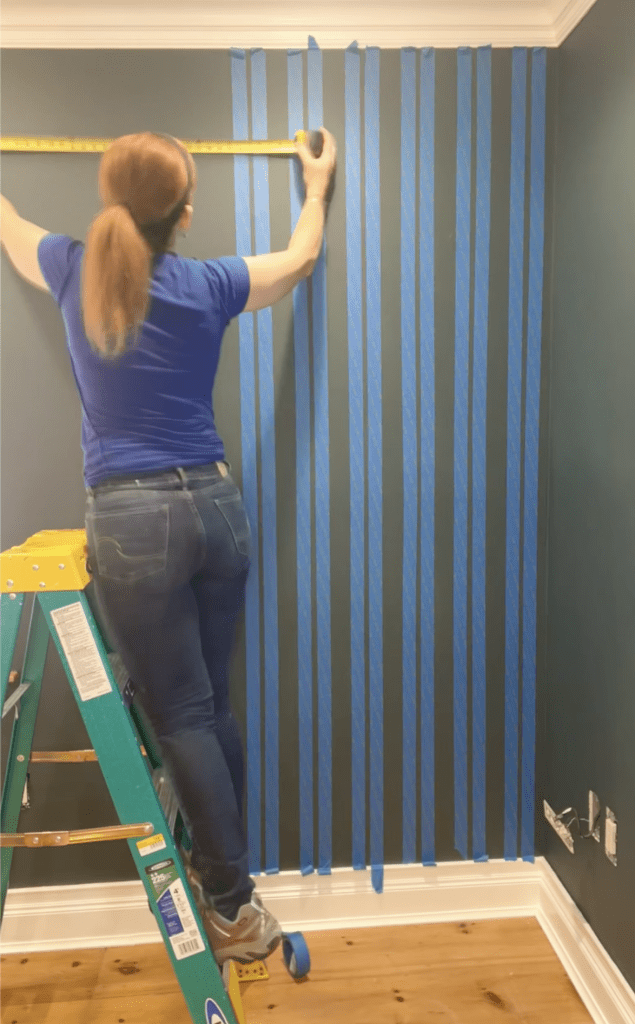
Paint the stripe.
After the paint was dry, the next step was painting the stripe. I’ve been dreaming about painting a contrasting sheen in the same color for years, and was very excited to finally create the look. The idea is to use a flat or matte color and then use the same wall color but in another sheen. For this project, I chose eggshell, since we wanted to create a subtle and calm vibe. If I was creating a dining room or a playroom, I’d probably choose a different combination of sheens for greater contrast.
After marking the layout of each stripe with a tape measure, level, and pencil at the top, middle, and bottom of the wall, I extended the painter’s tape from the top of the wall to the bottom. For a stripe to work, it needs to look vertical and consistent. So, after each set of stripes, I checked for plumb and measured the distance between the stripes to be sure I was on the mark.
The painstaking part is applying the tape. The fun part is applying the paint. But, before painting, I make sure that every bit of tape is adhered to the wall so that no paint can infiltrate beneath it. Then I rolled Secondhand Find in Eggshell on the wall. After waiting for the first coat to be dry to the touch, I applied a second coat. And then I removed the tape. I make sure to keep a low angle to the wall when I remove the tape so it comes off without messing with the paint on the wall.
No, I don’t wait for the paint to dry to remove the tape, as it can take a long time and it can be more difficult to remove. Just be sure to have a trash bag ready to drop the wet tape into after removing each strip. It can be a mess if you need to go searching for a place to dispose of the bundle of wet tape.
Update the decor.
When the paint was dry, the electrical faceplates needed to be put back. Before rehanging the antique pineapple light, I installed a ceiling medallion to help accentuate the little glass light fixture so it looks less like an afterthought and more like a featured player in our primary bedroom.
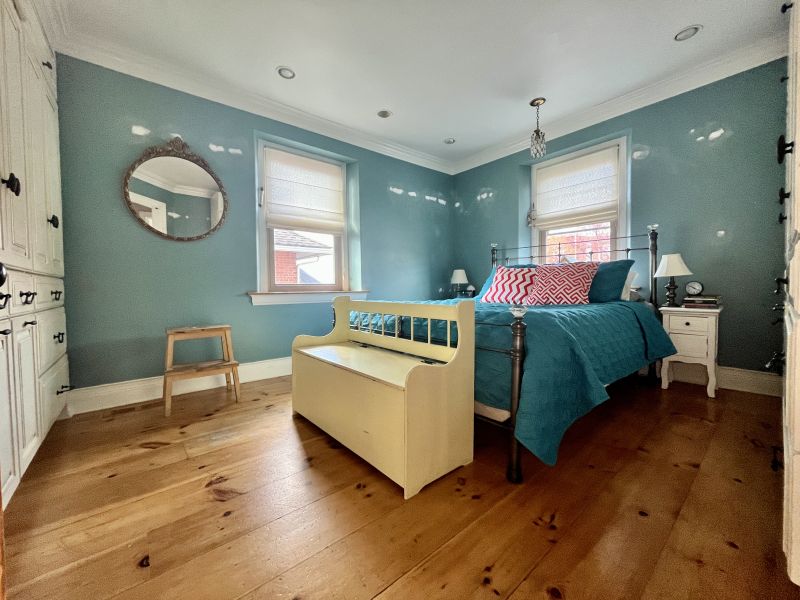
The old bedspread was swapped for a white quilt, the bedside table lamps have new shades, and the antique mirror went back in its spot. Since the yellow deacon’s bench is a family heirloom, we decided to use it in another room, and swapped it out with a backless modern bench that fits in better with the goal vibe.
Now we have a hotel-like sanctuary to retreat at the end of each day, instead of a looming project with decor that didn’t quite go together. It’s a calm primary bedroom with a perfect paint finish.
Learn more at https://www.kilz.com/

About the Author