


Here’s the stain a wood pergola story.
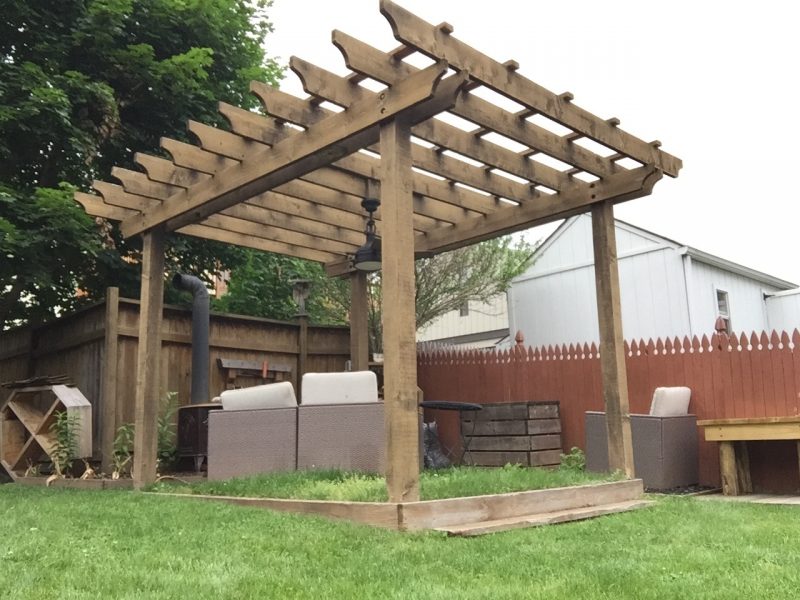
We needed to stain our wood pergola. The 8-year-old pergola has seen less than 8 seconds of maintenance, unless you consider rain as a cleaning.
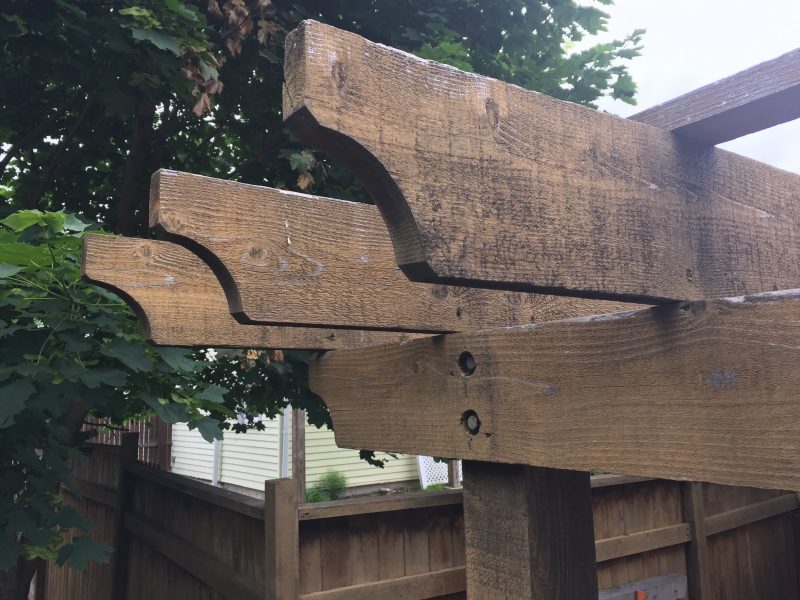
It has a rough-sawn texture and an existing finish from the pre-stain on the parts before assembling the pergola.
Like anything that lives outside, it’s gathering dirt and the finish is wearing. In short, it needs some TLC. So before we can stain the wood pergola, we needed to prep it and clean it.
As much as a start and stop journey as this has been, the beauty of a wood pergola is that you can change its look. Unlike a pergie made out of something else, a wooden structure can be updated and improved.
Tools for staining a wood pergola
I tried a roller to apply the stain, but on small surfaces like posts and rafters, there was too much squeeze out and I was staining the lawn as much as the lumber.
Plus, with the rough sawn texture, the stain flowed into the billion nooks and crannies much better from a brush. It was also easier up top where everything is close together.
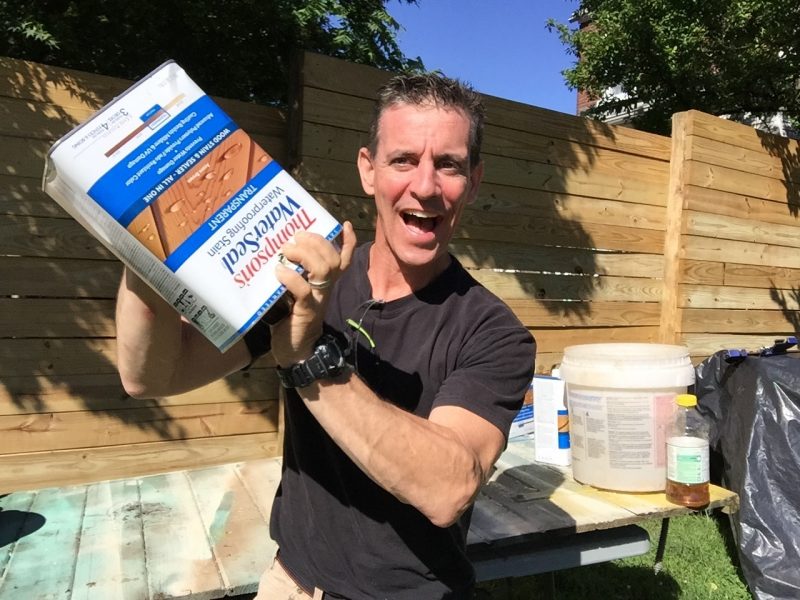
Quick tip: I used several gallons of Thompson’s WaterSeal Waterproofing Stain Transparent in Acorn Brown. First, shake ‘em up. Then, grab a bucket and pour in a little from each can to mollify any possible color variation between cans.
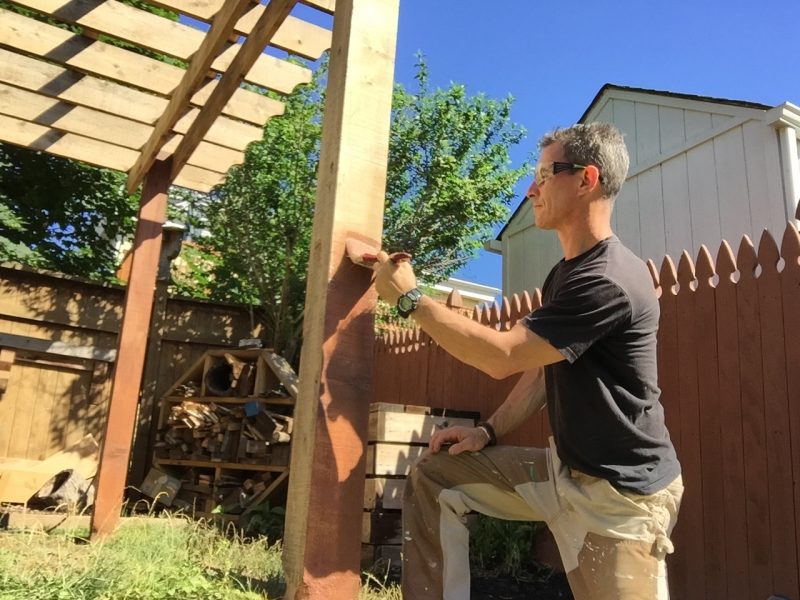
Set up the staging.
Carpenters call this a ‘staging plank’. I made mine out of 2×6 boards.
I chose the height by using my height as a benchmark. In other words, measure from the rafter bottom whatever your height is, then add four inches. This is where the top of the 2×6 gets screwed to the post.
It was perfect.
I could use the deck brush at pretty much the optimum angle, pivot my body, not bump my head and reach nearly everything with the paint brush. And I could slide the work platform almost anywhere I needed it and reach about 85% of the boards from there. No moving ladders. No up and down.
Let’s apply the stain.
So now that I could move around freely and quickly, I could do what I came here to do: De-dinge this prized pergola.
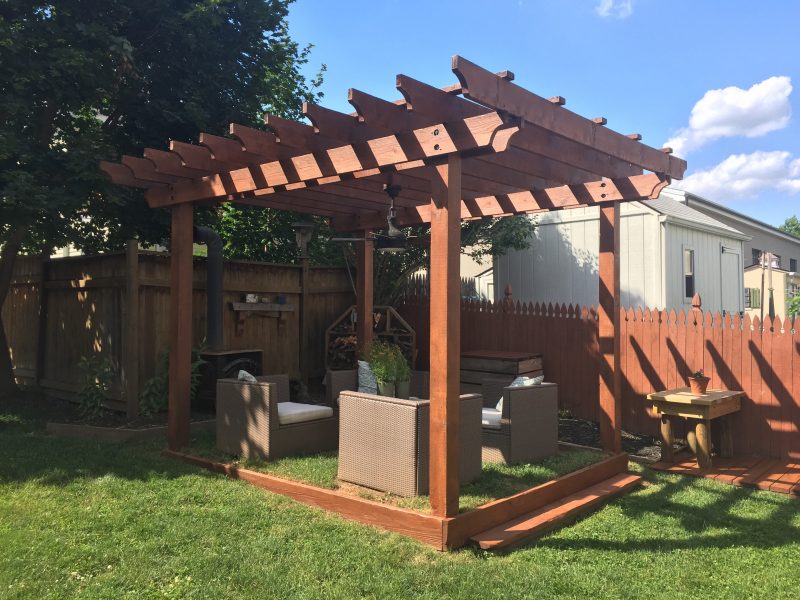
To stain the wood pergola, I used Thompson’s WaterSeal Waterproofing Stain. It’s ‘transparent’ which means that even though it has a tint—Acorn Brown—the wood grain can show through, which I like.
The tint gives a color I dig. And, as an ‘all-in-one’ stain, it is also a sealer so water beads off of this bad boy like never before.
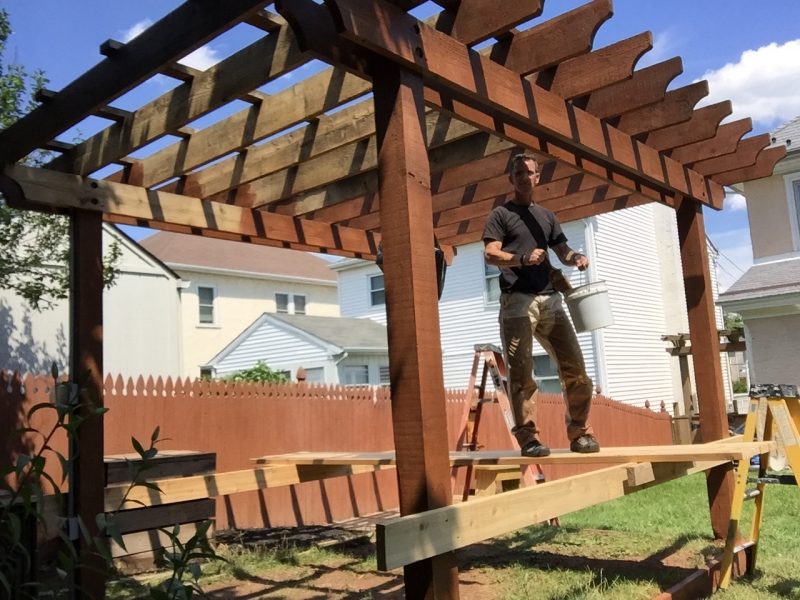
And I wish all coatings went on as well as this does. The rough-textured wood drank it in, but I can say that it covered in a single coat. That’s impressive. Water beaded up as soon as it was dry. Nice.
And even though I’m breaking my own arm patting myself on the back for figuring out the mystery of the pergola, it pays to be extremely systematic during this phase. There are so many adjustments—post to girder, girder to rafter tails (scroll cuts on the ends), rafter tails to rafter bodies (in the center of the span where the ceiling fan is), and then up to the purlins (the 2x4s on top) —that it’s almost inevitable you’ll miss or skip something.
What worked for me was to apply color from the bottom up (posts to girder), then the outside in (rafter tails to rafter body). Being systematic is important for all of this process, but you really want to be sure you get the color on everything.
And there you have it. I can’t wait to put the furniture back and wait for the perfect summer night for some advanced relaxing and enjoying.
Code: Cracked.
The Thompson’s WaterSeal Waterproofing Stain went on in one, easy-to-apply coat. It saturated the material and instantly, deeply brightened the color, look, and feel of this treasured backyard space. It repels water like gangbusters.
So… about the grass we chose for a pergola base. There’s no amount of magic that can bring that back I’m afraid to say.
Now that we finished the stain a wood pergola job, there is still more to do to our outdoor oasis. And so cracking the Pergola Code continues.