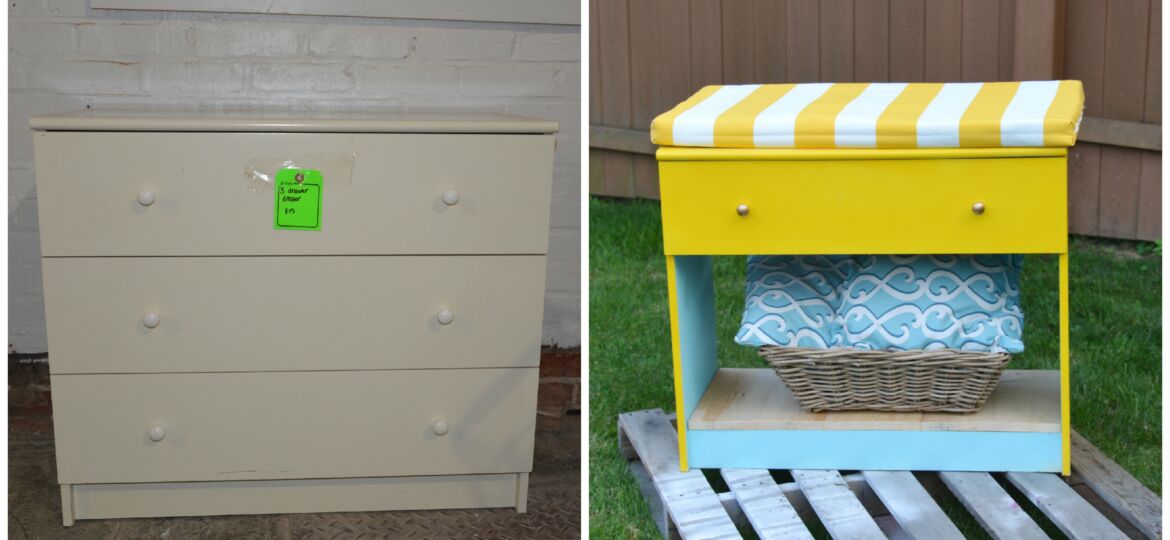
Upcycling furniture like a shelf or side table with basic strategies of paint or stain sounds like an easy way to extend the life of well-used or dated furniture, but there’s more to know about maximizing value from a sturdy old gem.
However, what do you do when you need to upcycle an old dining table? Or an armchair that is falling apart? These larger and very bulky pieces can be harder to work with. And, it can be very tricky to find a good idea for a new use.
So what can you do? Do you just throw the piece away, or donate it to someone who knows better? Consider these upcycling strategies. The following can help you make a plan for a upcycling furniture that’s large and bulky item in a way that best serves your home life.
Could upcycling furniture become a table, shelf, or tray?
Furniture that’s made from flat stock, like a shelf, cabinet, or dresser is a go-to for me. It’s possible to pick the piece apart and then reuse the slabs to create something new like a table, tray, or new shelf.
Also, old stools to chairs to sofa bases provide ample raw material. The pieces could become a table or a sideboard or even a shelf out of the carcass. Most of us could use more storage solutions, so a new table or shelf might come very much in handy.
Do a thorough inspection.
Before starting any project, do a thorough inspection to make sure it’s suitable to be used for another purpose. Check that it’s structurally sound, and free from bugs, mold, or anything else that’s less than ideal. After all, you don’t want to sit down on a repurposed into a table/bench combo, then immediately fall straight to the ground.
So make sure the furniture you’re using is in good enough condition. Inspect it for holes, scratches, and other structural issues, especially if it was once a weight-bearing item.
Cut off parts to make art pieces when upcycling furniture.
If you have no other way to make use of old, awkward, or ratty-looking furniture, you can try to take it apart and use them separately. In doing so, you can make some super unique and amazing art for your wall.
By using the materials in a new way, once it’s past its natural lifetime, you can make whatever you imagine. All you need is a saw, a bit of sandpaper, paint, and an idea for it all. You’ll also need some glue or fasteners to ensure pieces are well-secured together. If you like upcycling furniture though, you probably already have plenty of these tools and materials somewhere in the house already.

Invest in stencils for more creative designs.
If you’re tired of painting sideboards and old tables in just bold colors, consider investing in some stencils for more creative designs. With stencils that you buy or maker, it’s easier to create patterns and consistency in the decoration and design of a upcycled piece. You just need to lay the stencil and then paint within the lines.
Make your own stencils with a bit of paper, acrylic or vinyl. Draw on your stencil, use a craft knife to cut it out, and then apply it to the front of the project you’re looking to paint. It might take a bit more time than just painting a solid color. However, it’ll certainly create more unique decor and make your home a lot more personalized.
Multi-day project? No problem! Rent some storage space.
Sometimes, an upcycling project doesn’t happen in a day. And that’s actually OK! So if you’re going to make something really big out of an awkward piece of furniture, you don’t have to worry about it cluttering up your house and taking up space. You can rent time at a maker’s studio or rent out something like luggage storage to take care of it when you need the space to yourself.
You can rent out such a place for a few days at a time. Take the project out when you want to work on it. This is crucial when your house already works sort of like a workshop already or if you live in a smaller home.
If there’s no room left in the garage—or if there’s no garage like at our house—there are other options. You can work on these bigger projects without the pressure of crowding out crucial family space. Large furniture is great for such projects, and you don’t be afraid of trying ideas out!
For new DIYers, however, we always recommend starting small and testing out the skills you’ll need for the bigger project. This will give you a good idea of your skills, abilities, and time available to invest in a bigger DIY upcycling project.
Pro tip: If you want to upcycle bigger home items, it’s always best to carefully weigh the time, materials, and vision for the project before getting started. It’s really easy to blow a budget because not every tool and material was considered before getting started.
About the Author