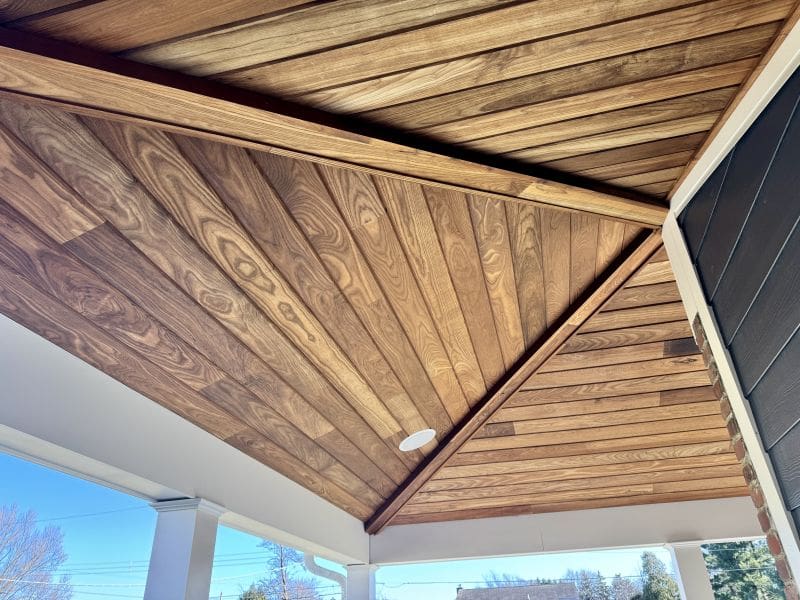
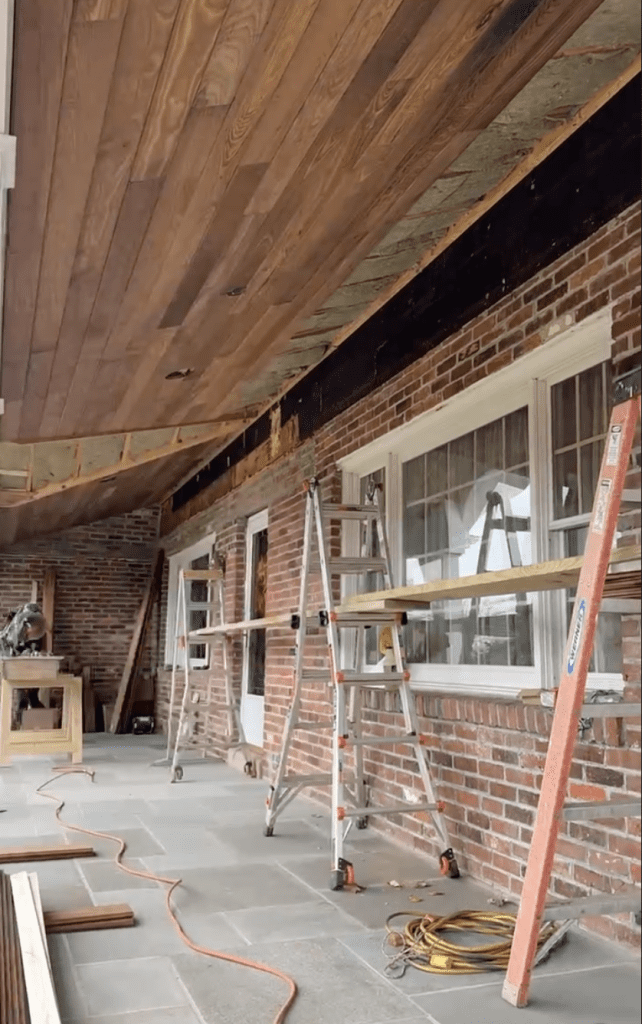
A wood plank porch ceiling warms up the vibe and creates a perfect transition between an interior and the outdoors. While you may think it’s just like installing a wood floor, there are a few reasons why it’s a whole lot more complicated. Plus, it’s all done on ladders and scaffolding. In this blog, we’ll get into some serious detail about installing this WoodPlank V-joint tongue and groove ceiling on our client’s new porch as a ceiling cladding.
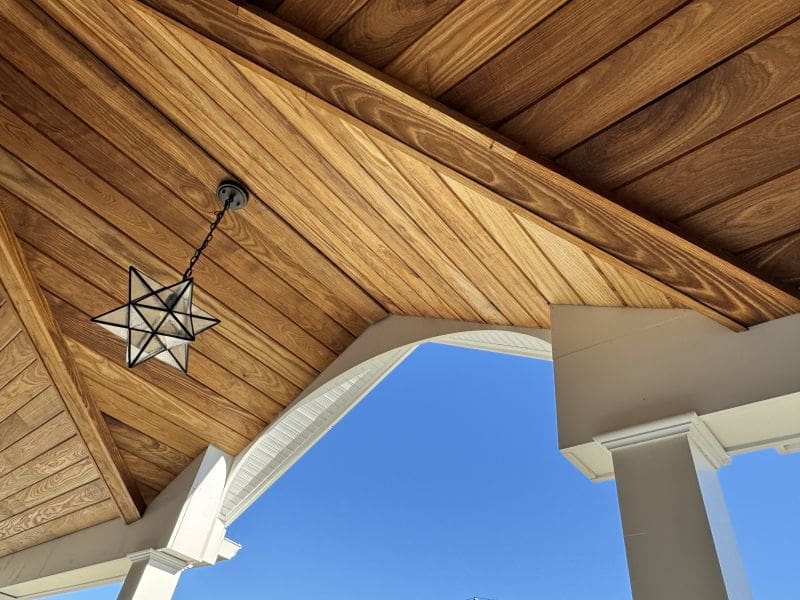
This WoodPlank project was a complex ceiling, no question. But if you’re a DIYer and have a simple shed roof that needs a finished ceiling or if you’re a homeowner wanting to know more about what you are paying a licensed contractor to do, we don’t ignore you in this how-to.
To get started, I’ll give a little backstory of the obvious and not-so-obvious challenges of a wood plank porch ceiling, then we’ll talk tools, products, and how-to.
Backstory
Our client had a ton of renovation work done by a single contractor–-a much larger contracting company than ours. (This will come up later.)
There was interior work, a dormer, all new siding, roofing, and exterior trim. And a giant wrap-around porch.
The Client
All clients, obviously, are different. We have to meet the needs of many personalities because the work we do touches them daily. It’s not siding or framing or windows. No, it’s how they walk into and out of their homes. Where they crap, where they rinse the day off under a Mona Lisa-esque rain shower. And then where they laugh and griddle with their families.
To say our client is mechanically inclined is an understatement. He and his wife own an auto repair shop and the volume and variety of things they work on–-from owning the business to soldering motherboards from cars’ computer systems to oil changes and inspecting EVs–is mind-bending. They also own rental property. They’re familiar with the home improvement arts.
So, when Contractor 1 started missing some obvious milestones and there were clear hitches when it came to details, they were already in so deep they had to see it through. As you might expect, that’s when it started hitting the fan. As I understand it: Making satisfactory progress was like changing a truck tire with a screwdriver. Then there were personal problems in the contractor’s life that affected the business and he started having to sub stuff out that he originally intended to have his crew build–and that he promised to be there to supervise.
No Show
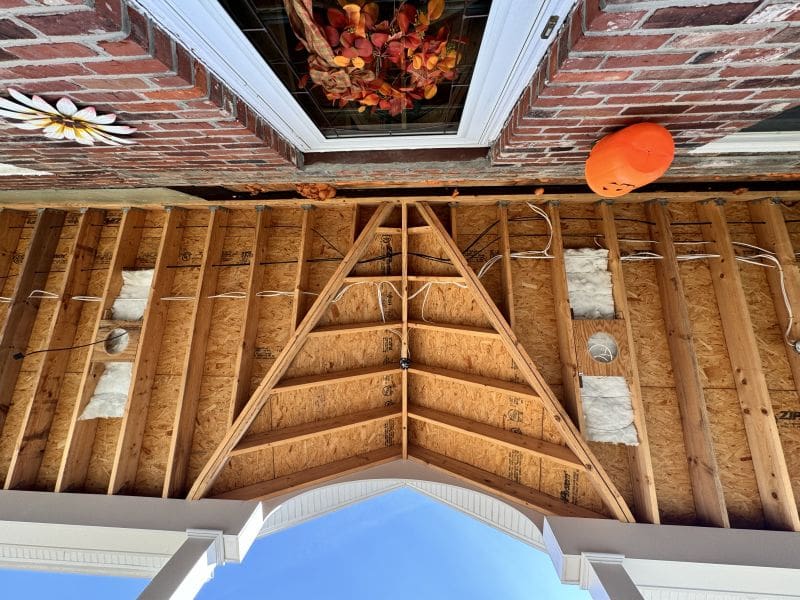
So some Amish guys or other framers came and blasted on this porch and did a bangin’ job with the rough carpentry and flashing. All the siding was spot-on. They also wrapped the columns in Azek and cut a nice ellipse in the cross-shed gable centered over the front door.
But once the porch was up and running, that was it for Contractor 1.
My guess is that he was mainly an “exteriors” guy: Siding and roofing. He called himself a “remodeler” but the detail work–and design interaction required for more intimate spaces–just wasn’t there.
That’s when our phone rang. “Can you help us with our porch ceiling?”
Design
Out of the gate: We don’t exactly specialize in porch ceilings. Reason is: Nobody does.
It’s just not a thing. I’ve installed a tongue and groove porch ceiling before and bigger deck builders than us install them on higher-end builds that include fireplaces and 3-season rooms. But, that’s not our market or model. However, when have I ever let that stop me from getting 3 miles in over my head? Come on.
Insulation
Let’s talk about a Heat Island.
Much like composite decks, a porch roof and its layers take a beating from the sun. As a result, they heat up. That heat needs to go somewhere. And where it goes is into the “shade” of the porch. Composite decks–not so with pressure treated decks or cedar wood decks–radiates up. Same idea.
So, sure, sitting in the shade of the porch is slightly better than sitting in your driveway (or on a composite deck) but not much. What you’re not getting directly from the sun you’re getting in radiated heat from the ~~120-degree roof assembly. It gets hot on top and Nature abhors a vacuum, so that heat has to go somewhere and it aint goin’ up. So it goes down.
Before we closed in with cladding, we put 2×4 ROCKWOOL insulation in the 2×6 framing, leaving a space for air to move and exchange moisture above the insulation. I know it doesn’t make sense–we’re outside and in the shade–but it works. I had to reach into the insulation to move wires and it was 20-degrees hotter above the insulation than below.
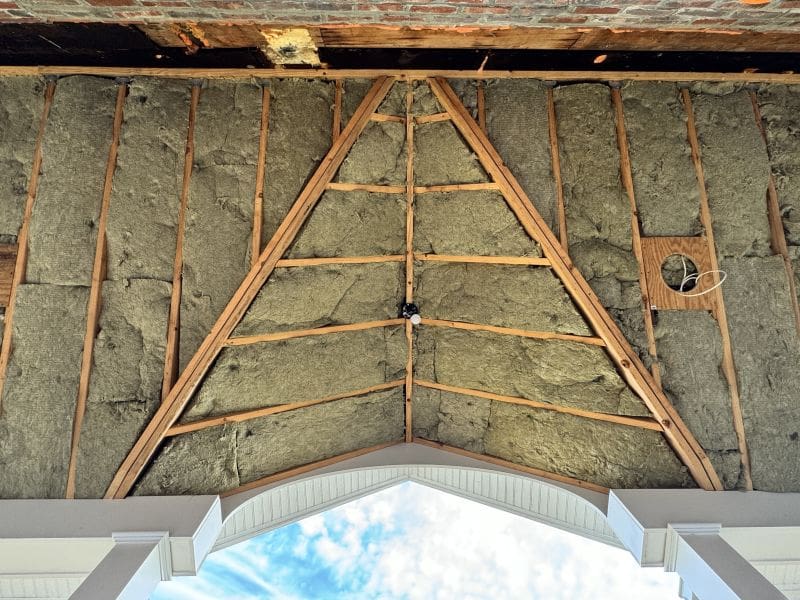
Wood Plank Porch Ceiling Design: Look, Light, and Finish
There are plenty of porch ceiling cladding products from knotty pine beadboard 1×6 from a big box to nickel-gap shiplap you could paint to pine 4×8 panels (yuck) to the rarified air of what the client selected: Thermally modified, factory finished ash (hardwood).
The grain of the ash looks a little like the undulations in Southern Pine, but not as harsh. And while the wood looks stained a color, it isn’t. It’s a little darker than its natural state. WoodPlank’s thermal modification–-the process that makes it suitable for everything from siding to a shower surround–darkens it a bit as does the factory-applied Thomson’s Water Seal.
The material is wonderfully light, cuts nicely–-like, zero tear-out–-and nice to work with overhead. There’s also no residue or tackiness from the factory finish and it is laser straight for the most part.
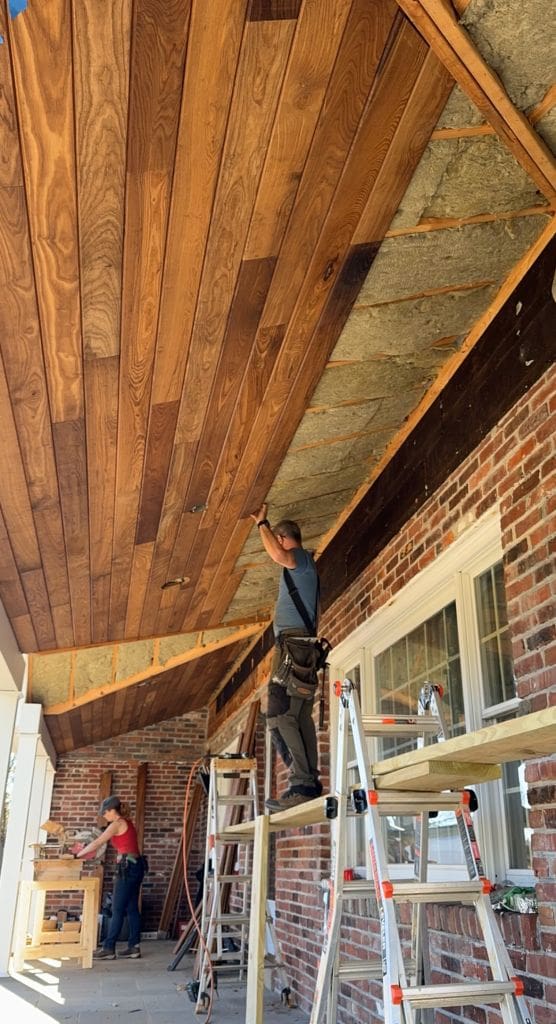
Tools & Installation
Not much to say here. All the usual suspects–table saw, miter saw, tape, and typical trim tools.
Narrow Crown Stapler
One thing we did notice is that ash is a hardwood. We started, as I have with every of T&G job I’ve ever done, with a 15-gauge finish nailer. The tongues didn’t like that at all. It’s way too much tool and several of them split right off. The tool that won the day for us was one of my favorite tools of all time: The Metabo HPT narrow crown stapler. Just the right punch and hold with 1 ½-inch staples.
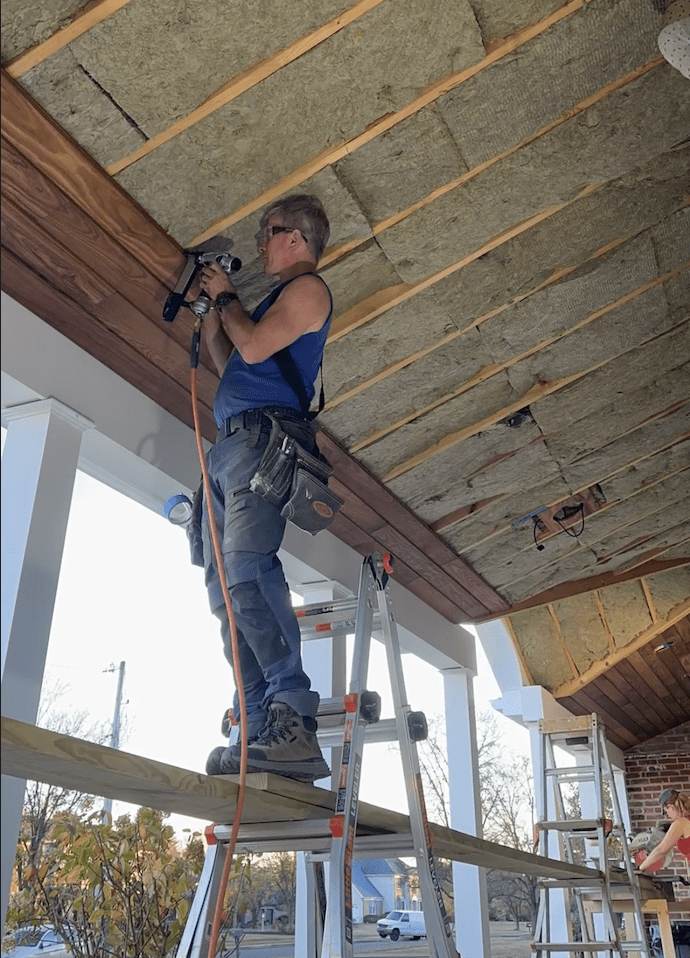
The First Piece of the Wood Plank Porch Ceiling
As goes your first piece, so goes the rest of the ceiling. However you transition to the beam holding up the porch rafters, make sure you do it evenly so your coursing runs as dead parallel to that beam as possible.
You have to face-nail the bottom of the first piece of a wood plank porch ceiling. After that, you’re shooting into the crease between the tongue and V-Joint.
Rough Framing and Randomized Pattern
The framing isn’t dead flat and hardwoods like ash aren’t flexible like cedar or pine. We had a few wrestling matches getting around these conditions. Generally, we’d get one side in and fastened on one or two afters, then move to the other end and force it in. This worked. It’s not a criticism of WoodPlank. It needed to be done.
I really, really like to randomize patterns in a project like a wood plank ceiling or a flooring plank installation. It is easy to develop a “laddering” pattern and I try hard to avoid that. Even if I’m the only one who can see the laddering, I don’t want it there.
Ladders
Speaking of ladders, we used ladders with a 2×10 walk board. I know I will get heat for this from some, but it is–-and has been for decades for me–-safe and efficient. You could also–-and probably way more efficiently used a Baker stage. I don’t own one. But in hindsight, if I ever do a project like this WoodPlank ceiling again, I think it’s the plan.
I used two Little Giant ladders and they worked great. Theresa did all of the ground work and cutting so I could stay up there and install. Yeah, I could have done this myself, but I’d be destroyed physically at some point.
Wood Plank Porch Ceiling Angle Party
On a typical porch with a typical shed roof, the only angle you need to worry about is 90 degrees. On a roof with two valleys and a hip, it is an angle fiesta.
There is so much to say about the angles that I think it’d be so muddy that it’s not worth writing. I’m not sure if this is right or wrong, but this is how I did it and it worked.
First, No Math
We used a bevel square to map the angle projection and transferred that to a piece of 30-inch long scrap lumber. I like furring strips (“strapping” for you New Englanders) for a job like this. Once we got the angle right on the wood that’s 2-cents/foot we transferred it to the WoodPlank.
For the field pieces, it was pretty straightforward. I left an expansion gap, between the WoodPlank and the rafter and I think this angle was 31 degrees.
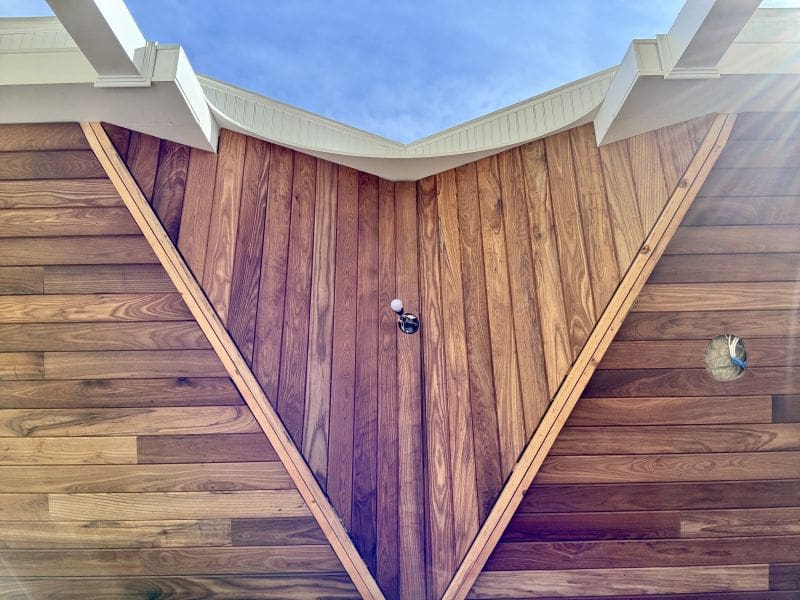
Angle Fiesta!
Things got really interesting when we started to wrap the valley and hip rafters and transition those pieces to the shed plane.
This is when the miters become compound cuts and you have to miter and bevel the saw–like cutting crown molding flat. I won’t lie. It’s a lot. And each project takes some miter saw creativity to solve for existing issues. The basic gist is that doing a porch ceiling project like this well requires understanding that you have to make a lot of transitions in multiple planes in a very small space and within at least fraction of an inch. A wood plank porch ceiling isn’t furniture, but there’s no caulk to hide behind either.
Where the valley rafters die into the sidewall of the house, I had to make a terminus and some “plinth” type blocks to terminate horizontal trim. The left side was different than the right side.
Rips and Trim Pieces
WoodPlank makes “trim” pieces and I bought a bunch. They worked in a few places, but this, I think, is an atypical project for all of us, so I ended up making the box beams that cover the dropped hip and valleys. That means ripping.
And ripping means saw marks you can’t see. But, you know the best way to highlight a saw mark you can’t see is? Apply a finish. And those swirl marks will jump right out at you like you just turned on a cheap table saw.
To cool this situation down, I ran the show edges through my benchtop jointer, something I do for a feature wall.
Battens for the Wood Plank Ceiling
Covering the ends at the shed roof was so easy I almost fell asleep. I rip the battens and brad nail them on.
Hey, Buddy!
Our client is a fixture in his neighborhood and has lots of friends. While we were there and Theresa was pulling in the final shots of the WoodPlank project, a guy in a truck pulled over and started talking to us like we were expecting him. “Yo, Buddy! Nice job!” Then he pulled away.
I’m glad he’s happy. We’re more glad our customer–and their 3-year-old granddaughter who loved this whole enterprise–are happy.
Like all of our projects, this wood plank porch ceiling is 1-of-1.
What’s next?
