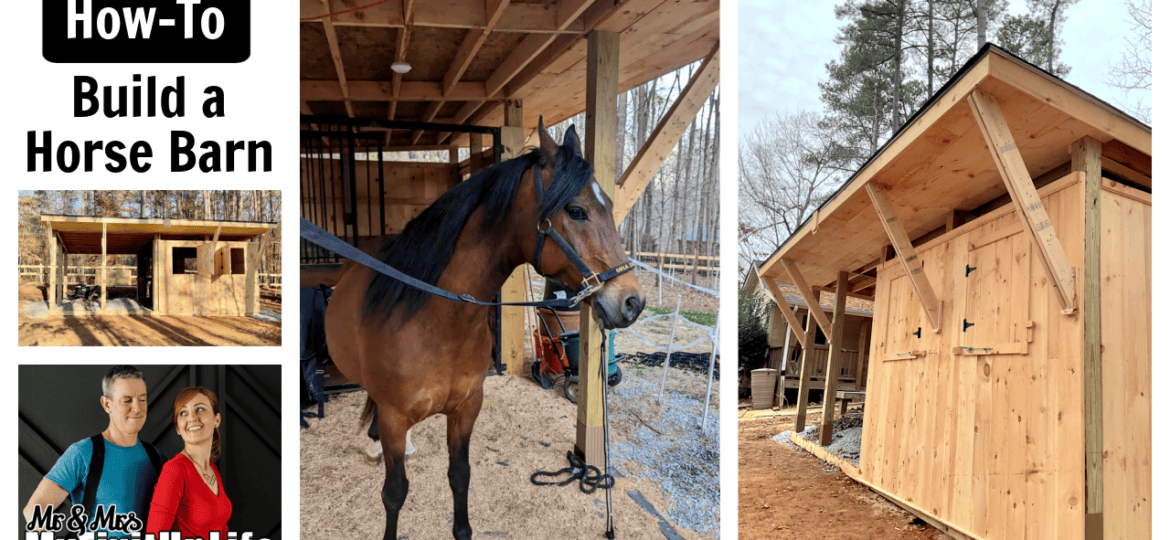
Building a pole barn for a horse is similar to building a shed, but there are specific details that horses require that your lawn mower, potting soil, and bins of ‘extra’ stuff don’t need from a regular shed. A DIY horse stable is possible but it takes more time to build and detail it for a horse than it takes to build a shed for your lawn mower. Here’s how to build a pole barn and DIY horse shelter.
What’s in this article?
Backstory
There’s an old horse who needed a new home.
Our friend is an animal lover and animal expert, specifically horses.
The farm where she rode horses, to put it mildly, fell on hard times. And, to put it more mildly if that is even possible, the lives of the farm’s 28 horses went into slow-motion peril.
For some it was obesity, others starvation. There were hoof, shoe, and farrier issues. Basically, if it could go wrong, it was going wrong. The barn was collapsing.
So she went to work.
As the farm imploded and homeless horses needed forever homes rather than, well, death, she found them. Nursing the creatures back to health while mucking out their stalls and learning each one’s personality along the way. She basically became an equine adoption agency.
It worked.
She re-homed 27 1,200-hundred-pound animals. Creatures, I learned, of amazing beauty and strength and empathy. But also violence and aggression. Mating, don’t you know. They can’t just go live anywhere.
The last horse, well, for many reasons, came home with her.
And that’s where I came in.
“Mark, we need a horse stall and storage shed before the farm goes under.”

Design
Before we started building the DIY horse stable, I was given design parameters based on local zoning codes (this building didn’t require a permit) and I went to work to make it work. This structure had to conform to local shed restrictions. But, it needed to be a barn.
To meet the barn rubric, a pole barn was the answer. Why? Well, a wood-framed floor under a 1,200-pound animal with an I-don’t-know-how-many-gallon-bladder…bad idea.
That boiled down to two 12×12-foot cubes. One enclosed for the horse, Donny. One a sort of car port for stuff. The base of both to be covered in “3/4-clean” gravel.
Side Note: I travel to build sometimes and this was one of those times. I couldn’t bring all my stuff, so this played into the learning curve for building the DIY horse shelter.
Site Prep
The stall needed to be cut into a hill. A contractor came in ahead of me and cut the hill out, “flattening” the grade.
Notice I didn’t say “leveling.” That’ll come up later and is a big reason I chose a pole barn–technically, post frame construction–a genius design, to make this work.

Layout
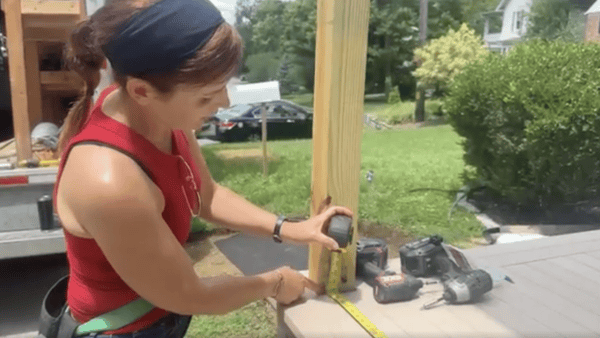
I’m a big fan of what I call “full-size templating.” And even though other builders do it every day, I’m not a big fan of using string if I don’t have to.
To that end, I bought three bundles of my favorite material of all time–strapping, aka furring strips–using them and re-using throughout the project.
I cobbled them together into a 12-foot x 24-foot frame and used that frame to mark my post hole locations. Before removing the frame–that weighed all of 12 pounds or so–I sprayed the the post hole locations with Flex Seal.
Did I need Flex Seal? Probably not, but I keep cans of it on my truck, so why not? It worked.
Post Holes for a DIY Horse Shelter
There’s some basics to know about how to build a pole barn. Pole barns are vertically arrayed posts embedded in the ground on to which horizontal framing members are added. No foundation, no slab, and no floor. That means digging holes.
And at my age digging holes means hydraulics. I can dig post holes, but I don’t want to dig post holes. And with posts spaced every 6 feet or so, we had a few to dig.
I could not bring my beloved Beast Mode tractor with me, so we rented from a big box. A few things to note. The big box sales people, in my experience, know either zero or just a little more than zero about the equipment they’re renting.
They know the store’s computer system and what the machines are, but the unit I rented–and I should have checked–came with auger teeth pretty much rounded off. So, we were able to dig hydraulically but it took forever. Pro rental yard next time. It’s worth the extra money.
Post-Protectors for a DIY Horse Shelter
I don’t put a post in the ground unless it has the great and powerful Post-Protector installed first. I love these things and this isn’t a sales pitch. It’s math. They work–they isolate the wood fiber from the things in the ground that eventually break the wood down.
They’re waaaaay faster than concrete tubes and mixing umpteen zillion bags of concrete. They’re way less money than concrete. And, they enable me to put most of the dirt I dug out of the hole back in it. They come from the post-frame world, but I won’t build a deck without them.

Framing a DIY Horse Shelter
In a pole barn, “wall framing” consists of horizontal 2x4s nailed level every 2 feet. We don’t need a wall cavity or vapor barriers. Though those things can be added, we don’t need them here.
The roof system is comprised of a flush header in the center of the span with purlins running left and right. It minimized the length of the material we had to deal with and minimized the span.
The overhang in front was a happy accident. I bought 16-foot material to hedge my bets against coming up short figuring my roof pitch and the ample overhang in front turned out to be just about my favorite feature of the whole thing.

Siding
We used heat-treated, knotty Eastern White Pine. Milled as a shiplap and installed vertically, I love this siding. It’s easy to work with. It’s easy to make transition strips (site-made shiplaps on smaller pieces to cover gaps using the miter saw and table saw) and it even smells good. It was easy to make the shutters out of it and catches to keep them closed.
To protect the end grain of the siding from splash back when it rains, I made a weather board.
To evacuate ammonia from Donny’s urine and poops, we left a huge vent space at the top. It took everything I had as a builder to not lock the space in–“But it’ll rain in there!” I told my friend–not thinking there was already a tsunami of liquid in the building already. “Oh! NOW I see what you mean”.

Kickboards, Stall Front, Details
Horses kick (see mating above) so the interior of their stalls need protection. We recycled old kick boards from the farm and gun nailed them to our posts.
We recycled a stall front–something specific to horse stalls, not pole barns–also from Dilapidated Acres. To say this steel and wood enclosure was heavy is like calling the iceberg the Titanic hit an ice cube. It took some rigging, but we got it in and fastened fast to our frame with maxed and mighty 5/16 x 5-inch Spax Power Lags.
We installed hybrid structural/decorating brackets–two 2x6s with a 3/4-inch gap between them for shadow and texture–under the roof overhang.
Shingles on the roof and a gravel in and around the pole barn and it was time for Donny to find his forever home.

Watch How to Build a Horse Barn


Thank you for sharing invaluable insights into the DIY construction process of horse pole barns and sheds. It’s inspiring to see such informative content that empowers horse owners to create safe and functional spaces for their equine companions.
Constructing a DIY horse pole barn and shed is undoubtedly a rewarding endeavor for any equestrian enthusiast. The versatility of metal horse barns stands out remarkably in such projects. Not only do they offer durability against the elements, but they also provide ample space and structural integrity, ensuring the safety and comfort of our equine companions.
Metal barns, with their customizable designs and straightforward assembly, truly make the dream of owning a functional and reliable shelter for horses a tangible reality. From protecting against inclement weather to providing a comfortable resting space, these structures excel in meeting the diverse needs of both horses and their caretakers.
As someone who’s passionate about the well-being of horses, I appreciate the emphasis on durability and practicality that metal horse barns bring to the table. The ability to tailor these barns to specific requirements ensures that every aspect of the shelter is optimized for the comfort and safety of our beloved animals.