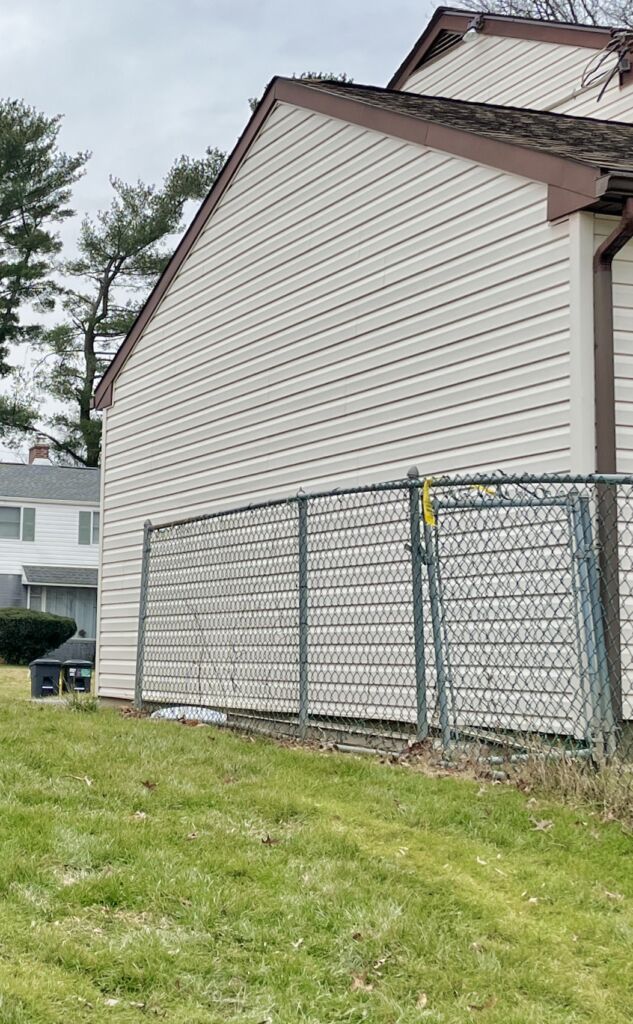
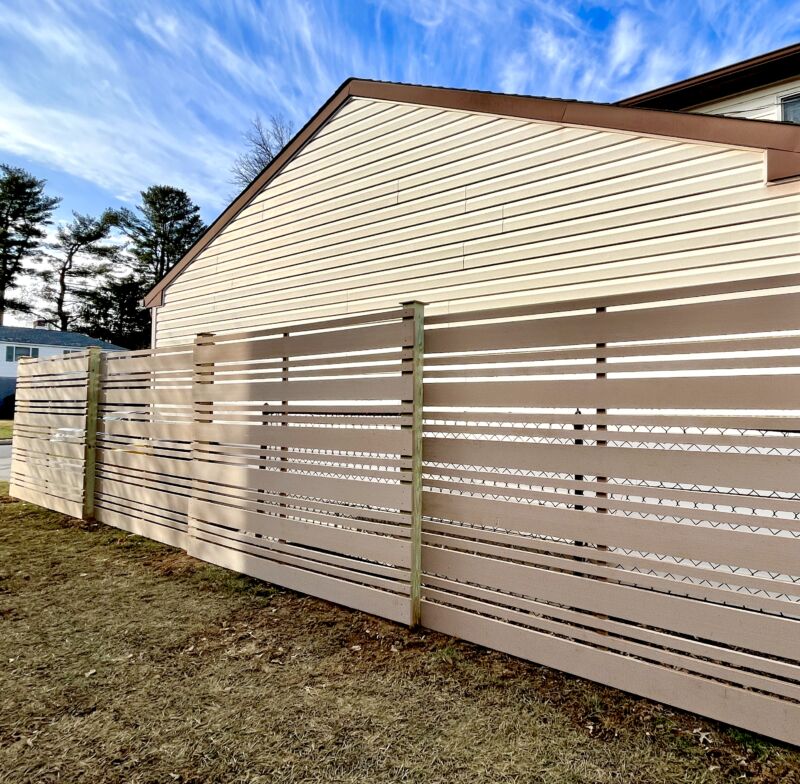
Tired of looking at the neighbor’s trash cans and chain link fence, these homeowners wanted a better view so we created a custom paneled privacy fence.
One goal was to provide each neighbor the same view of the privacy screen, so we installed one panel of cladding to the neighbor’s side and one panel to our client’s side. The blank posts we dressed up with a little ripped and routed piece of Acre. Not quite a raised panel, but it gives the post a little texture.
Here are the steps to building this privacy fence.
Step 1. Call 811 / DigSafe.
Whether building a fence, deck, or mailbox, always call DigSafe before digging in a yard. It’s a free not-for-profit service that notifies local utilities about upcoming excavation projects. The local utilities then come out and mark the location of their lines, so you know where to avoid digging.
Step 2. Pull a string line in the location of your privacy screen.
If you’re installing cladding on opposite sides of the fence posts (like we did for this privacy fence), make sure to leave room for it when you install the posts. One easy way to do this is to simply install the posts 2 to 3 inches inside the property line.
We had to butt to an existing fence, so we had to cut it kind of tight. I use a bowline knot and trucker’s hitch to get the line taught.
Step 3. Layout.
We used 16-foot 1×12 Acre boards for this project, which we got from our local lumberyard–along with some nice guidance on detailing it on site.
First, we cut them in half to get 8-footers. Then we measured for each post location such that we’d have a 1 1/2-inch overhang past each post. This extra amount past the posts gave us a little wiggle room in case a post is warped. This’ll bury it behind the cladding.
Once you set the first post, use an 8-foot furring strip to mark the overhang and to mark the hole locations without measuring.
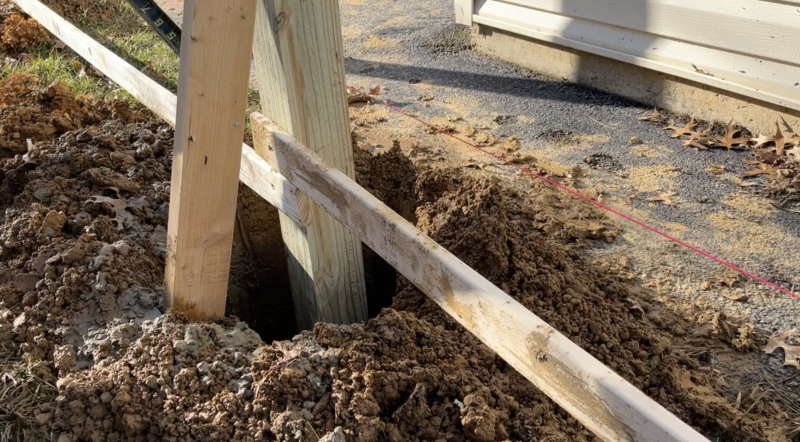
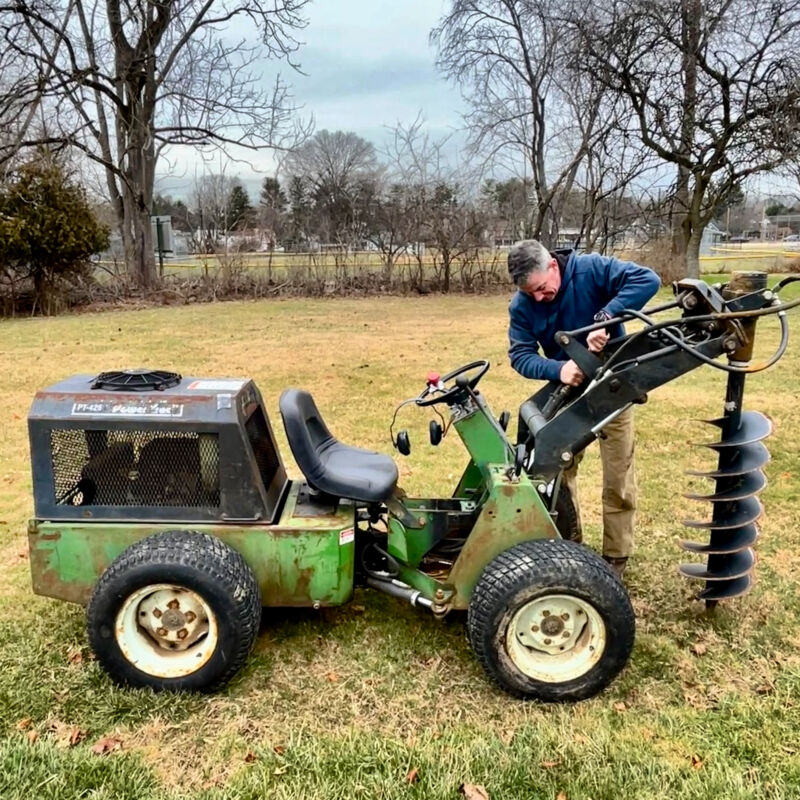
Step 4. Dig.
I use my tractor and hydraulic auger to dig most of my post holes. A 10-inch diameter hole worked here. My machine’s wheels all roll and the body pivots in the center so I can move around without FUBAR-ing the lawn.
If you rent such equipment, be mindful that skid-loader type machines are murder on grass. Also, if renting, make sure the auger teeth are sharp (squared off) before you drive away. We set our posts 30 inches deep where we build. Even in warmer climates, I like 30 inches because its good ballast to keep the posts straight.
Step 5. Set posts.
Using the same furring strip (and as many more as there are posts) screw them to the posts and register them plumb and along the string line (we can call this “left and right”).
Next, run a diagonal back to the ground to register them plumb in this axis (we can call this “front and back”). You’ll have to readjust as things move around. It’s almost easier to do it in real life than to write how to do it.
Leave the posts tall. They can be cut to a desired finished height later.
Step 6. Mix and pour concrete.
Mix and pour one bag of concrete around the base of each post and backfill. I like to use fast-setting concrete.
Concrete will cure under ground.
Be sure not not move the posts when backfilling. Tamp the dirt every 6 inches or so to smush the air out of it.
Step 7. Design the fence panels.
Before we can build the privacy fence panels, we need to decide of the design. One of the cool things about working with Acre by Modern Mill’s 1×12 material is that we can make just about any pattern of slat we want.
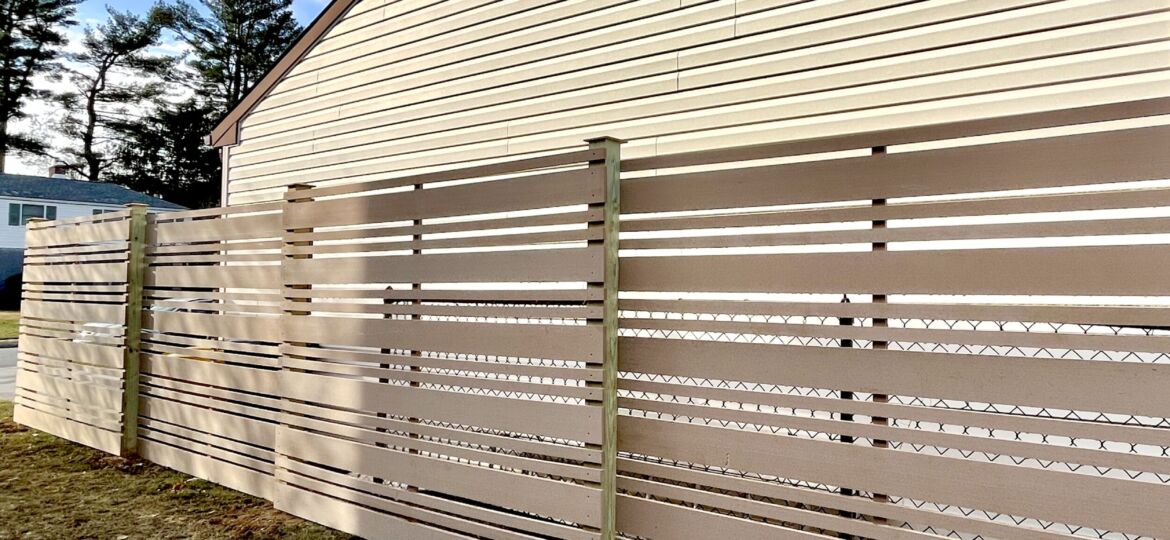
Here, the client liked two thin (1 1/2 inches) and two wide (5 inches) alternating up to the post tops. It also maxed out how much material we got from each 1×12. Spacing worked out to be 3/4-inch, and we used a little block to keep the space even throughout the next step.
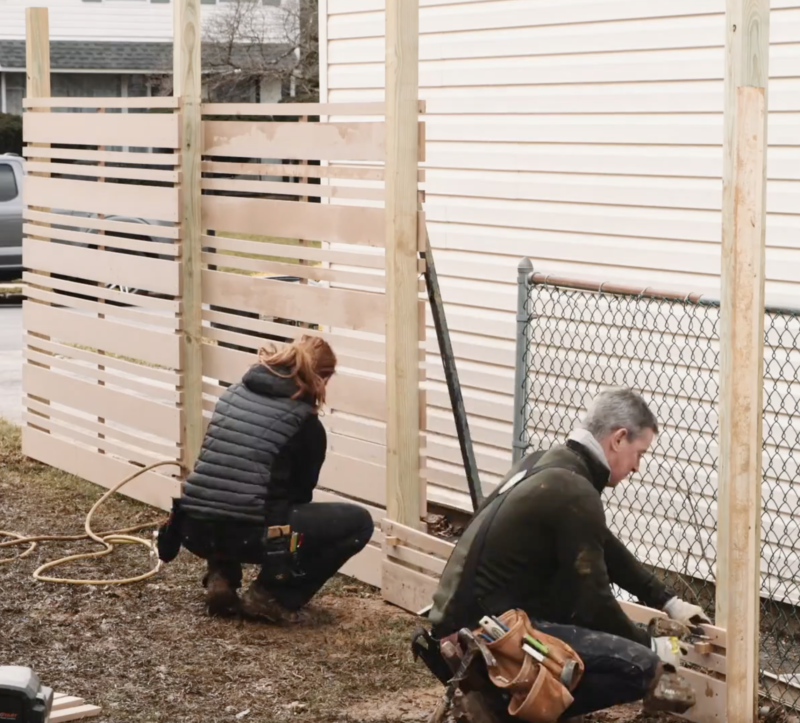
Step 8. Install the privacy screen.
Two main criteria during installation: Level and leave a gap.
It’s practical (and building code around here) to leave at least a 1 1/2-inch gap between the bottom of the first fence slat and the ground, and 2-inches works as well. The space allows the lawn to be trimmed easily. Once you get the gap, make sure the first piece of cladding is installed level. Each subsequent piece registers off the first one. Psssst…It’s worth checking every so often that you’re still running level.
So that each neighbor had the same view of the privacy screen, we installed one panel of cladding to the neighbor’s side and one panel to our client’s side. The blank posts we dressed up with a little ripped and routed piece of Acre. Not quite a raised panel, but it gives the post a little texture.
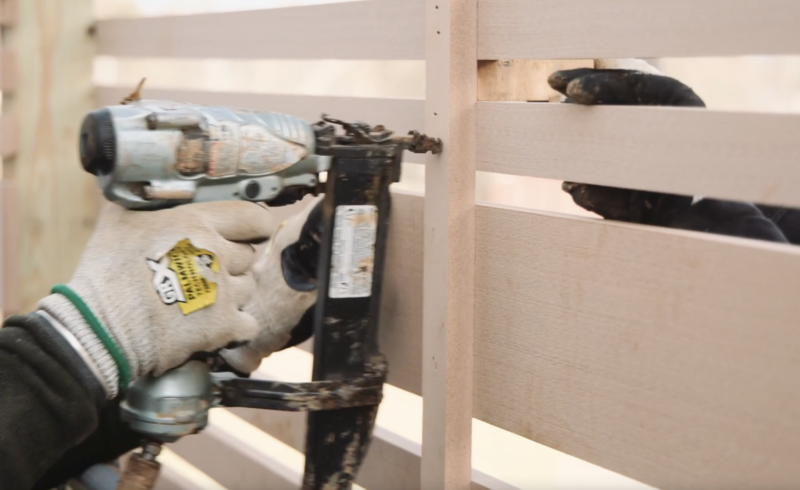
We fastened everything on this privacy screen with mighty #8 x 2-inch HCRx coated Spax screws. They’re a permanent connection–easy to remove if something needs to be adjusted–and the heads countersink just so into the Acre.
Last, we installed a vertical rib in the center of each panel to keep the Acre nice and straight and to add a little more visual detail. For those connections, we used 1 1/4-inch galvanized narrow crown staples from our beloved Metabo HPT stapler.
Step 9. Cut and cap.
Once our privacy fence panels were set, we cut the posts in place with a circular saw. Then, with post caps made from Acre on the table saw we capped the posts, planted a little Blue-Cote Scotts grass seed around the post bases and the privacy fence build is complete.
Curious about Acre by Modern Mill?
Learn more about the wood alternative that’s mostly made from rice husks called Acre by Modern Mill.
Note: Modern Mill by Acre provided us the material to create these privacy fences.
About the Author

MyFixitUpLife Carpenter