Building a shed ramp is one of those DIY projects that is super easy to put off because it’s not immediately important. After you have set on your shed ramp ideas, and once this DIY shed ramp done, you might wonder why you didn’t do it sooner, because: Little. Daily. Joy. Matters. Life improvement happens, a few steps—and a few wood boards—at a time. Here’s how to build a shed ramp this weekend so you can make using your shed easier every day. (And there’s a DIY shed ramp video included.)
Here’s what’s in this how-to:
- Why build a shed ramp?
- How to build a shed ramp: step-by-step.
- DIY shed ramp video
- Tools and supplies
- Why I use a pitch fork and pressure treated.
- Attach the shed ramp's ledger board to the shed.
- Finding the joist angle.
- Securing the shed ramp's band joist.
- Using gravel to help with level.
- Measure for square.
- Securing the shed ramp joists.
- Bevel the first piece of decking.
- Time for decking the shed ramp.
- How to make filler pieces for the shed ramp.

Sure, a leaking toilet, overflowing gutters, dangling cabinet door that you use every day is impossible to ignore when compared with lurching in and out of the shed with the bikes, mower, or ladder a bunch of times a week.
Why build a shed ramp?
However, a DIY shed ramp like we built here is similar—if you’ve been on a construction site—to the day the stairs go in. There is a huge and humanizing difference between clamoring up a ladder and gliding up stairs like human being with a fully developed cerebral cortex.

It’s the same with a shed ramp, not to overdo the analogy, but it’s true. A weekly wrestling match with the mower turns into a glide up an inclined plane of civility and there’s just something righteous about it. And handsome. Add some flowers and mulch on either side and cut in some garden beds so you’ve gone from cringe-fest to curb appeal.

How to build a shed ramp: step-by-step.
Here are the essential steps that I’ve found work well and efficiently to build a shed ramp. I recommend reading the entire how-to and watching the shed ramp video before you get started. Also, gather all of the tools and materials before you start. Because there’s nothing like a few surprise trips to the home improvement center to deflate the energy you’ve built-up for a DIY project.
DIY shed ramp video
There are other shed ramp ideas. But ours is the easiest one to build we’ve seen.
Here’s our DIY shed ramp video that will help you see all of the key steps to building a shed ramp at your house. Definitely recommend watching it before you get started.

Tools and supplies
Southern Pine rated for ground contact: 5/4 x 6
HCR-X coated exterior screws 3-inch
Pencil
Circular saw (table saw is helpful, too)
Levels: 2-foot
Why I use a pitch fork and pressure treated.
This is a little aside from the carpentry, but if you have to dig or remove sod this not-so-new invention called a pitch fork is awesome for it. Much, much easier than using a shovel. That’s next. Who’s psyched?
Before we start though, a word or two about the wood. We used pressure treated Southern Pine that is rated for ground contact. How do you know the lumber you buy is rated? Check the label at the end of the board. It’ll say if it is or isn’t. OK, moving on…

It does not feel like it’s easier to dig out a space a little wider and deeper than the ramp, but, it is. I know what you’re thinking: Dig channels for the joists.
Maybe it’ll work. But there is near atomic-clock certainty something will be in your way. Or you’ll trip. Or something hyper-annoying will happen. Forget it. Bite the bullet and then you’ll be glad you did.
An overarching theme for DIY projects is that a clean, spacious work area makes life easier—even if it doesn’t seem like it in the beginning. So, short story long, I dug this out. In the end, it took about an hour and saved all kinds of time on the back end.
Attach the shed ramp’s ledger board to the shed.
First, the board attached to the shed is called a ‘ledger.’ Couple things happening here:
1. It needs to be level OR parallel to the entry. If you have to pick one, pick parallel. Ideally it’s both.
2. It needs to be positioned such that there is room for the decking to fit under the doors so they can swing. We used 2×6 decking boards so I left 2-inches between the ledger and the bottom of the doors. I fastened it with my favorite decking screws: HCR-X coated exterior screws.

Finding the joist angle.
In the photo above, I’m laying out the angle of the joist. Near the driveway, I propped up a scrap board on blocks. The block on top of the joist simulates the decking. The idea is that the top block lays out flush-ish with the driveway so the transition is reasonably even.
After that, I screwed a block to the ledger. Then, I hold the joist flush with the ledger and trace the angle.
Once I cut this piece (miter saw or circular saw), I use it as a pattern for the rest of the joists so they’re all the same.

Securing the shed ramp’s band joist.
Another multi-step photo and a jargon alert in these how to build a shed ramp instructions. All these parts have names.
We mentioned the ledger above. The joist in place is the left band joist. To secure it I then fastened it to blocking screwed into the ledger. That blocking is 14 1/2 inches long. More on that below.
Because the driveway is in the way, I use a transition block to fasten the front band joist to the left band joist. In this photo I’m starting the screws so they’re ready to drive once I position the piece. You can see how it fits together below.

Using gravel to help with level.
Getting a DIY shed ramp’s front band joist level—which also makes it parallel with the ledger—is nice. Note the gravel piled up on front me. I’m placing that under the frame so water can trickle through it away from the wood once the piece is integrated with the landscape. Adding gravel underneath the frame and tapping down with a hammer is a good way to ‘set’ something like this on a nice foundation.

Measure for square.
So now it’s time to measure for square. Measuring from corner to corner is called ‘pulling diagonals’. For reasons that have to do with geometry I don’t understand, when each measurement reads the same, the frame is square.
Once I know the frame is square and level, I pack more gravel around it to further stabilize it. Before getting it square and level I want it to have some give. Once I achieve those things, I want it to stay still. Also gravel is great for that.

Why is the block 14 1/2 inches? Because I spaced the joists 16-inches on center. I marked the ledger and the band joists the same way so the joists run straight and parallel with each other.

Securing the shed ramp joists.
I could drive a screw through the front band joist into the regular joist which was faster than cutting and installing more blocks. Because I had easy access I used a screw driven in at an angle—called ‘toenailing’—in the back. Three screws per joist. Two toe nails and one through the front band.

Bevel the first piece of decking.
Because the ramp is angled, if you don’t cut the corresponding bevel on the first piece of decking, there will be a gap between it and the shed. It’s not the end of the world if there’s a gap (OK, it might be for me) but I am a carpentry dweeb so I do stuff like this. The ramp angle is 10-degrees so I ripped 10-degrees of the first piece of decking and installed it.
It is flush with the shed floor and also my OCD.

Time for decking the shed ramp.
I used 3-inch deck screws and butted the deck boards tight to one another. Pressure treated yellow pine (unless it’s KDAT—kiln dried after treatment…not something you’d probably use on a project like this) doesn’t need to be gapped. As it dries out, gaps will then form and water can pass through. So here’s what I do.

Then true up deck boards using a chisel. With the chisel’s bevel facing the deck board, drive it into the joist with your hammer at an angle. Then pull the chisel toward you. This will draw the board tight so you can fasten it in place. There’s a video showing that tried and true deck building tip here.

How to make filler pieces for the shed ramp.
Chances are roughly a trillion to one the joists won’t be covered evenly by deck boards. No problem. So simply cut a filler piece. Then with two deck boards remaining, figure out what the filler piece’s dimension is. Here it was 2-deck boards plus 1 1/4-inches.
So I ripped the filler with the circular saw (a table saw is better if you have one). I installed it then installed the last two full deck boards. The general idea is that you don’t want the skinny board at the end.

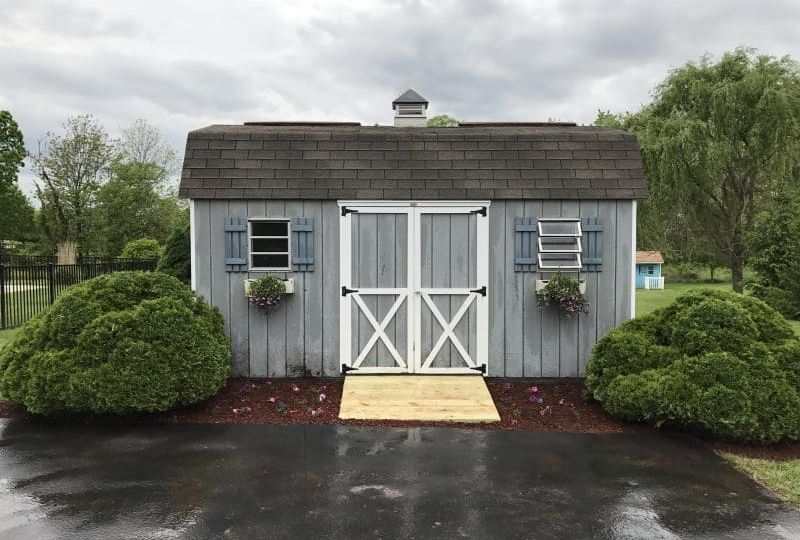
Boom Boards mulch flowers and weekend DIY makes every day a little better So whats next
And the end is where we are. The shed ramp is finished. I hope this ‘how to build a shed ramp’ and DIY shed ramp video helps with your DIY projects. Have you built a shed ramp? We’re always looking for inspiration and would love to see your shed ramp ideas.
Note: Wood It’s Real sponsored this shed makeover. The sponsorship is theirs. The how-to, DIY and general hilarity is MyFixitUpLife.


Very shortly this website will be famous amid all blogging
and site-building users, due to it’s pleasant articles