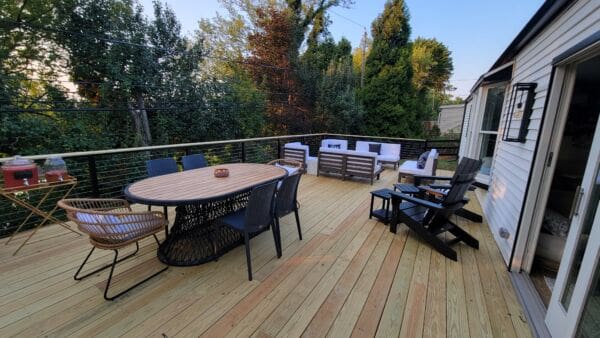
Building a DIY dog gate is a project that most skilled DIYers can do, especially if it’s an addition to a deck guard rail system that’s already built and plumb and level. If you have to build more or fix the current railing or fence situation, then the project will take on another life and you may need to learn more about fence building to build your DIY dog gate. But among deck gate ideas, this is a pretty simple and budget-friendly solution to needing a deck gate for dogs.
About this DIY dog gate project
Adding a dog gate to a deck can be a DIY project if you’ve had some successful experience building a deck or fence. If you aren’t confident about what you are doing, read through the entire how-to before getting started.
This DIY dog gate example is on an old deck and it’s a new dog dilemma: they need a deck gate for dogs on their deck.
Question
Can you add a new dog gate to our deck? We have a new puppy who I want to let out on to the deck, but not into the yard. She’ll really like the freedom. And, do you have the tools to attach it to a brick wall?
Answer
Yes.
How-to Challenges for a DIY Dog Gate
This was a fun one. But there were enough peculiar challenges, I thought it’s worth sharing.
Challenge 1: Small space.
First, there was a lot happening in the small space that needed a new gate. There was a sliding glass door, stairs, and the step-down opening to the stair landing.
Challenge 2: Swing.
t was pretty clear the best “swing” for the gate was to swing out, so they could just push the gate out and walk down the stairs. But it had to swing toward the house, or else the gate would block the walkway down the step.
Challenge 3: Stay open.
The gate had to be able to stay in the open position as well as in the closed position.
Challenge 4: Matching.
The new gate needed to blend in, and match the rest of the deck.
Challenge 5: Brick-mount.
The hinge side needed to be mounted to the brick.

What’s in this article about How to Build a DIY Dog Gate on a Deck
How to make a new DIY dog gate
Along with all of the challenges, I have a no-sag rule for gates. It’s important to make sure the structure is sound and sturdy. So here’s how all that came together to create a new dog gate in an afternoon.
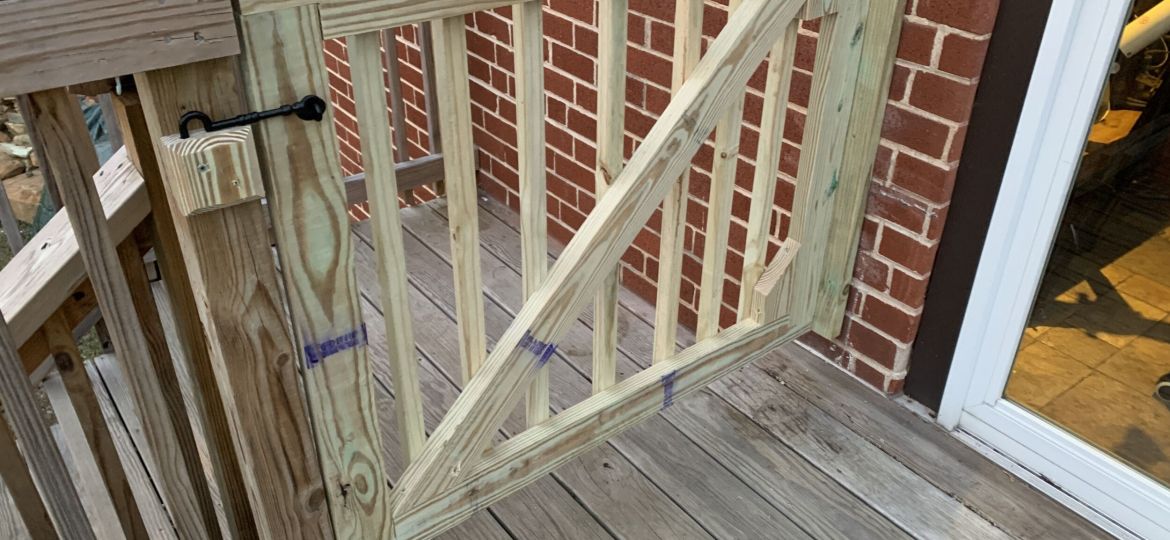
Step 1. Attach the new hinge side.
The first step for this project is mounting the hinges on the brick. I secured a 2×6 to the wall to act as a jamb. But I didn’t just put it anywhere. I positioned it parallel to the deck post that would serve as, in door parlance, the “strike” side.
The post was set 2 inches in from the edge of the decking, so I ran my new “jamb” 2 inches in from the edge of the decking. I held it up 3 ½ inches to match the bottom rail of the deck railing and I fastened it to the wall, making sure it’s plumb.
I used my rotary hammer to drill the holes and used my favorite screw, a #10 x 3-inch Spax screw, to fasten the 2×6 to the wall.
Step 2. Make the DIY dog gate frame.

While it’s important to assemble the gate frame on a flat surface, I have a unique way to assemble gates. While some guys miter them (sort of a picture frame) those miters are doomed to open up and look like crapola in a few short months.
I do a kind of half-lap. I cut a notch (3 ½ x 1 3/4 inches) out of the top and bottom rails to accept the side rails. This erases the miter problem and makes an easy way to fasten everything together.
Since jigsaws mostly suck, I cut most of the meat out of the 3 ½-inch dimension on the table saw first. I raise the blade to full height and cut to no closer than 1 inch of the line.

I then kerf the vertical cut with the miter saw. Yeah, the jigsaw comes out to finish the cut.

Overarching rule: Round blades make the straightest cuts, which I explain in more detail in this deck resurfacing video.
I fasten the gate with the same screws I used for the masonry connection.
Step 3. Make a diagonal brace.
Gates sag when they don’t have a diagonal brace. I know most of you know that. But I have also seen enough sagging gates to know that this is new information to others.
Getting the brace’s angle cut right is always a challenge for me. So here, I laid the gate frame on top of a 2×4 and some supporting blocks and positioned the brace where I wanted it. Then all I had to do was trace and cut the angles. It fit like a glove.
To fasten the brace, I drove one screw through the tip of the angle into the frame. I drove a second via my patented (not patented) jobsite pocket hole technique (see how I do this in How to Build a Bunk Bed video through the heel of the miter into the frame too.
Step 4. Place the DIY dog gate pickets.

Deck pickets should be 5 inches on-center to comply with code. The gate is no different. Plus, it matches the pickets that are on the deck. Because the gate is an odd size–I think it was 46 ½-inches wide, I can’t just start on one side and finish on the other or the pickets will be off-center.
To hopscotch this, I start in the middle with a center picket then lay out left and right. Doing this centers all the pickets and gives you the coverage needed. I call that “layout by centers” and go into more detail about that in this deck building video.
Step 5. Attach the gate hardware.

There aren’t a tremendous number of things to say about the gate hardware, but I do use Spax here too to make my life a little easier.
But first, I had to add a few blocks in the corners to capture the end of the T-hinge.

I should also point out that I made a mistake, and there was a picket in the way of the end of the T-hinge, so I cut an inch off with my angle grinder and it works just fine. Sometimes a broken play leads to a touchdown.
The role #10 x 1 ½-inch screws play is as a place-holder and pilot hole driller.
The lags that come with the gate hardware require a decent amount of pre-drilling and umph to thread into the wood fiber, but a #10 Spaxer, gets right in there. Driving a couple in there enables me to do the three-handed work of holding the gate in position, keeping the hinge from flapping out of the way, and getting the screw in the hole.
Once pinned with a couple easy-to-drive screws, I remove them and–with a pilot hole now drilled, set the larger diameter lag.
Step 6. Secure the latch and latch block.
So the latch should be easy to suss out. However, the dog gate needs to stay open and closed, and the hardware only came with one hook. I needed two.
The first decision was to place the latch hook on the interior face of the gate when in the closed position. It’s easiest to access and operate there.
With that done, when the gate is in the open position, it’s 3 inches away from the wall.
To solve that problem, I made a latch block. This is comprised of a 2×6 block and a 2×4 block. I mitered a little chamfer off each edge of each block and I like the look. It’s no longer just a hunk of wood. It’s a trim detail.

I used the rotary hammer and some Spax screws to mount the 2×6 to the wall with four screws into mortar joints. Then mounted the 2×4 block to the 2×6 with 2 ½-inch screws. Next, I mounted the latch–all laid out so that the hook laid flat in the latch eye–and the gate stays open.
To keep it closed, I’m down one eye. No matter. I made another chamfered 2×4 block for the strike side of the gate. I drilled a hole where the hook descends and hooby dooby the deck’s dog gate stays closed.

Watch how to build a gate for a deck
In this video, we build a gate for a deck. It’s another among deck gate ideas, but the basic principles of building the gate are the same as the deck gate for dogs project depicted above.

If you have more questions about how to build a deck gate for dogs, send us a note.

You met those challenges head on, great job! I have a similar challenge, but no brick wall. Thanks for the tips. ?
The bottom of the diagonal should be on the hinge side. Huge mistake.
Hi Joe Bob,
Thank you for your feedback. I get that there is a legit conversation about which way to point the strut, but this is a gate, not a suspension bridge. Appreciate your note.
Are you on Instagram?
Interesting blog!