Our clients wanted a budget-friendly basement renovation, so we suggested using materials that didn’t require a lot of finishing. Surfaces that don’t need paint and non-drywall options that don’t require sanding and coats of joint compound reduce the number of days we need to be on site, and decreases the overall budget. As part of this project, we planned to install a plank ceiling called WoodHaven Plank from Armstrong Ceilings. And we think it looks so much better than drywall, too. Here’s what you need to know about basement ceiling installation before you begin your basement ceiling project.

What’s in this article about how-to install a plank ceiling?
Before you begin the plank ceiling
Ceilings play a key role in basement remodeling projects for several reasons:
- A basement ceiling is often much closer to the top of your head than a typical 8-foot-tall main floor room, so they are much more noticeable.
- There are systems inside them that supply the main living space upstairs. The older the house, the more stuff that was just run and routed through there because the basement space was never meant to be finished. You’re dealing with decades of “who cares what’s in the basement?” mojo.
- Who wants to lug umpteen zillion sheets of drywall and tubs of joint compound through the main floor of a house, around corners, or slip them in through Bilco doors? Nobody. Definitely not us.
- Beyond that, who wants to tape, finish, and paint a basement ceiling? Also, nobody we know.
- Drywall is nice, dead flat, and just disappears. In addition, it doesn’t add to the design or the ambiance. And it definitely doesn’t feel upscale, either. It’s basic. (When you’ve used drywall to wrap HVAC trunk lines, now there’s a 4-lane highway on the ceiling…and then you’ve definitely got trunk lines down there).
The Ceiling: The 5th Wall
In our basement designs, we want the basement ceiling to be a feature, not an afterthought. We don’t want it to disappear. And, we want the installation to merge with our company’s core strength: Carpentry and Design Uniqueness.
These homeowners wanted a stylish and budget-friendly option for their basement ceiling, so we steered them away from drywall.
The Basement Ceiling Solution
Our business makes more money the more work we keep in-house and within our core competencies. Yeah, I can lug and finish and paint drywall, but I’m slow and it’s spirit-crushingly labor-intensive. To save time and money, and to amp-up the design appeal, we suggested a plank ceiling for this basement: Armstrong Ceiling’s WoodHaven Plank system with EASY UP Installation System.
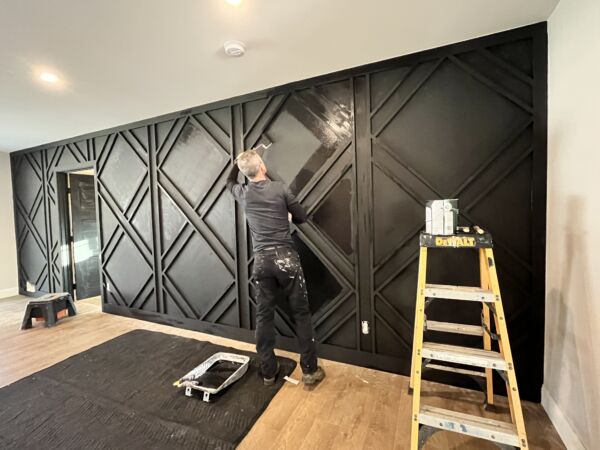
A plank ceiling may not technically be carpentry, but it is certainly close enough. Besides, WoodHaven Plank is DIY-friendly, too. Think, covering popcorn ceilings, damaged drywall, or worn-out suspended ceilings. You can even use it for feature walls.
Plus, installation is smart, reasonably simple, and the material comes factory finished. I do not need to switch over my tool set-up or move carpentry tools for drywall installation. We also don’t have to deal with cutting in primer, two coats of paint, and touch-ups. There’s some dust when we cut the planks, sure. It’s MDF. But nothing compared to a gypsum blizzard from sanding.
Set-Up & Before You Start
The nature of basement remodeling, as opposed to, say, a bathroom or kitchen, is that you’ve got tons of room to place tools and materials. However, this is deceptive, because unlike a kitchen or bath–where you can’t store much inside the space you’re remodeling–everything is inside the basement that you’re remodeling. So things are simultaneously in the way and too far away.
Carts and Acclimatization
In order to save huge amounts of time moving materials around a basement project, I build giant moving dollies made of 4-inch casters and 2x4s. On this 900-square-foot basement reno, I used five of these rolling carpenter carts.
How to Build a Rolling Carpenter Cart for
ceiling planks, flooring, and other long materials
Without the carts, no matter where you put something in a basement project, it’ll eventually be in your way. Rather than move stacks of stuff, I just roll it out of the way.
Once WoodHaven Plank is imported onto the project, Armstrong Ceilings requires the boxes be opened and given 2 to 3 days to adjust to “relative humidity in the space it will be installed.”
If you’re only doing the basement ceiling, that’s easy. Bring in the boxes and open them up. If you’re also putting in a floor, managing the plumber, electrician, other clients service, and completing inspections so you can close in, that material–easily 1,200-pounds–arrives a week in advance of when you need it, so you need to be able to move it around.
Working Overhead
Most home improvement carpentry is “down” or “in front of” rather than “above.” And, in most basements “above” really isn’t that far away since ceilings usually are a lot lower than the other floors in a home.
Scaffold, Stool
On this basement remodel, I only needed to reach 12 to 16 inches higher to work effectively. While a 4-foot stepladder is the sweet spot for most remodeling work, it’s a nightmare here.
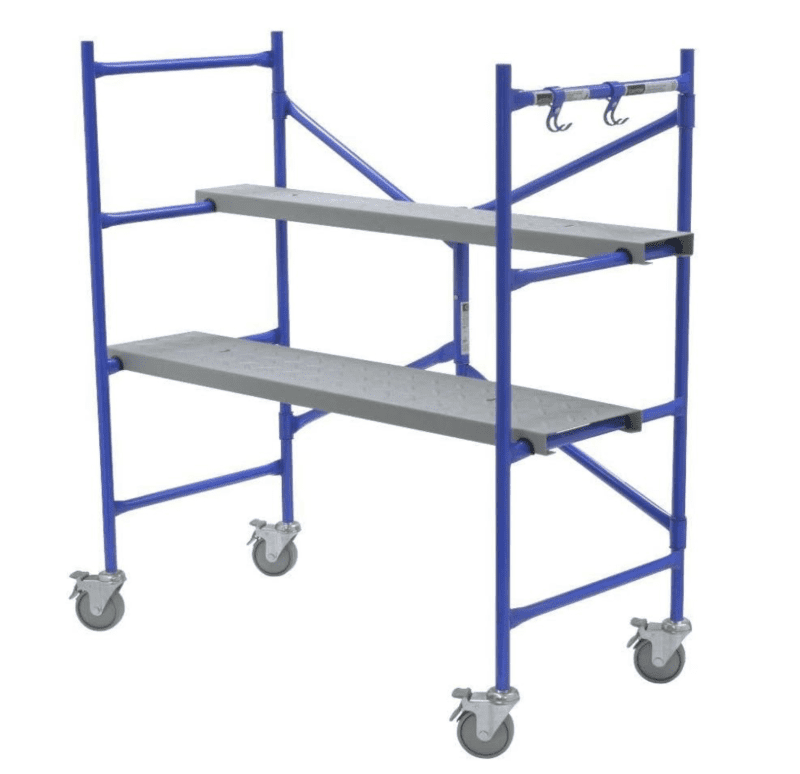
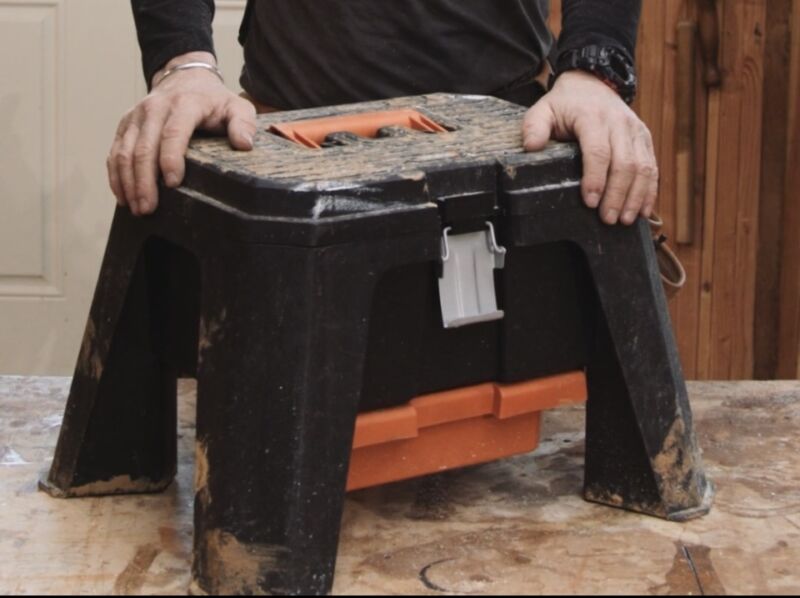
Instead, I used my Werner Rolling Scaffold and solid plastic step-stool-toolbox.


And for drywalling and painting a ceiling too


I set one of the scaffold’s walk boards at the lowest level and one at the highest. I stood on one–making it plenty tall–and used the other one for tool and material storage. Even better, I could walk a few feet along a WoodHaven Plank piece and get it installed without ever needing to get down and get back up again.
The stool is super handy and durable. I kicked and slid around the floor without ever having to pick it up.
Tracks
It’s best to think about your basement ceiling layout at Design Stage. If you have a bold linear pattern on the floor–like tile–you may want to match, or not match, it in the direction of the ceiling. The way you layout the planks will determine how you install the metal tracks.
I used Armstrong Ceiling’s EASY UP Installation System of tracks and clips. Tracks need to be installed 2 inches from each perimeter and 90 degrees to the ceiling joists. The tracks go 2 inches in from each border and 2 feet apart in the field. I snapped lines and rough-set all the tracks.
Also, I’m a little miserly. Armstrong Ceilings says that when a track line doesn’t run all the way to the end of the room, you don’t need to cut them. Just get a new track and run it parallel to the first line.
Yes, that’ll work and I get why they recommend it. However, I chose to conserve materials. I cut end-lengths with an angle grinder.
Make sure tracks do not pass through lighting locations. More on this later.
Flat
The directions call for getting the ceiling “level.” What they mean is “flat” or “in-plane.” The joists typically vary in thickness, and this creates a bunch of different levels that can make the track layout wavy. So if you just screw the tracks up, they’ll follow that undulation and it’ll telegraph through to the ceiling making installation troubling at best.
The key is to “flatten” the ceiling in both directions, North-South/East-West. I used a 78-inch level, shims, and 1 5/8-inch bugle head screws (I tried some pan-head screws thinking they’d lie flatter to the track; nope).
With the tracks up, use the level as a straightedge. You’ll find a big ‘ole joist or two that you’ll have to work around. Just back the screws out a little, re-check for straight, shim as needed, and snug the screw back up.
Impact Driver
I used my 12-volt Skil impact driver–something I call my “installer’s tool.” I love this tool for certain tasks. Light. Plenty of powerful and wonderfully soft start.
Screen Protector Mojo. Think about the challenge of getting the tracks in plane like you’re working the bubbles out of a screen protector. You’ll get to a point here–unlike a screen protector–where done is better than perfect and close enough is right on the money. Don’t let “Perfect” be the enemy of the “Good.”
WoodHaven Planks. After you figure out the square footage arithmetic, you’ll need to order material from Armstrong Ceilings. Once you start installing, you’ll have to do a little more math.
Plank Ceiling Layout Formula
The instructions that come with WoodHaven include a series of calculations that help you with the layout. It’s important to not skip this step. However, directions are typically thorough and they faithfully list out the steps and procedures. But they rarely give any reasons or tips. In other words, Directions tell you WHAT to do. They do not tell you WHY to do them.
(Those missing reasons are basically why a younger and far less handsome me into writing about building. Shameless plug for my one and only novel about a carpenter, The Carpenter’s Notebook.)
The reason for pulling out your calculator app and filling out the thorough, easy-to-follow instructions is to determine the width of the first and last pieces—those planks that will on the left and right edges of the ceiling where it meets the walls. Why is this important? It’s the same as tile or deck posts: It’s so the first piece and the last piece are the same width as each other and there are no odd-looking and tough-to-install sliver cuts.
WoodHaven Plank Ceiling Installation
After the tracks are up and flattened, it’s time for the good stuff: Installing WoodHaven Planks.
Backstops and Obstacles
Armstrong Ceilings wants a ¾-inch expansion gap between the product and the wall. This seems larger than it needs to be, but it’s what they call for.
To that end, I screwed a couple 1-bys to the wall. I placed the fasteners low enough such that when the ceiling is installed, I can access the screw to remove it.
Every old house basement remodeling project is different and poses some head-scratcher challenges. On this one, the house was built with the cold air return in the end joist bay where we needed to get a screw to hold the first ceiling plank. To solve for that, I screwed a few pieces of 1-by right to the sheet metal, then I screwed the ceiling into that. Because the WoodHaven Plank is MDF, I pre-drilled and countersunk for the screw head.
Whatever you’re fastening the first piece to, do not over-drive the screw and make sure it will be hidden by the trim.
EzUp Clips and Planks
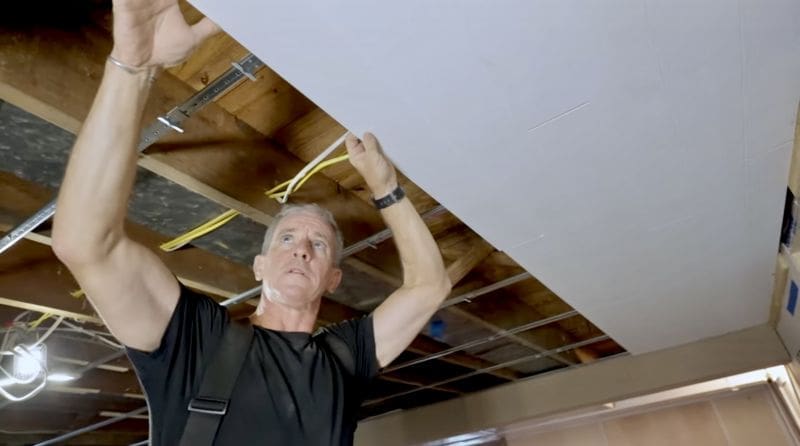
After securing the first piece of plank ceiling with EzUp clips, use a cut-off to start the second course, tongue-side out. The pieces fit together snugly and I found that a thump with the heel of my hand did the trick to slot them together. I also found that placing four clips on each track, then installing planks, then installing four more clips was about as efficient as I could be.
Lighting and Duct Maps
If lighting is involved with your ceiling install–and it almost surely is–you probably mapped it out on the concrete floor months before installing the ceiling. If you’ve installed an LVP floor like we did here, you’ve probably transferred the marks from the slab onto the new floor.
As the plank ceiling goes in, this is when you confirm that the floor mark represents where the wire is and that the light fixture won’t interact with a joist. Using a laser will confirm this. An old-timer might use a plumb bob.


Horizontal Trim Around the Plank Ceiling
After you install a plank ceiling, Armstrong Ceilings calls for crown molding to bridge the ¾-inch expansion gap. Crown really didn’t fit the design here so I doubled up on ¾-inch material. Layer 1 is a 1×2. Layer 2 was going to 1×1, but the more I thought about it, I thought using ¼-inch round might make the entire assembly disappear.
And I was right. ¼-inch round required a little learning curve–we had to nest it in the miter saw as it sat on the wall to make the miters make sense–but it worked out great.
Plank Ceiling Cost
As for a retail price, the Armstrong Ceilings WOODHAVEN planks are less than $7 per square foot at Lowe’s right now online, but we paid $4.39 in Pennsylvania. Easy Up tracks are $77.20 each pack. Easy Up clips come in 8-packs and are $36.96. So adding this up:
- 8 x $36.96 = $295.68
- 4 x $77.20 = $308.80
- 900 sq. ft. x $4.39 = $3,951.00
- Total: $4,555.48
I’m doing some back of the envelope math for this plank ceiling. However, in a space this chopped up, just buying, storing, and importing (through a stair/door configuration a 4×8 sheet can barely get through) drywall that I also have to hang, skim, sand, and clean up after is 4-Gs before I trim and paint it–which is yet more!
For my money–and for my customers’ money–I’ll take Armstrong Ceilings WoodHaven Plank all day for a basement ceiling project.
If you have any questions about how to install a plank ceiling, send us a note.
Note: Armstrong Ceilings collaborated with us on this project. However, we have chosen Armstrong Ceilings for years because of the quality and the ease of installation.


