How to reupholster a tufted ottoman (one with buttons)
Theresa
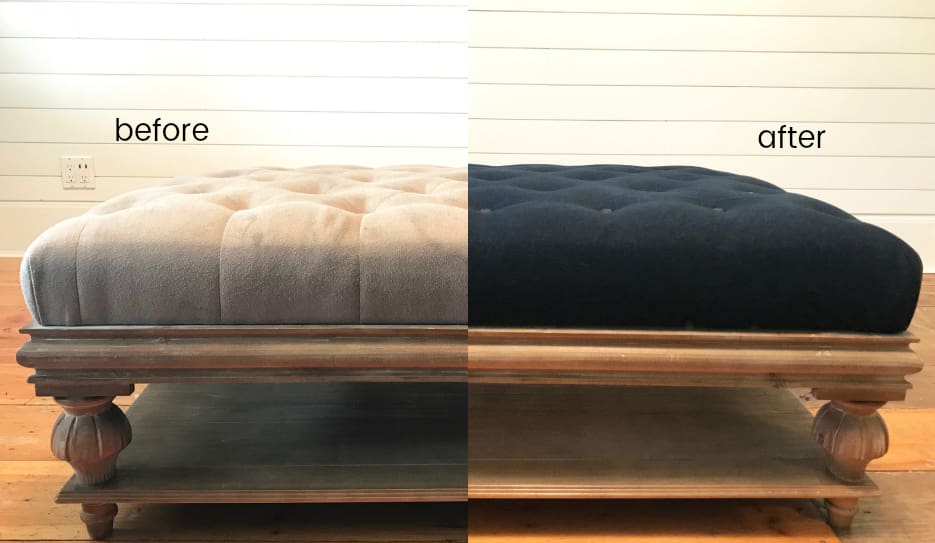
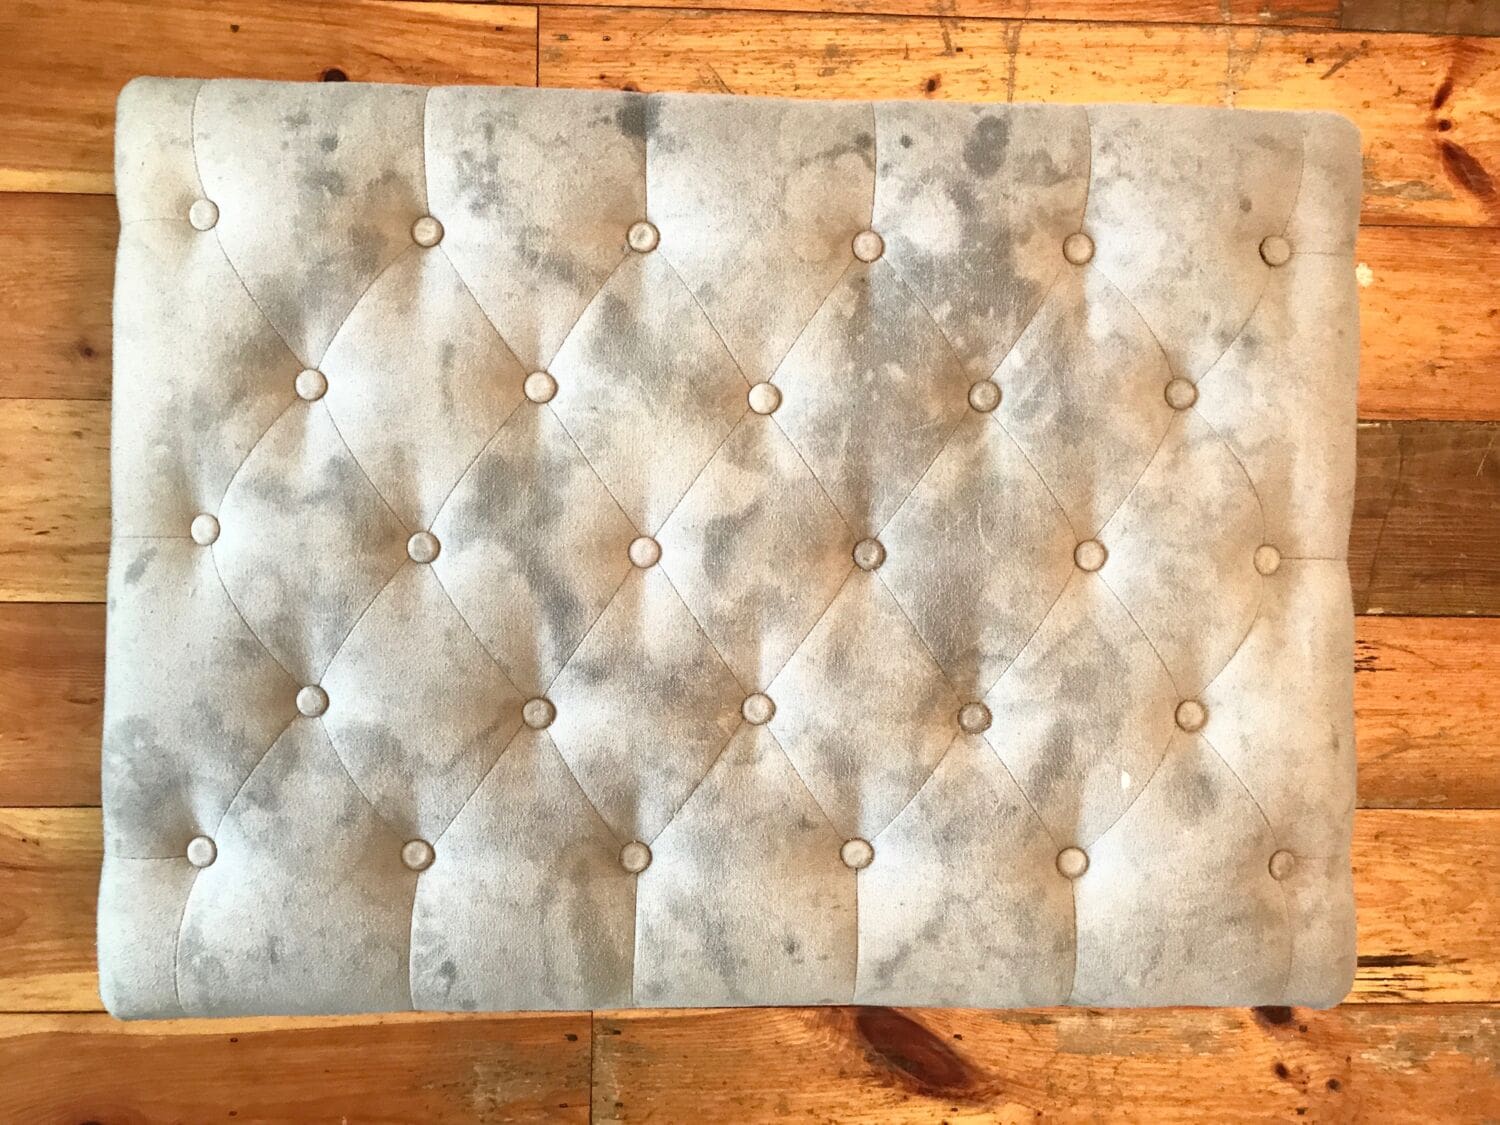
A babysitter gave Jack clay to use on our fabric tufted ottoman, and it gave me a DIY project: reupholster an ottoman.
I’ve noticed that I have strong attraction to tufted furniture. Especially, if the tufted furniture has nail-head trim in a classic fabric and turned legs, well, that’s all I need to know to fall in love.
After a search, I found this ottoman with a storage shelf. It has the wood features that Mark is into, and the turned legs and tufting that I’m into. So when shortly after buying it, I came home to find the babysitter and Jack playing with clay on the ottoman, my heart sank.
I didn’t let on how furniturely-devastated I was on the inside when I saw the evidence of the clay fun all over the ottoman.
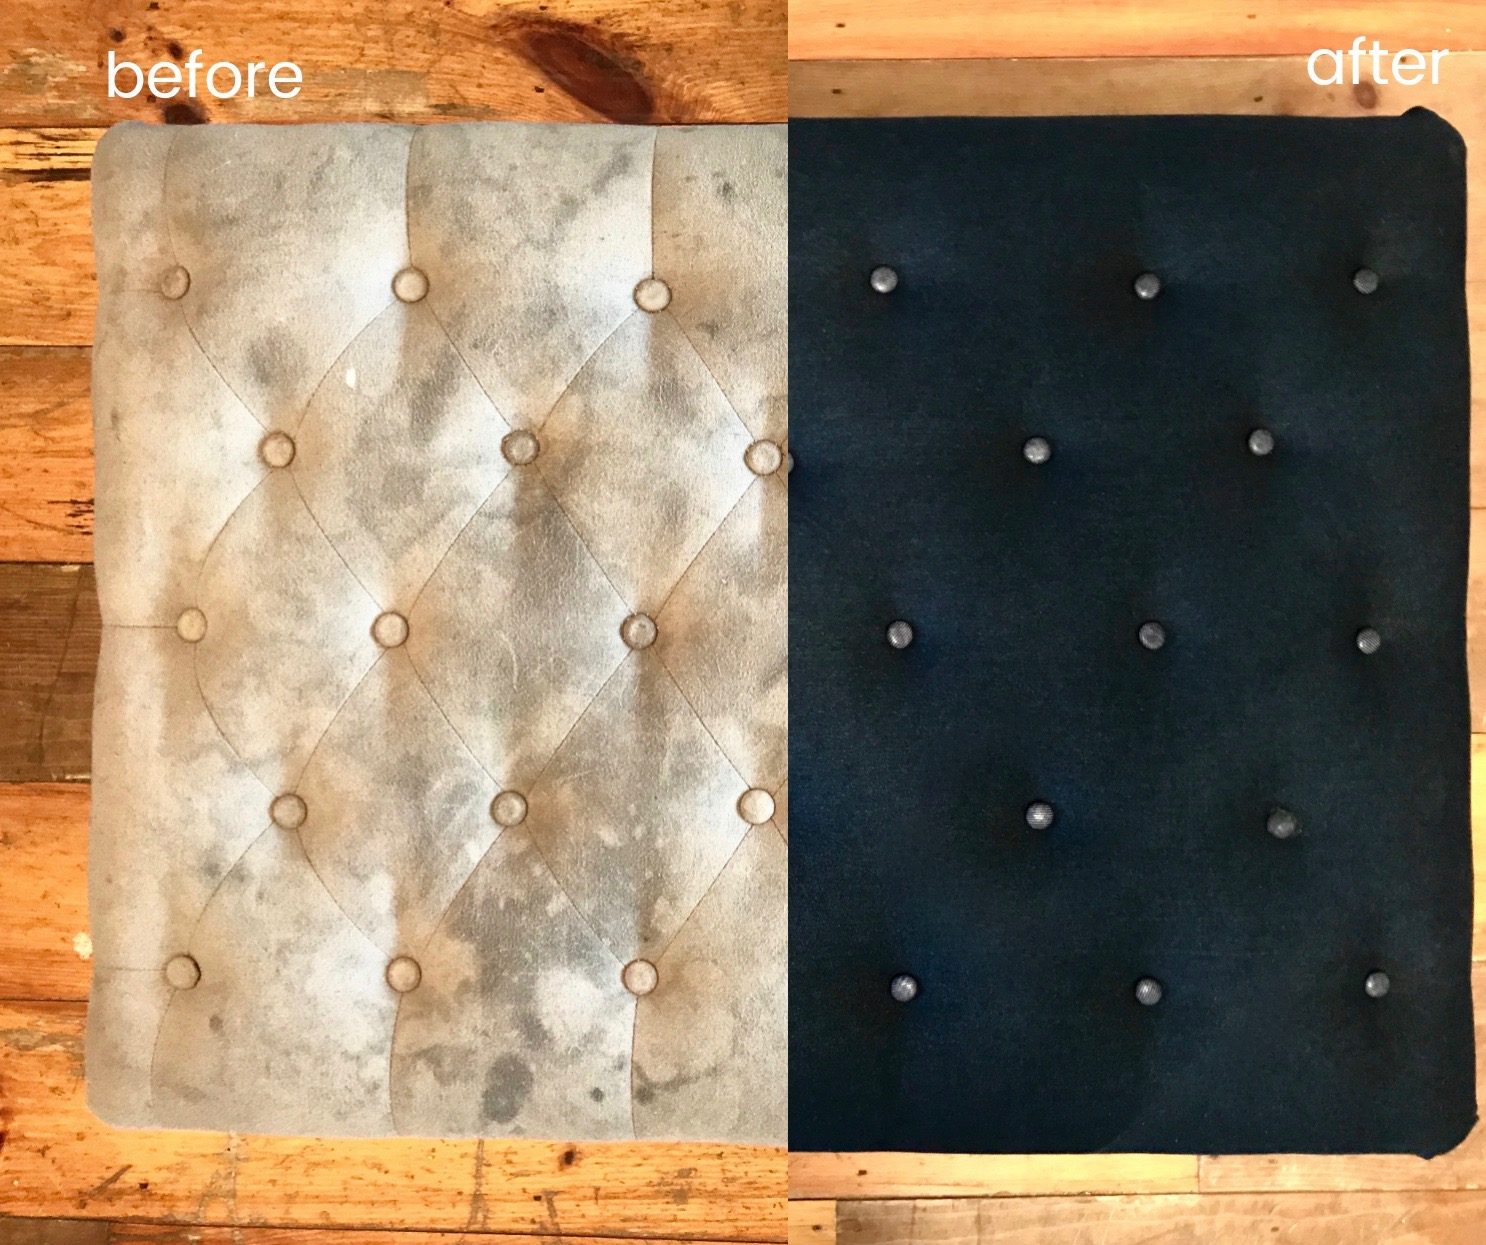
It’s been on my list for several years to reupholster the tufted ottoman with buttons and new fabric, and it makes me a little sad everyday to see the serving trays that I use to cover the worst of the stains.
Reupholstering an ottoman is a fairly easy DIY project. It takes a long afternoon, if you have all of the supplies on hand and uninterrupted time from other responsibilities.
Supplies needed to recover an ottoman, like this one, include:
Fabric.
Buy enough fabric to cover the ottoman on top and around the sides in one piece. Specifically, you’ll need an additional square foot of fabric for the buttons. And don’t settle for the cheapest fabric. Look for the best upholstery fabric you can get for your budget.
Plus it might be nice to buy an extra 1/2 yard to make a few matching pillows for the sofa or chairs in the room, or adjoining room to pull the color through your home. Plus, I used muslin for the interior backing.
The DIY project is fairly straightforward. First, take the fabric top off of the bottom ottoman frame, remove the buttons, and then recover and reattach the buttons and the top to the frame.
Here’s how I updated our ottoman in denim fabric.
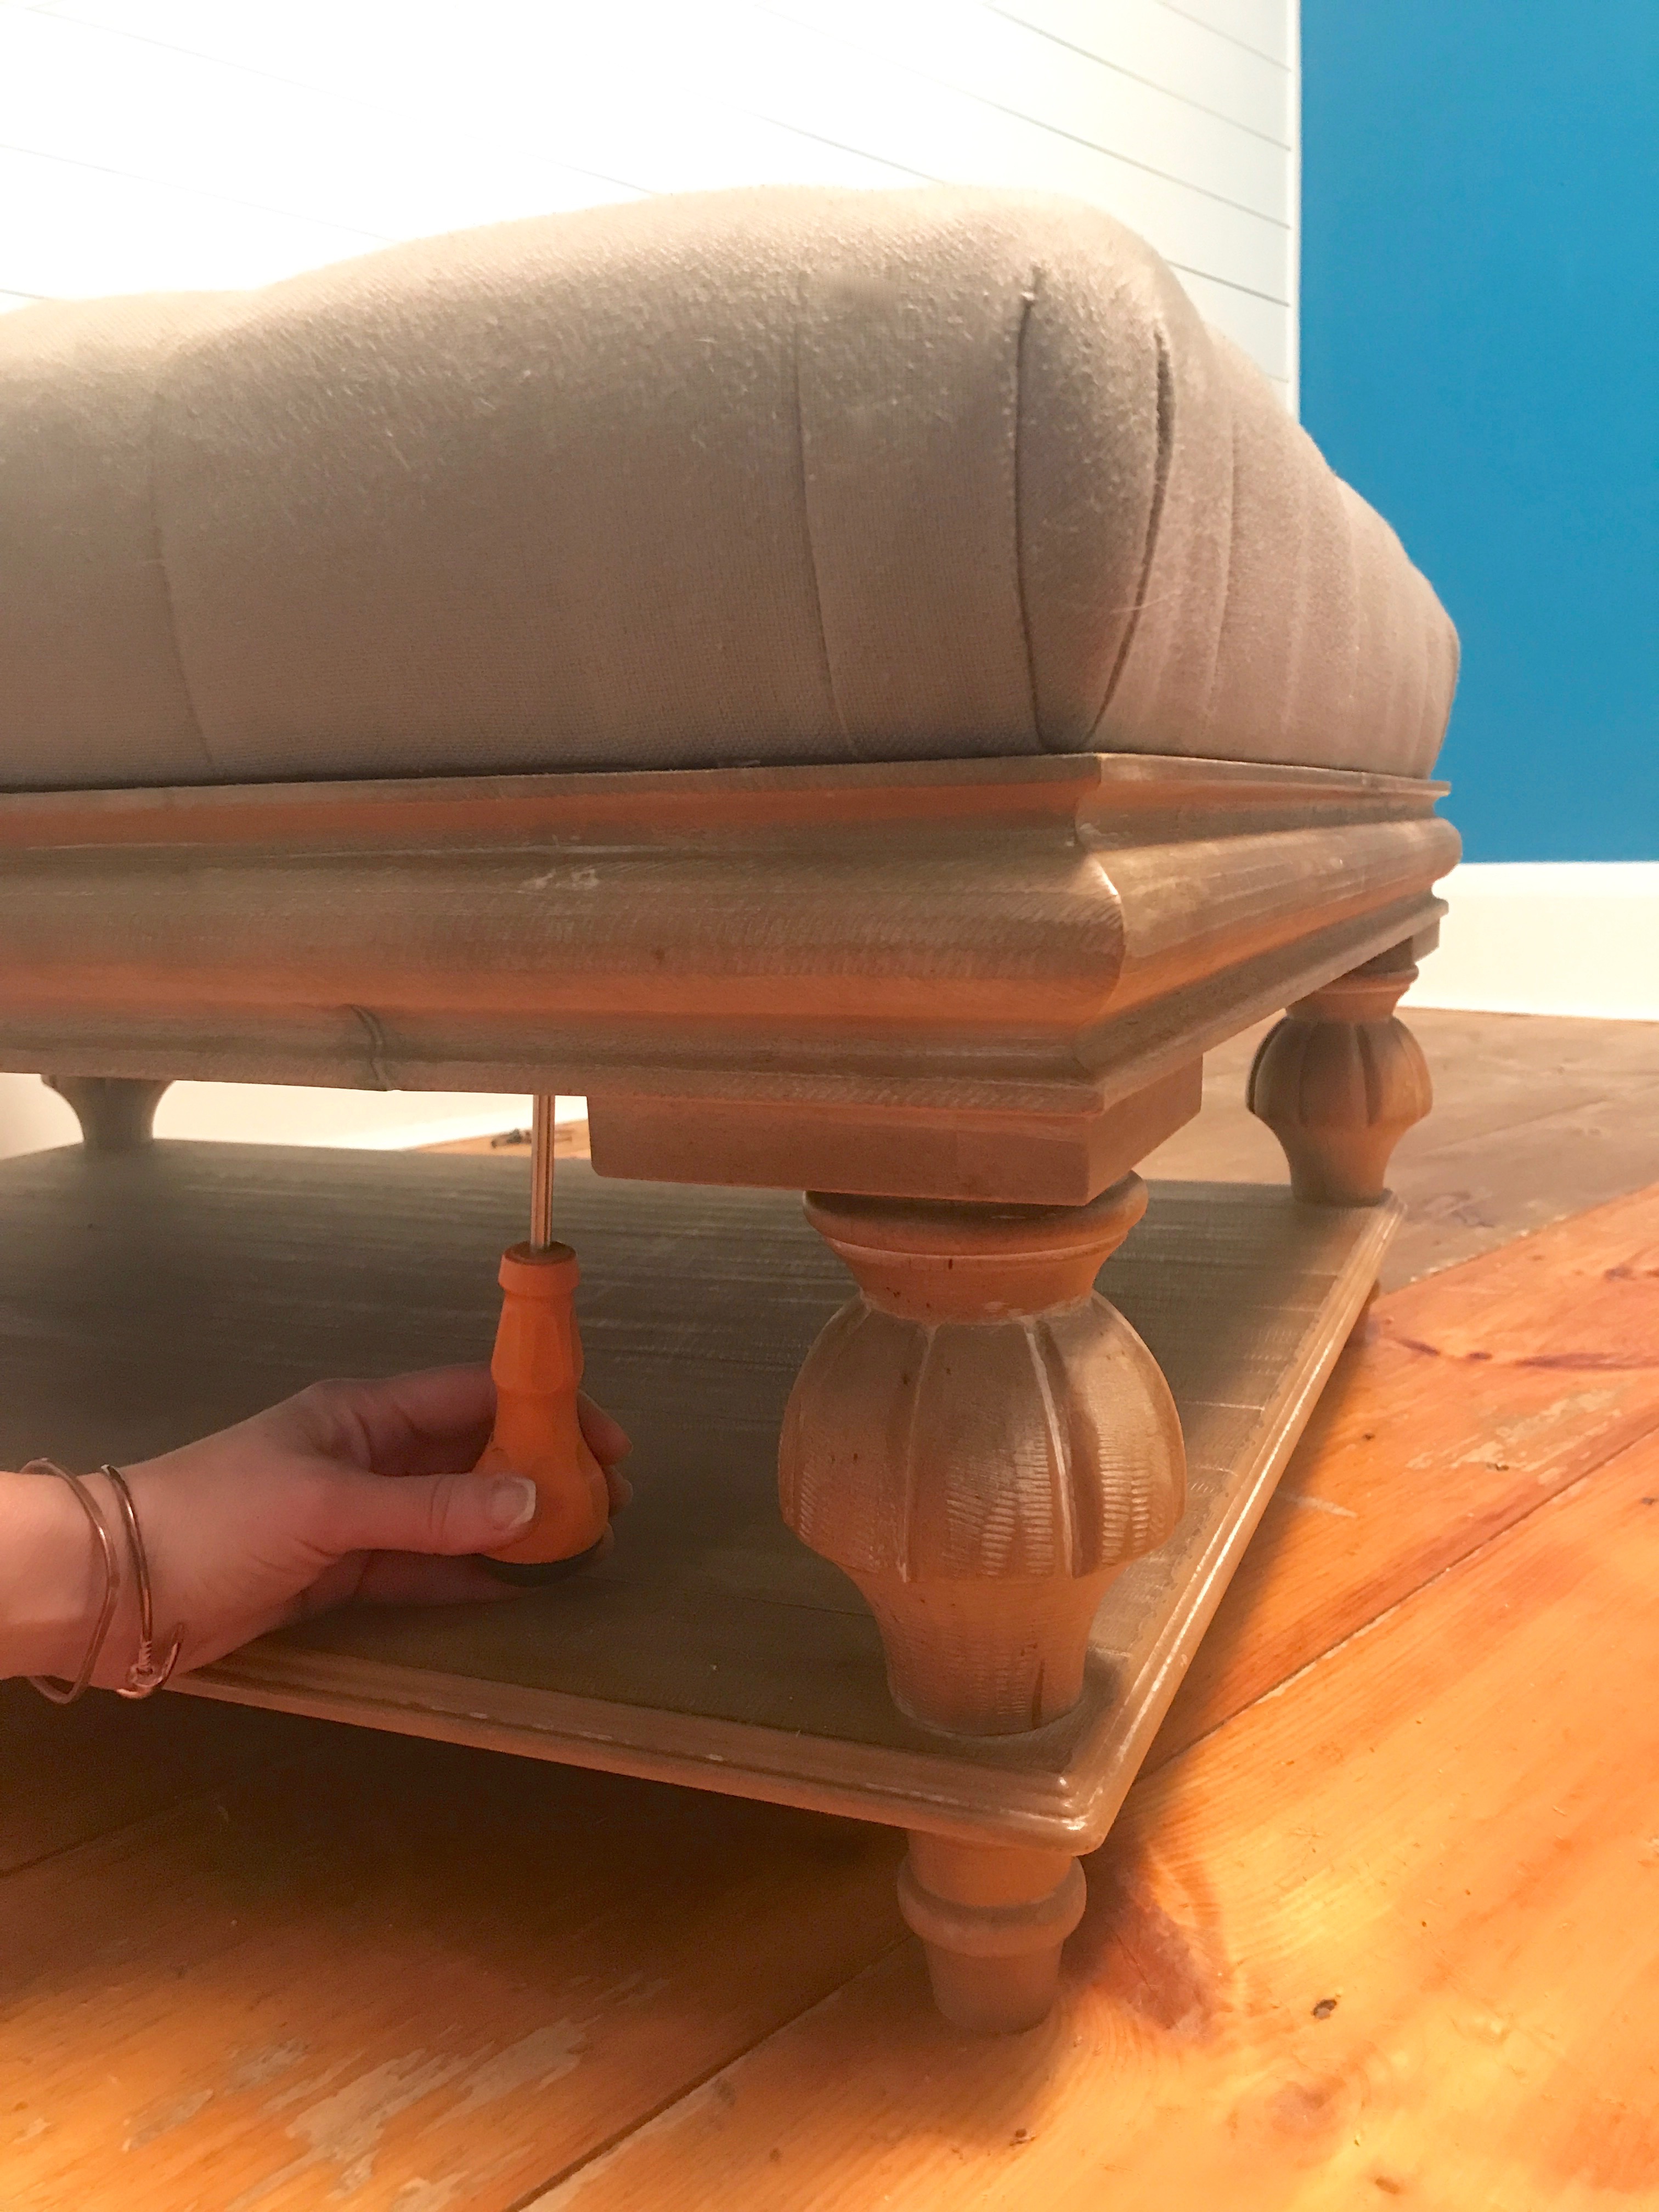
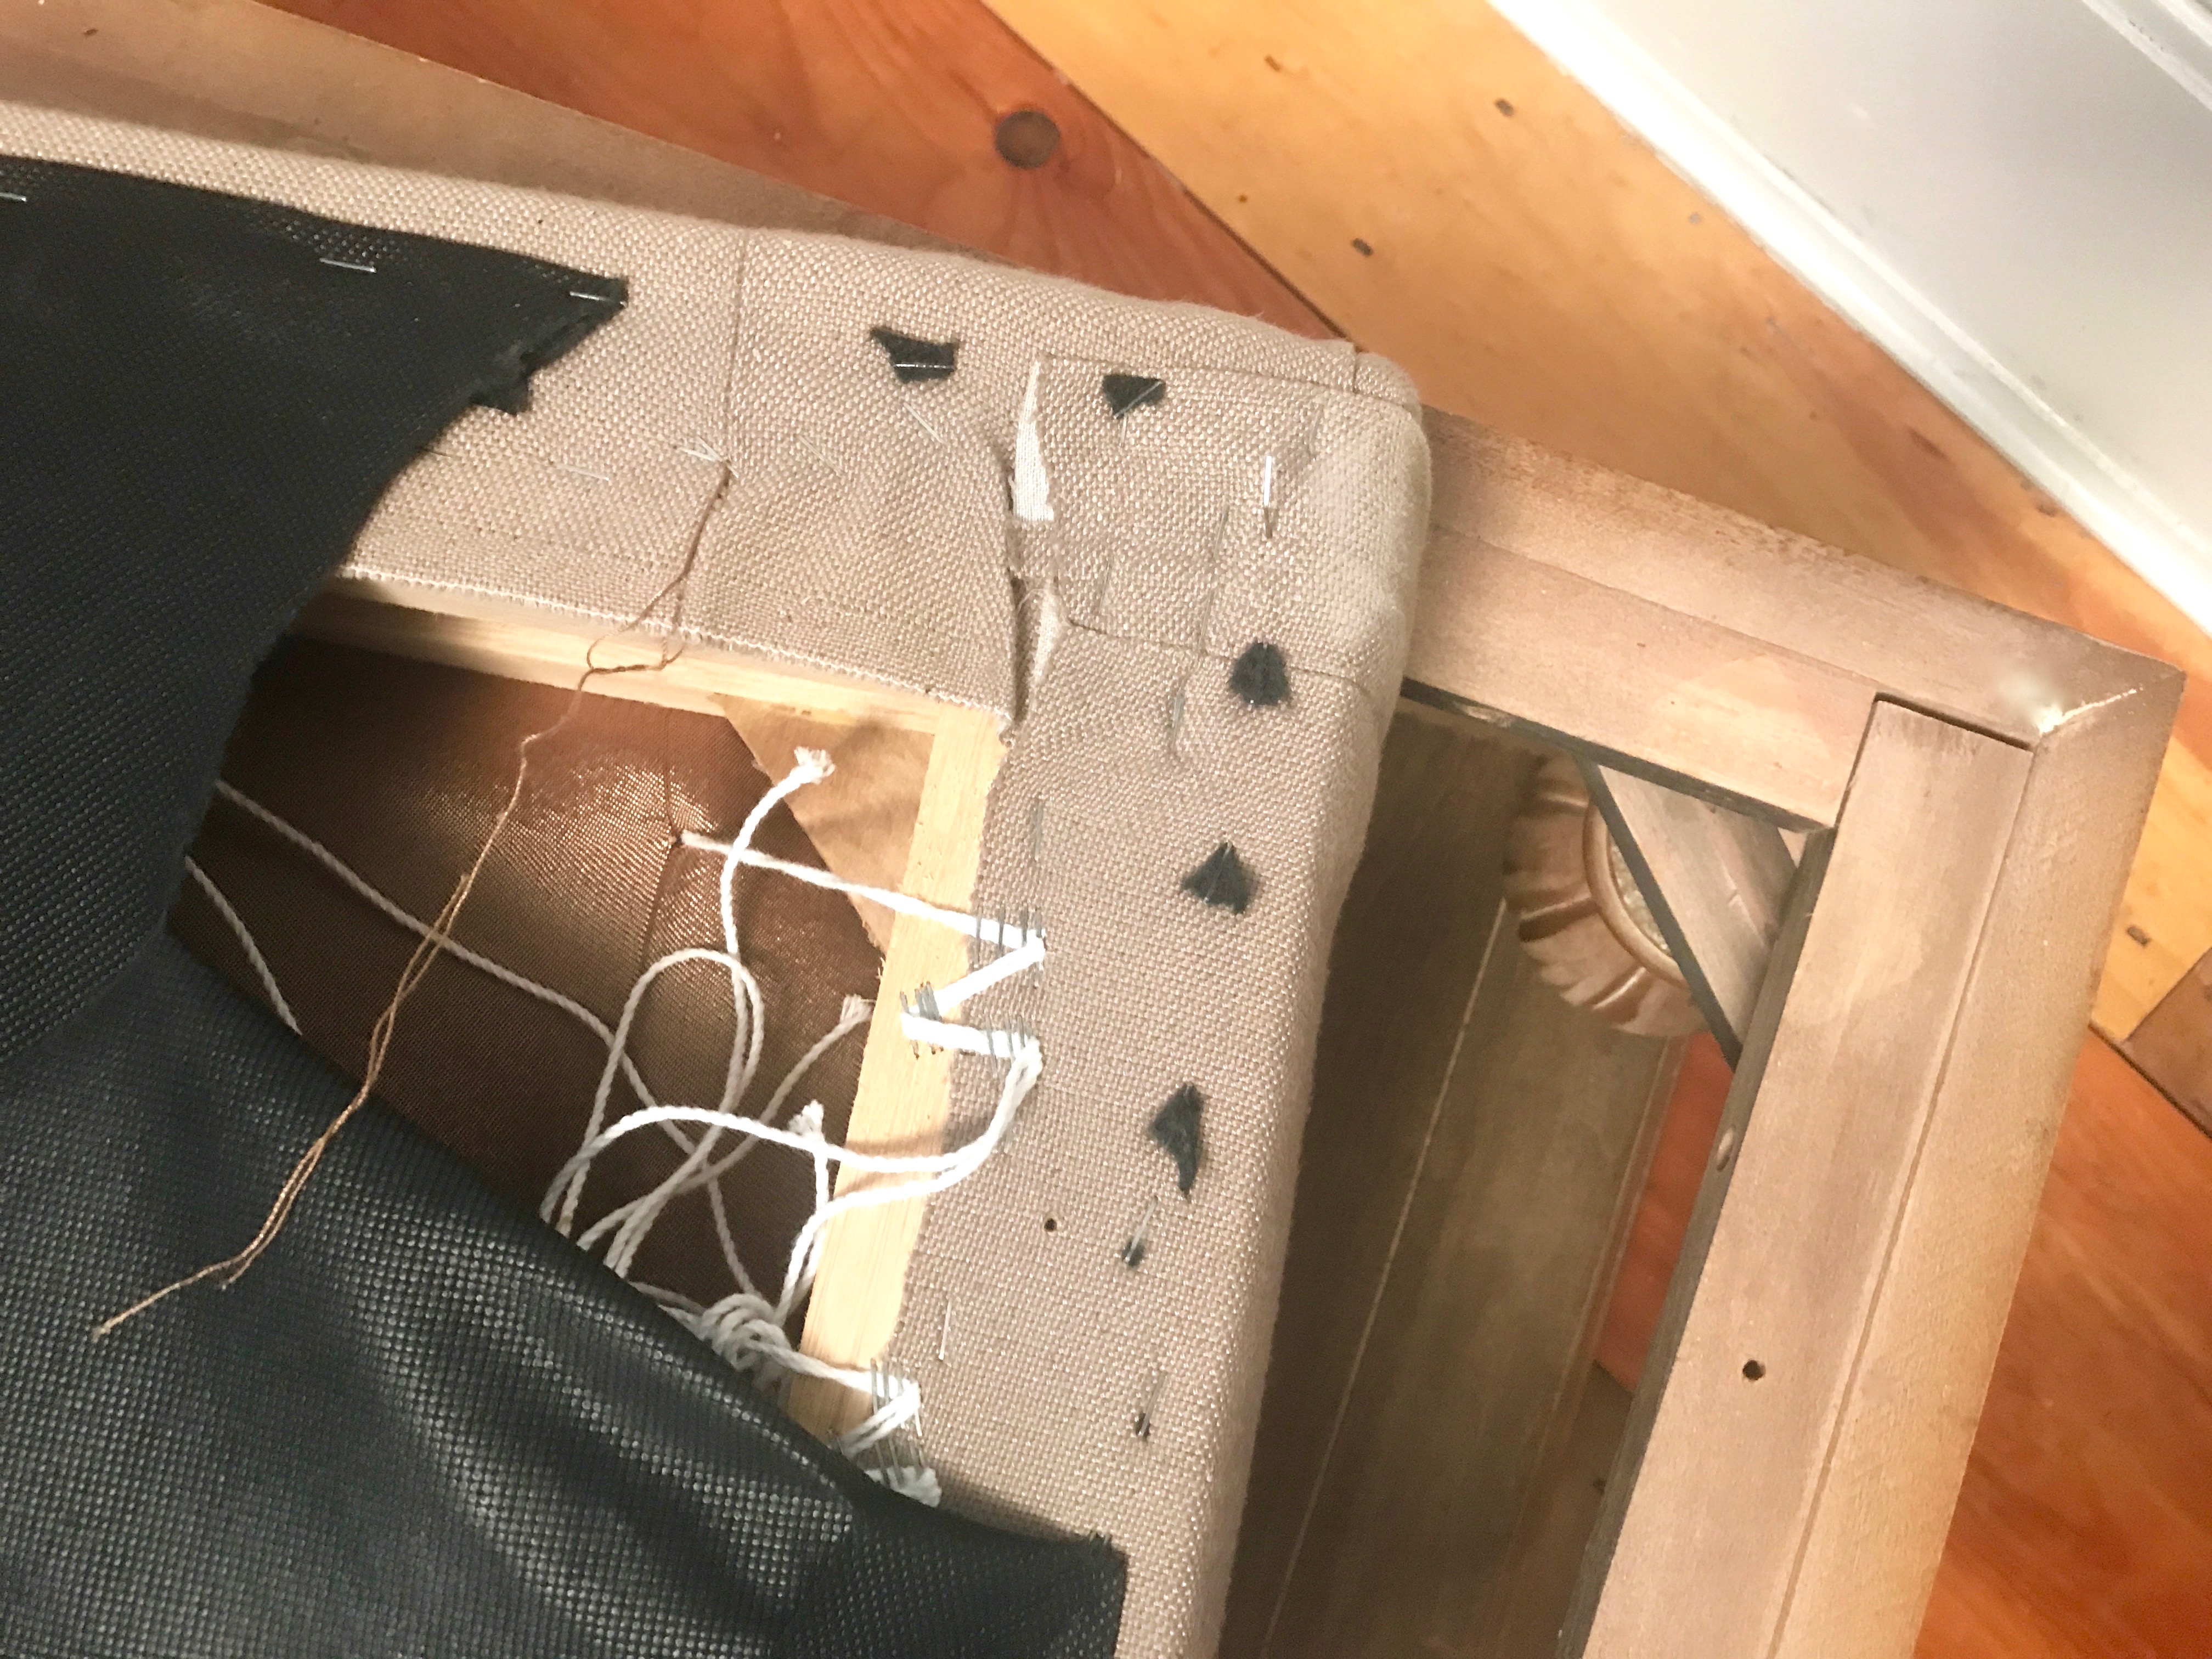
The first step to reupholster a tufted ottoman is to remove the fabric-covered top of the ottoman.
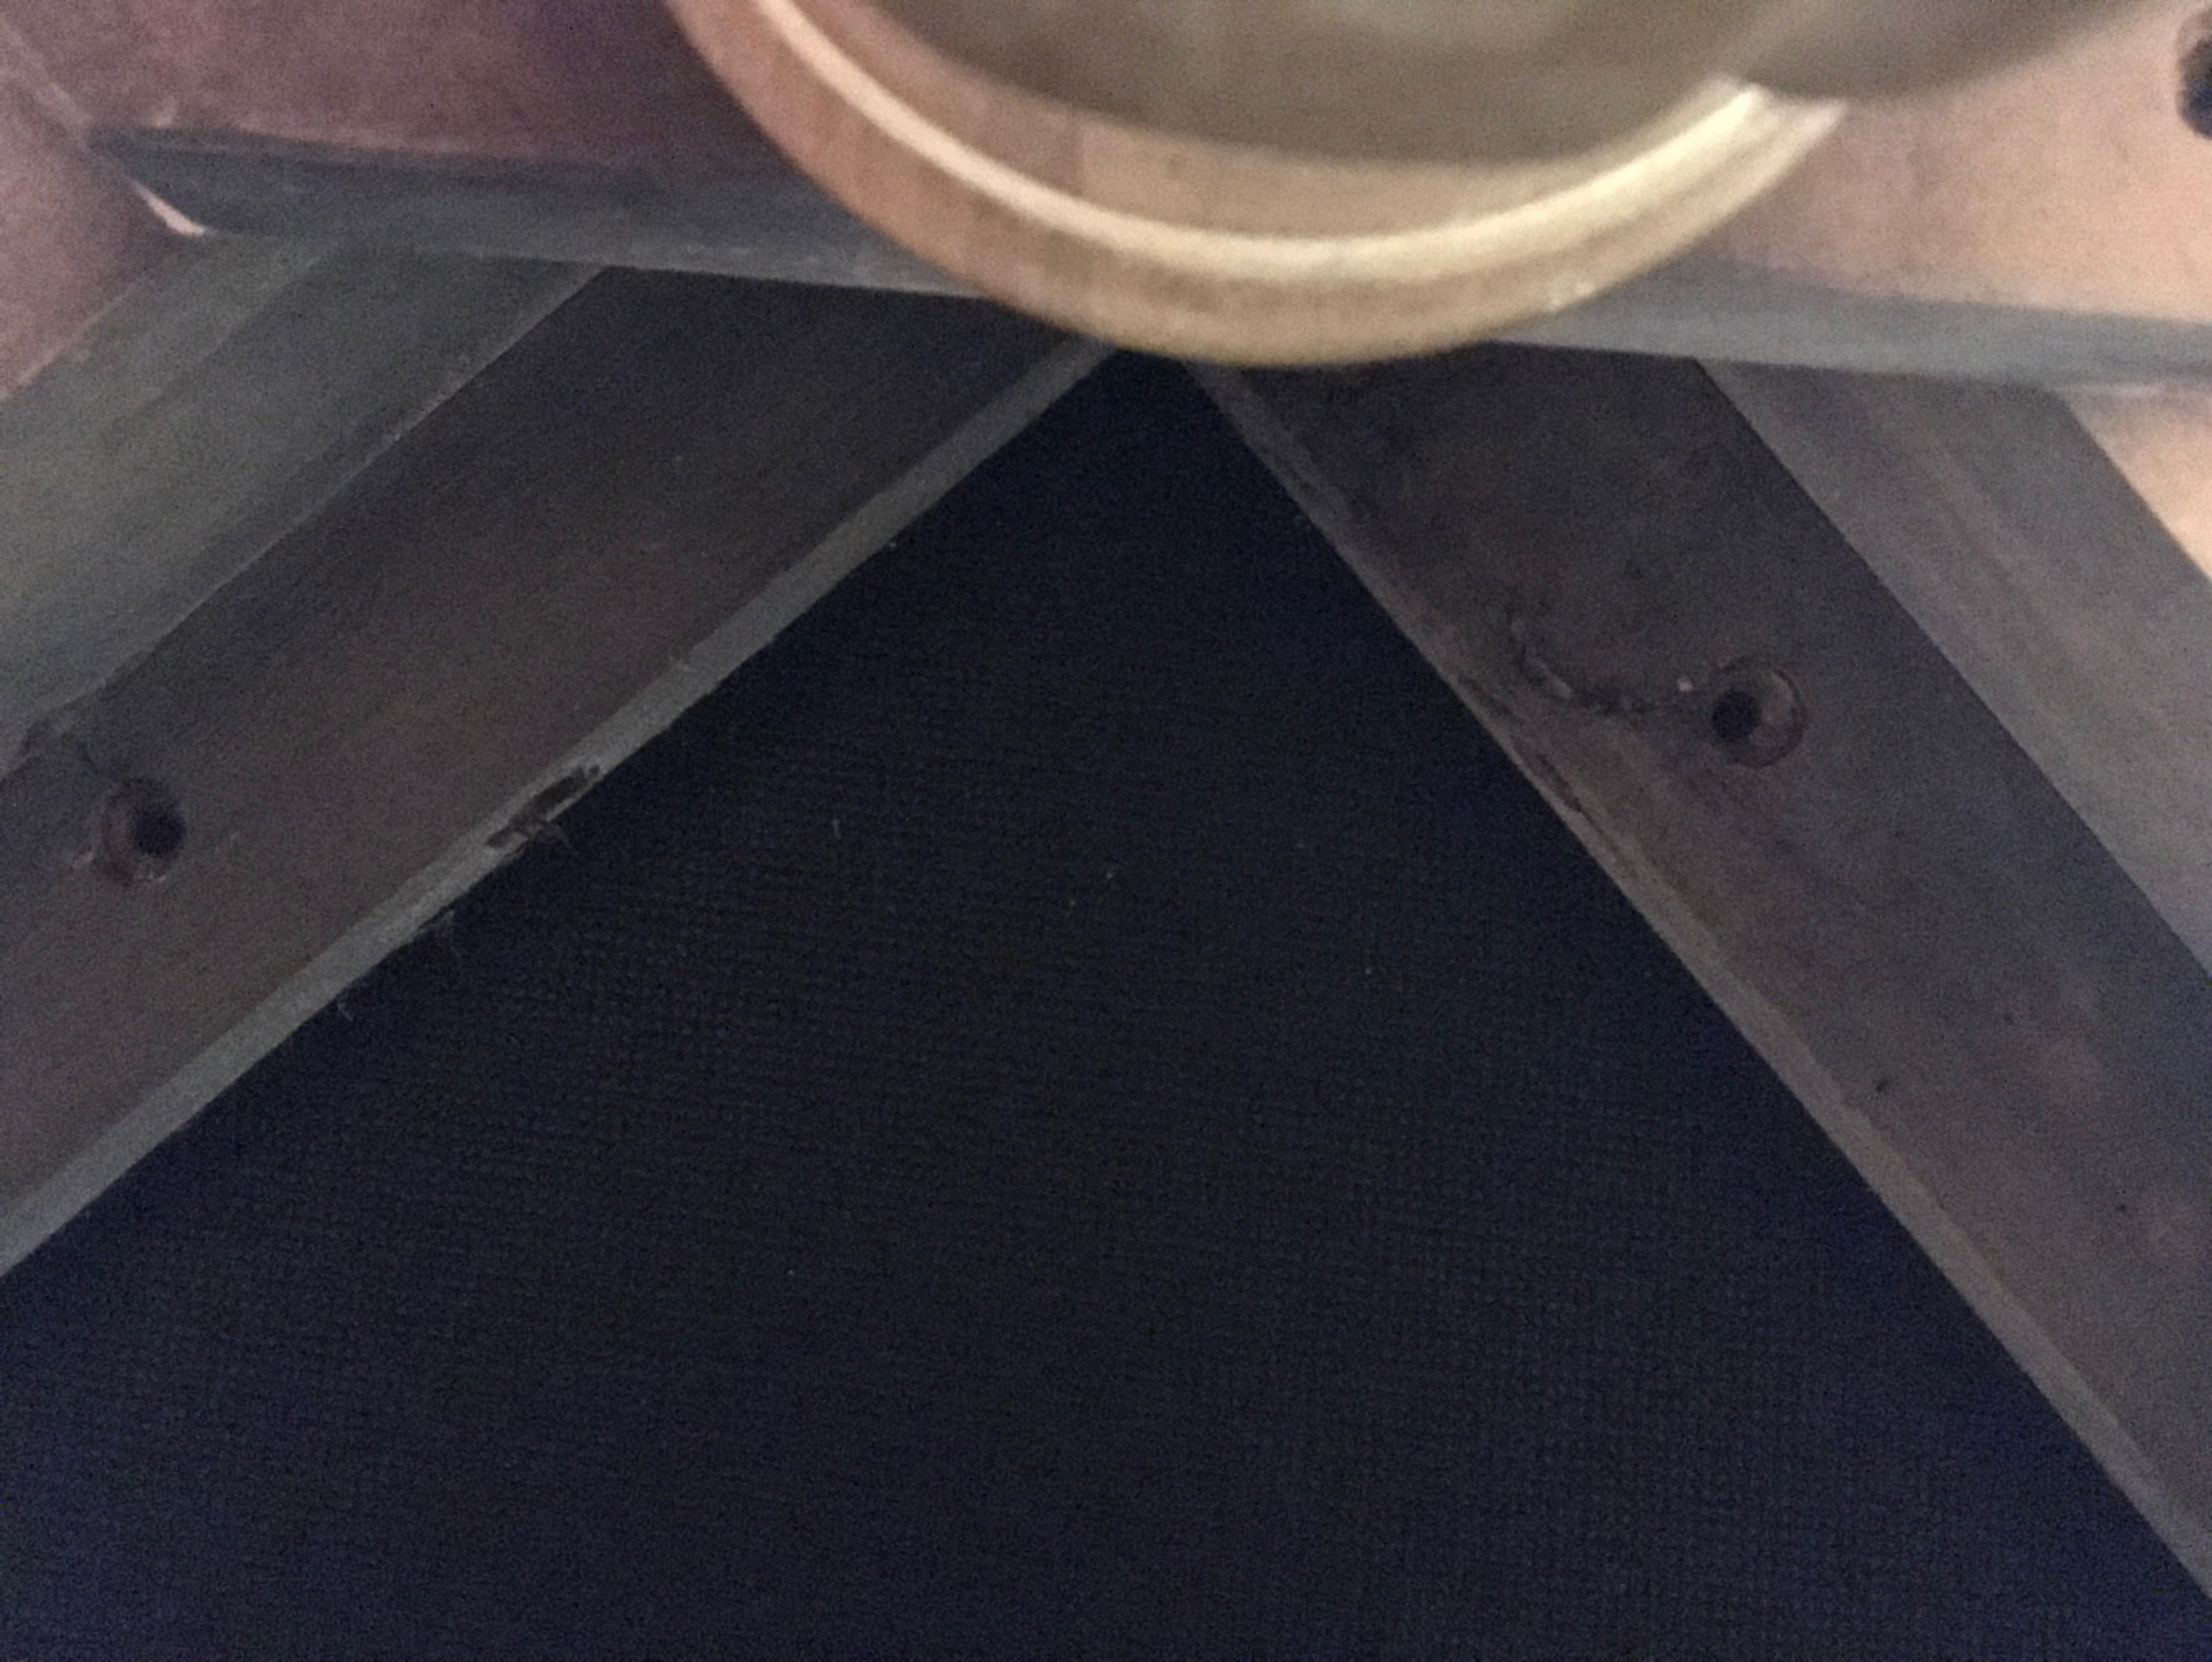
This is the inside view of the ottoman, looking up toward where the fasteners are found.
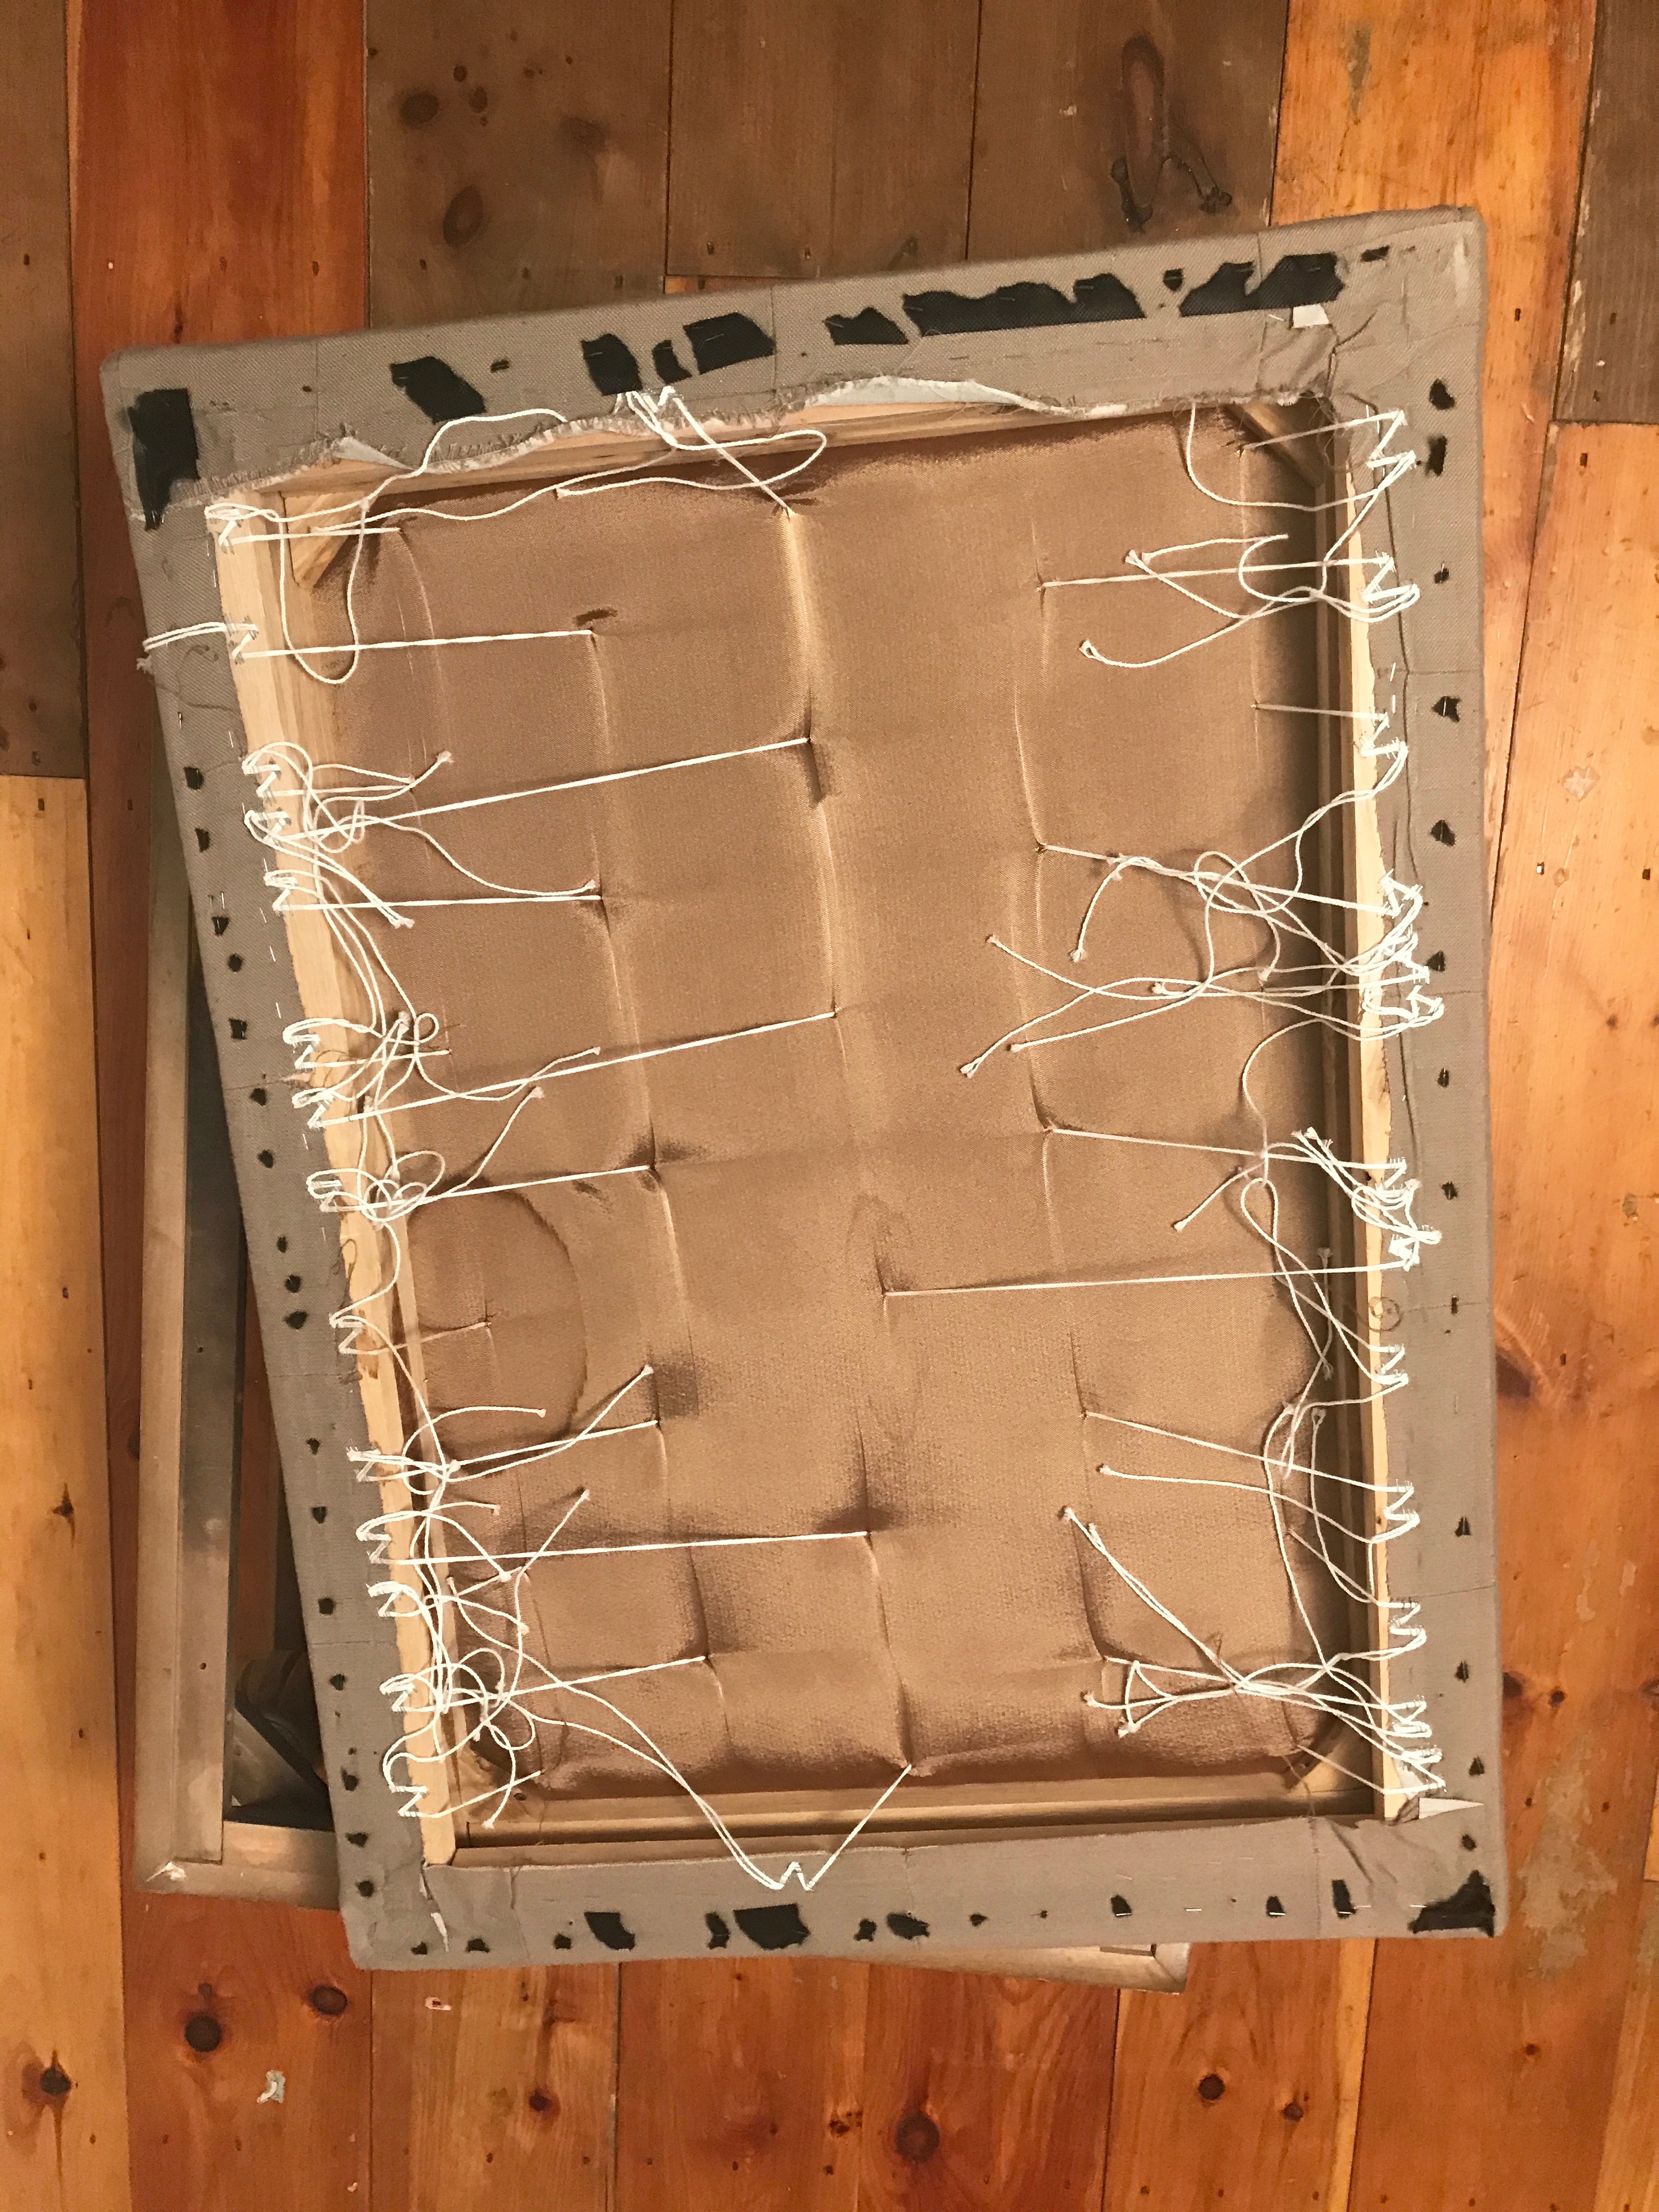
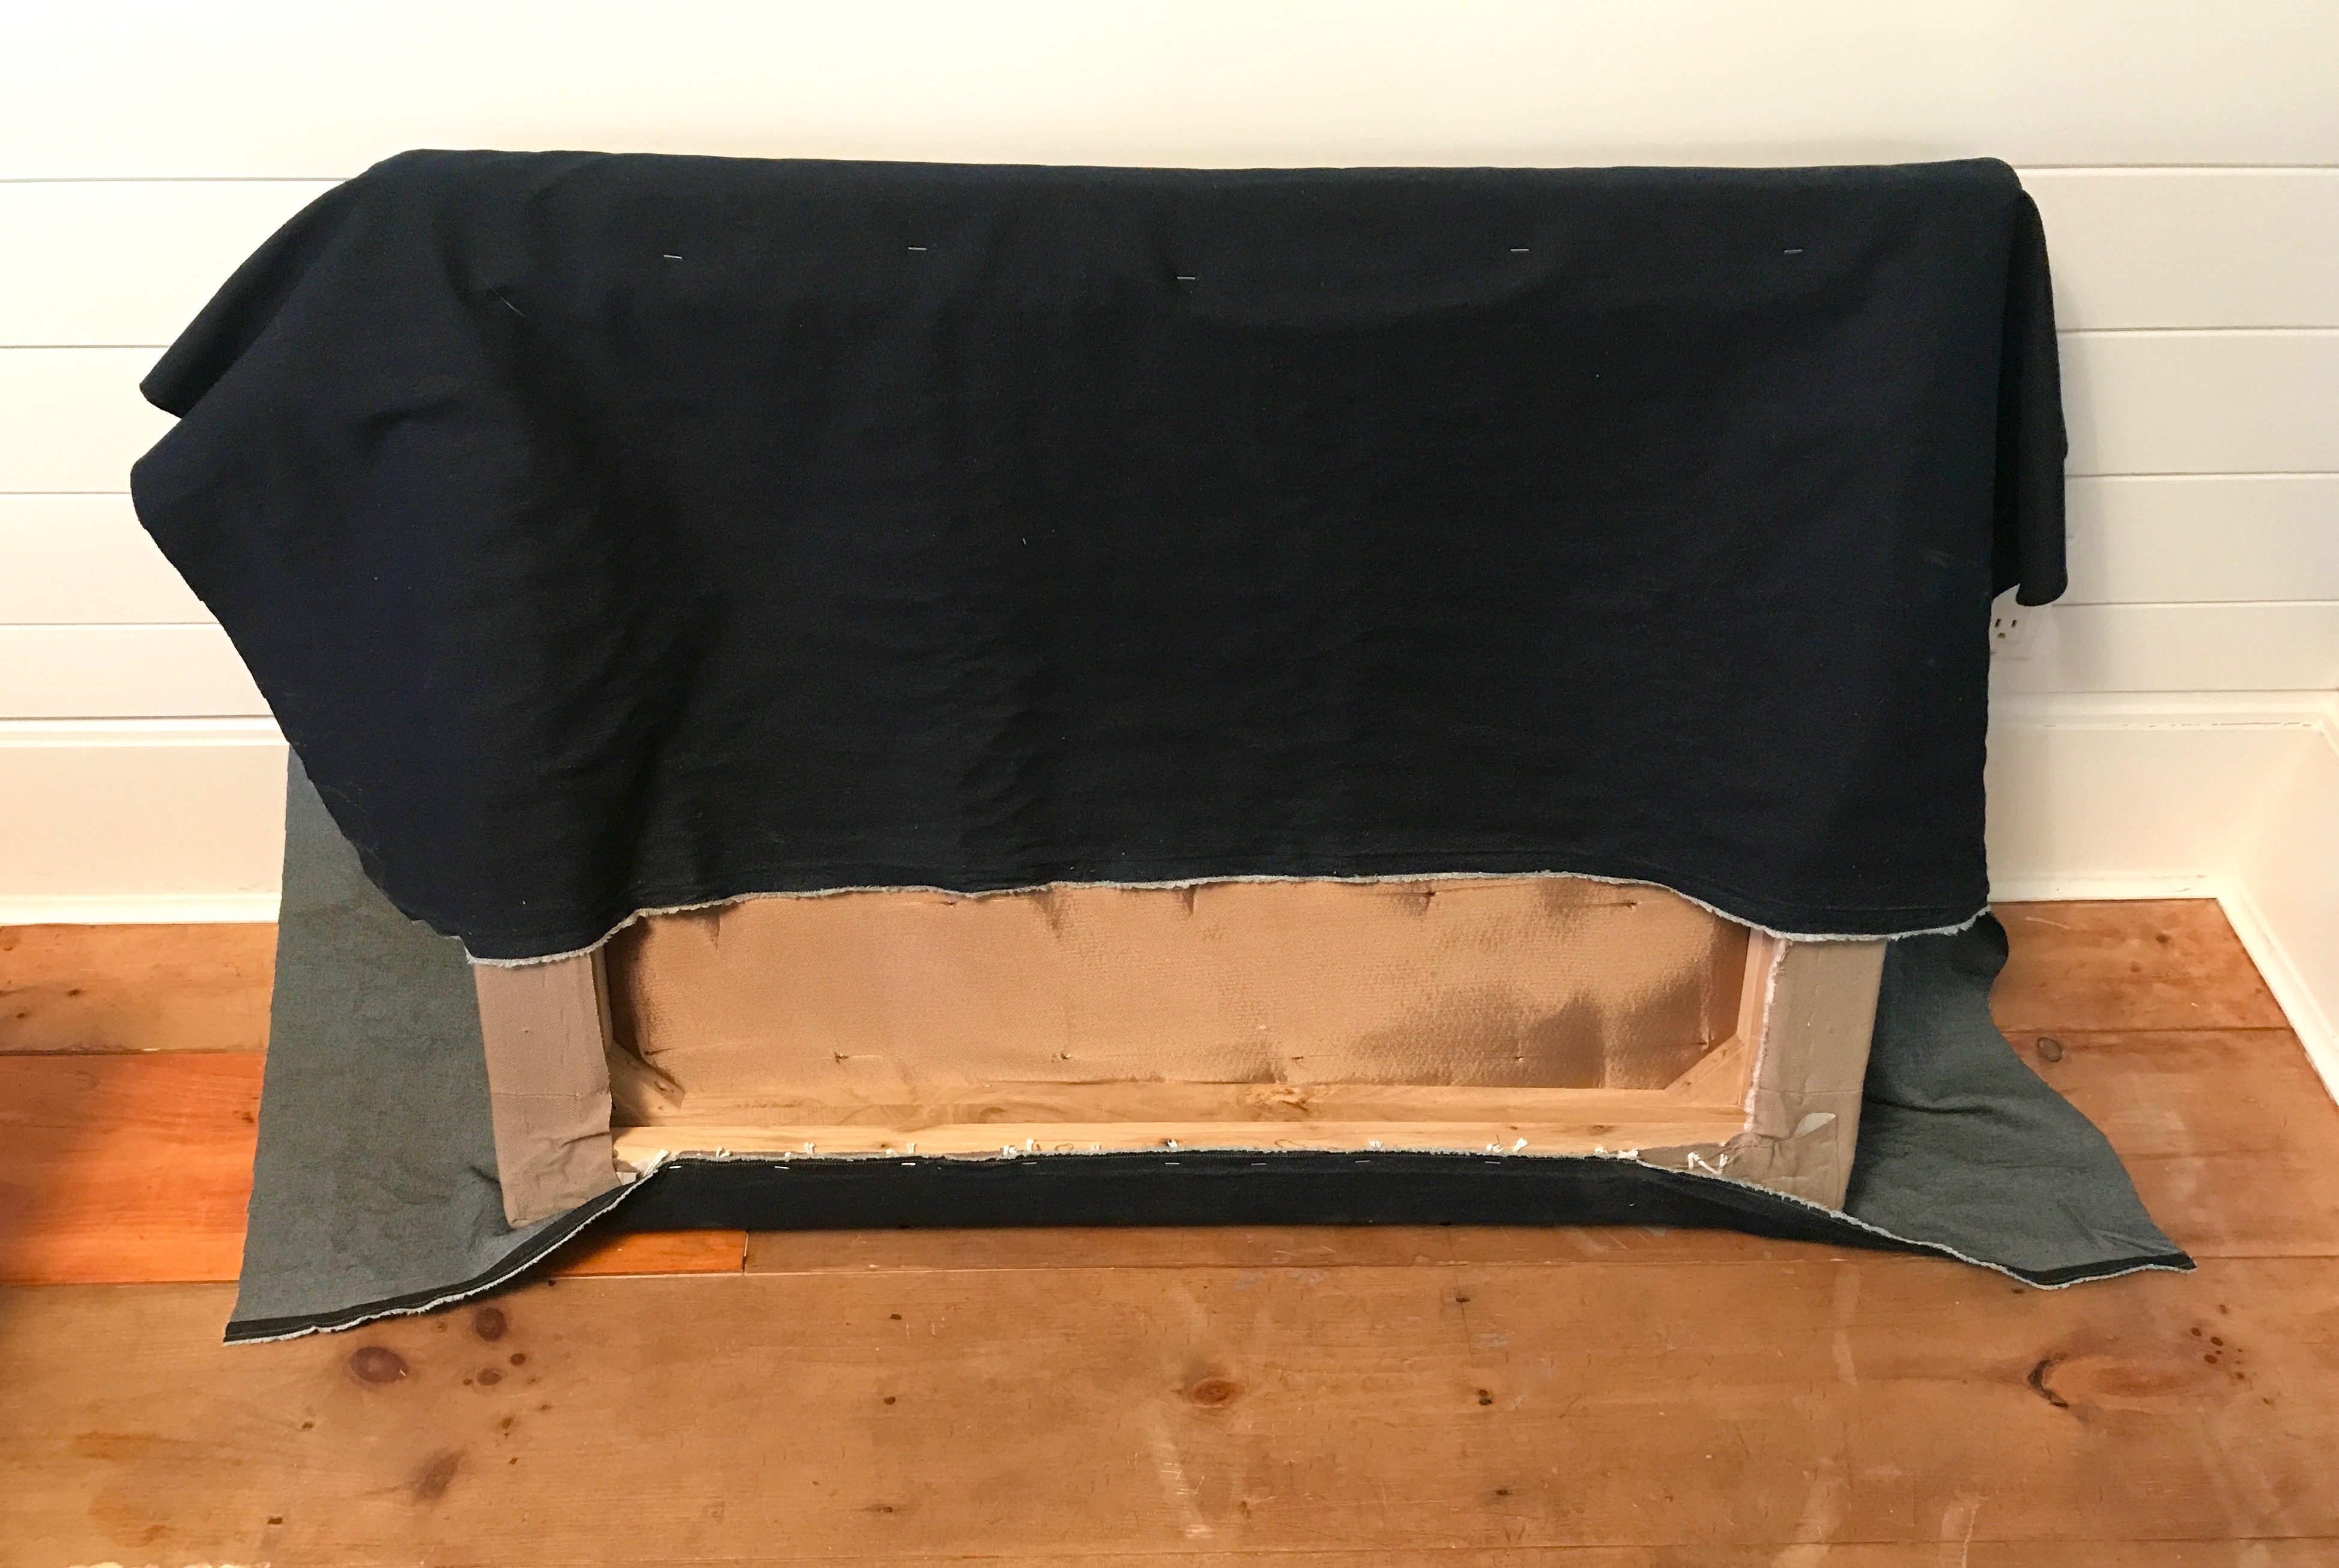
After taking the top off of the ottoman, I flipped it over to remove the backing fabric.
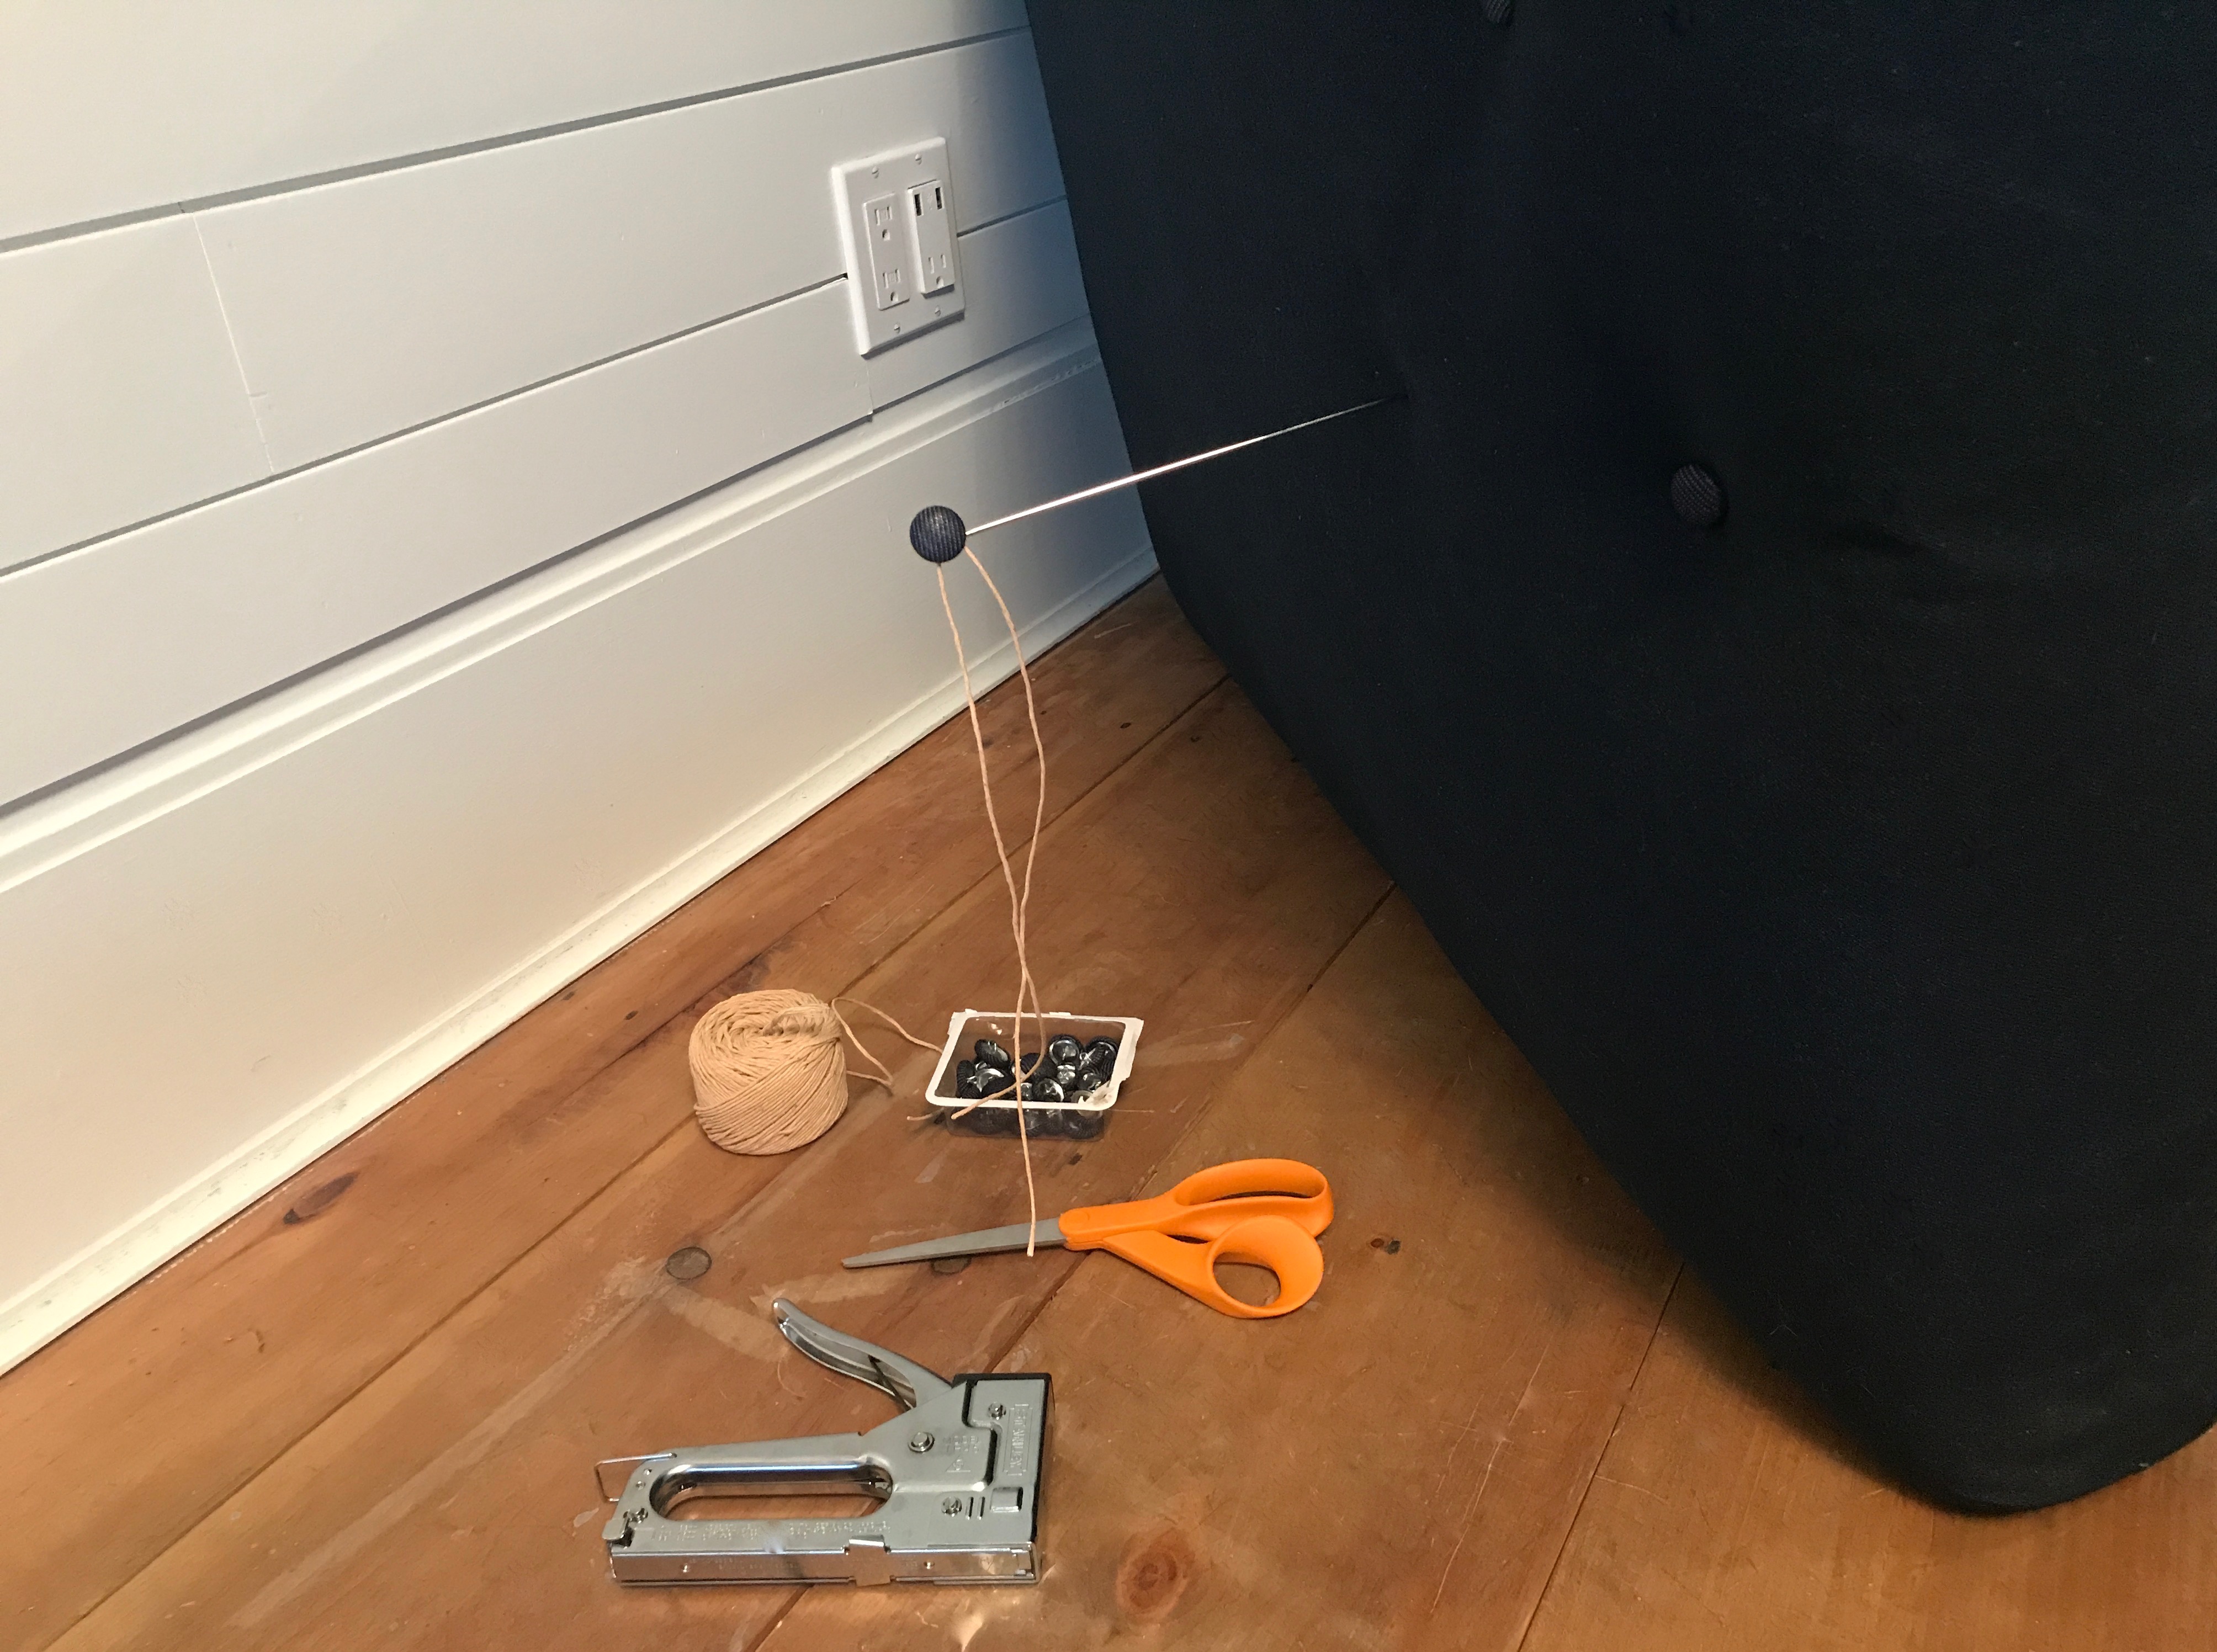
The inside of the ottoman is an organized web of string. Each string is attached to one button on the top.
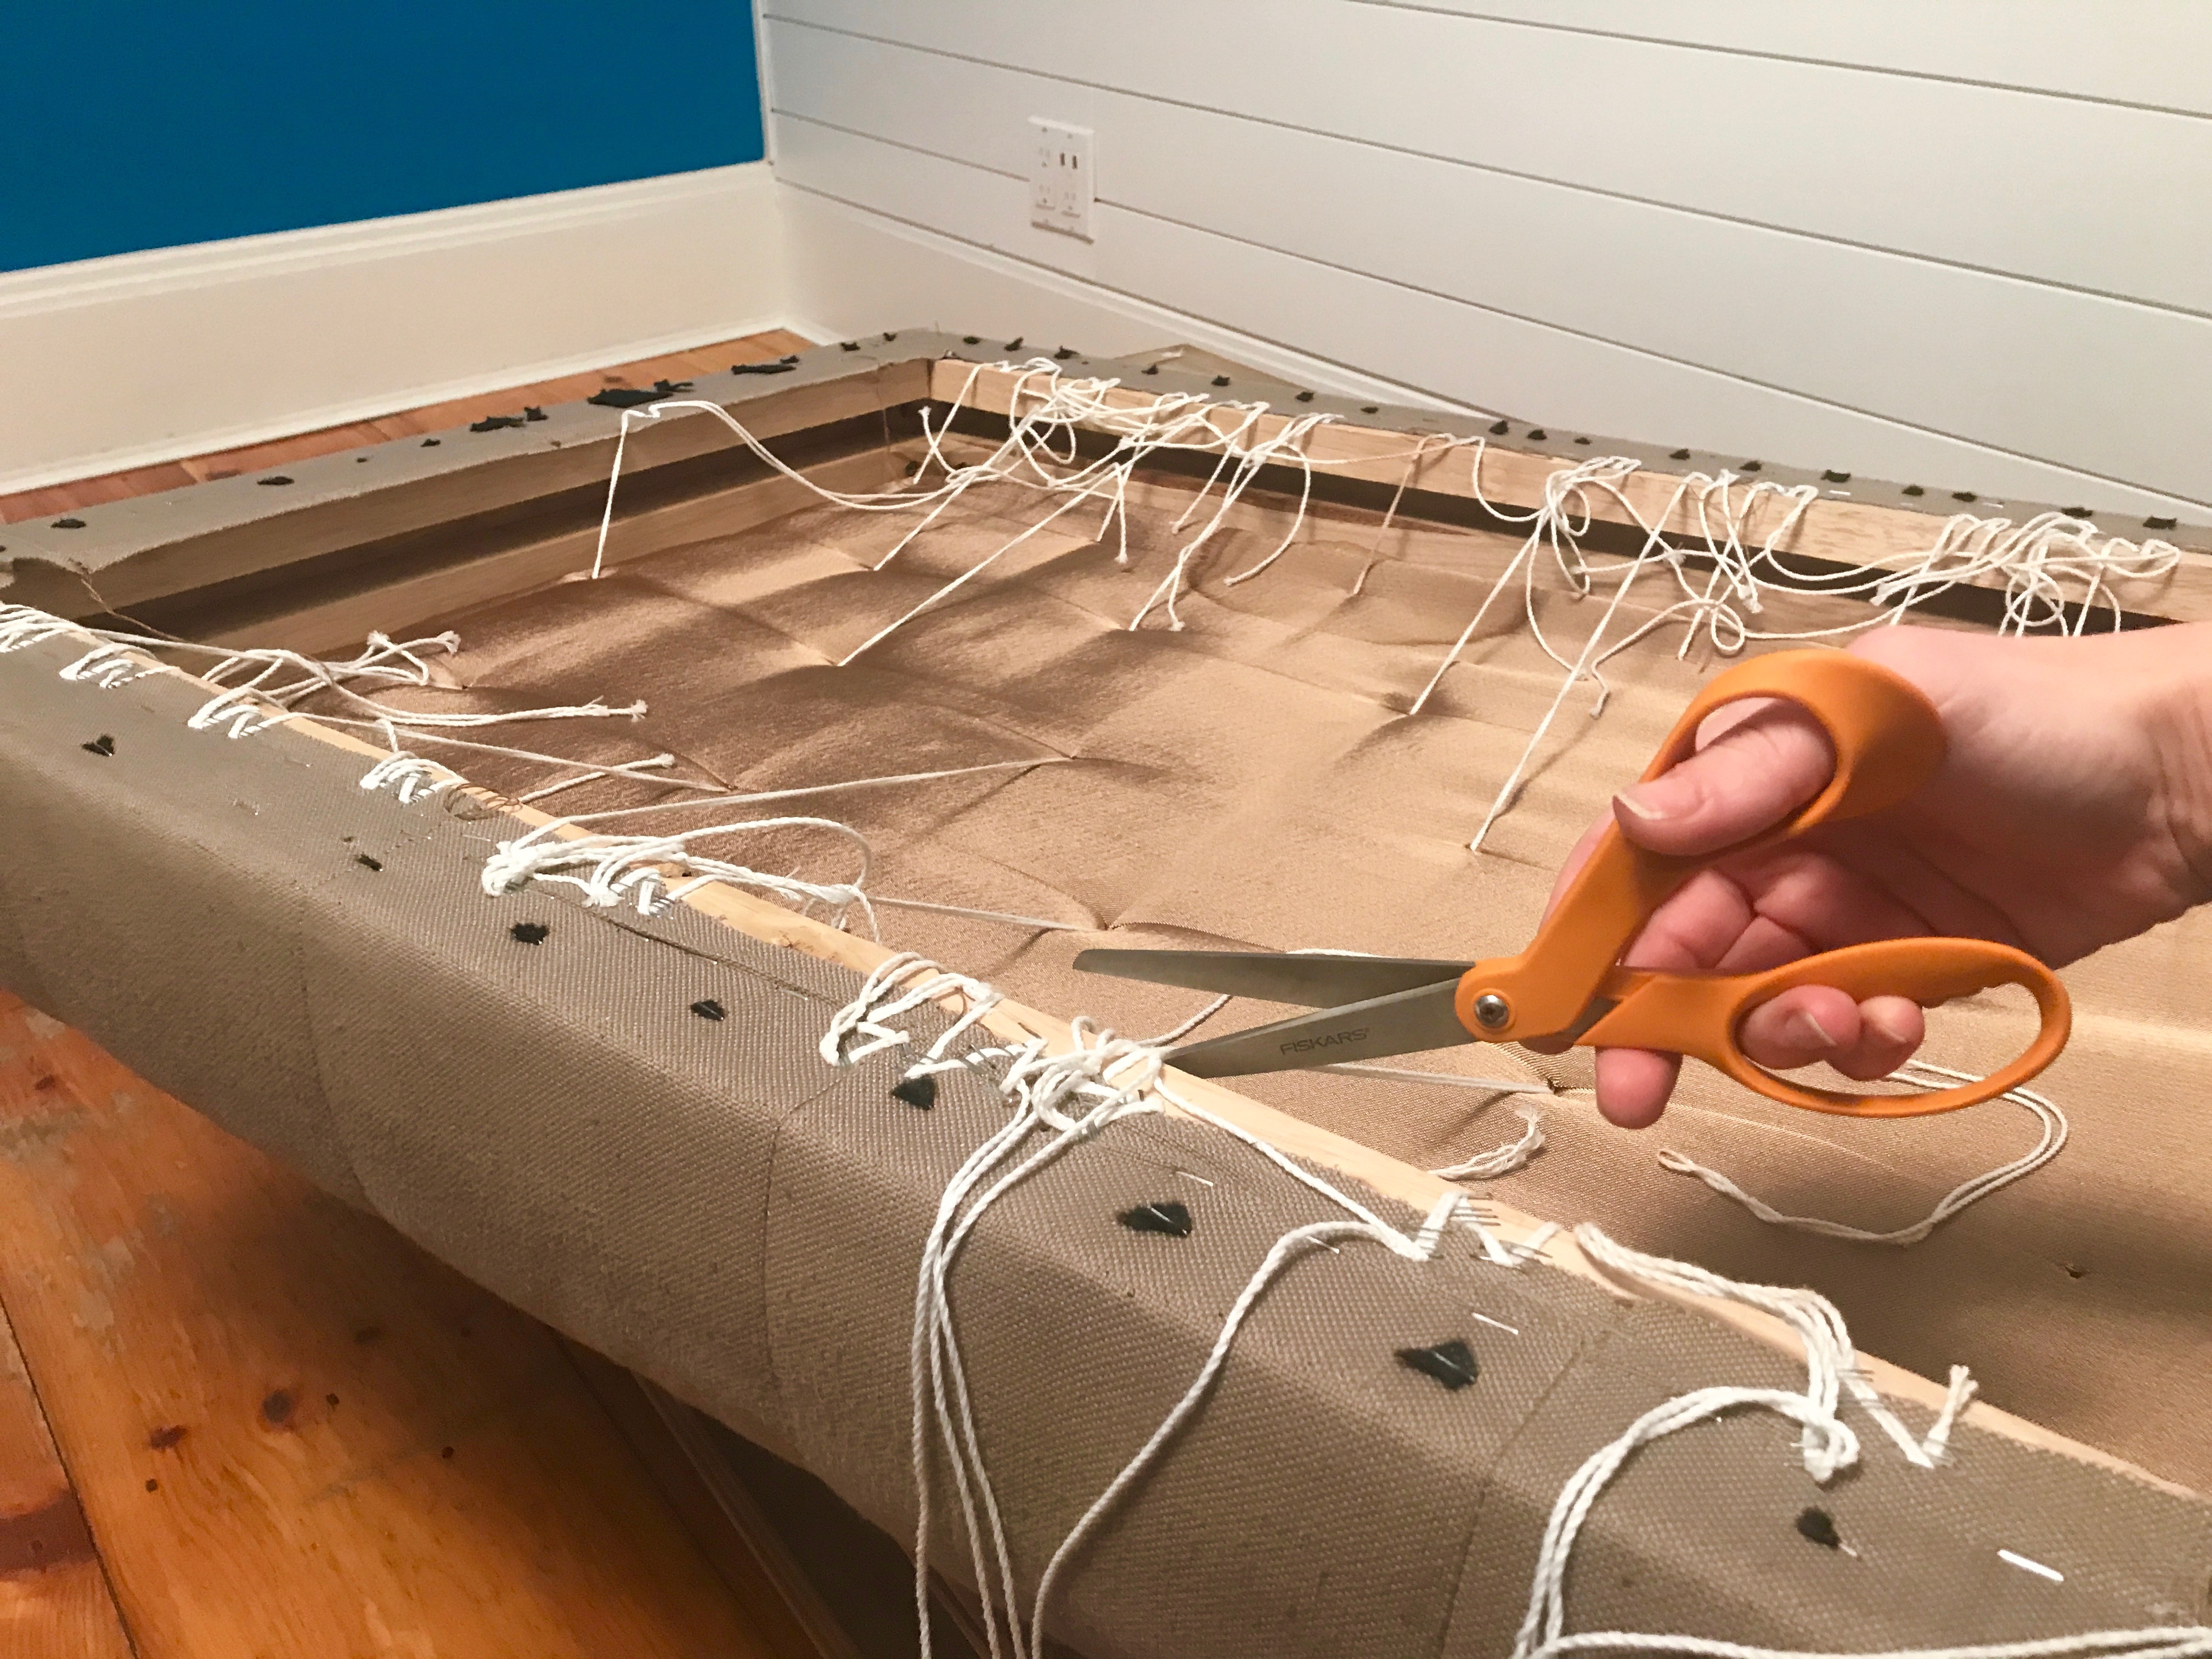
Next, I cut every string and pulled through to remove every button.
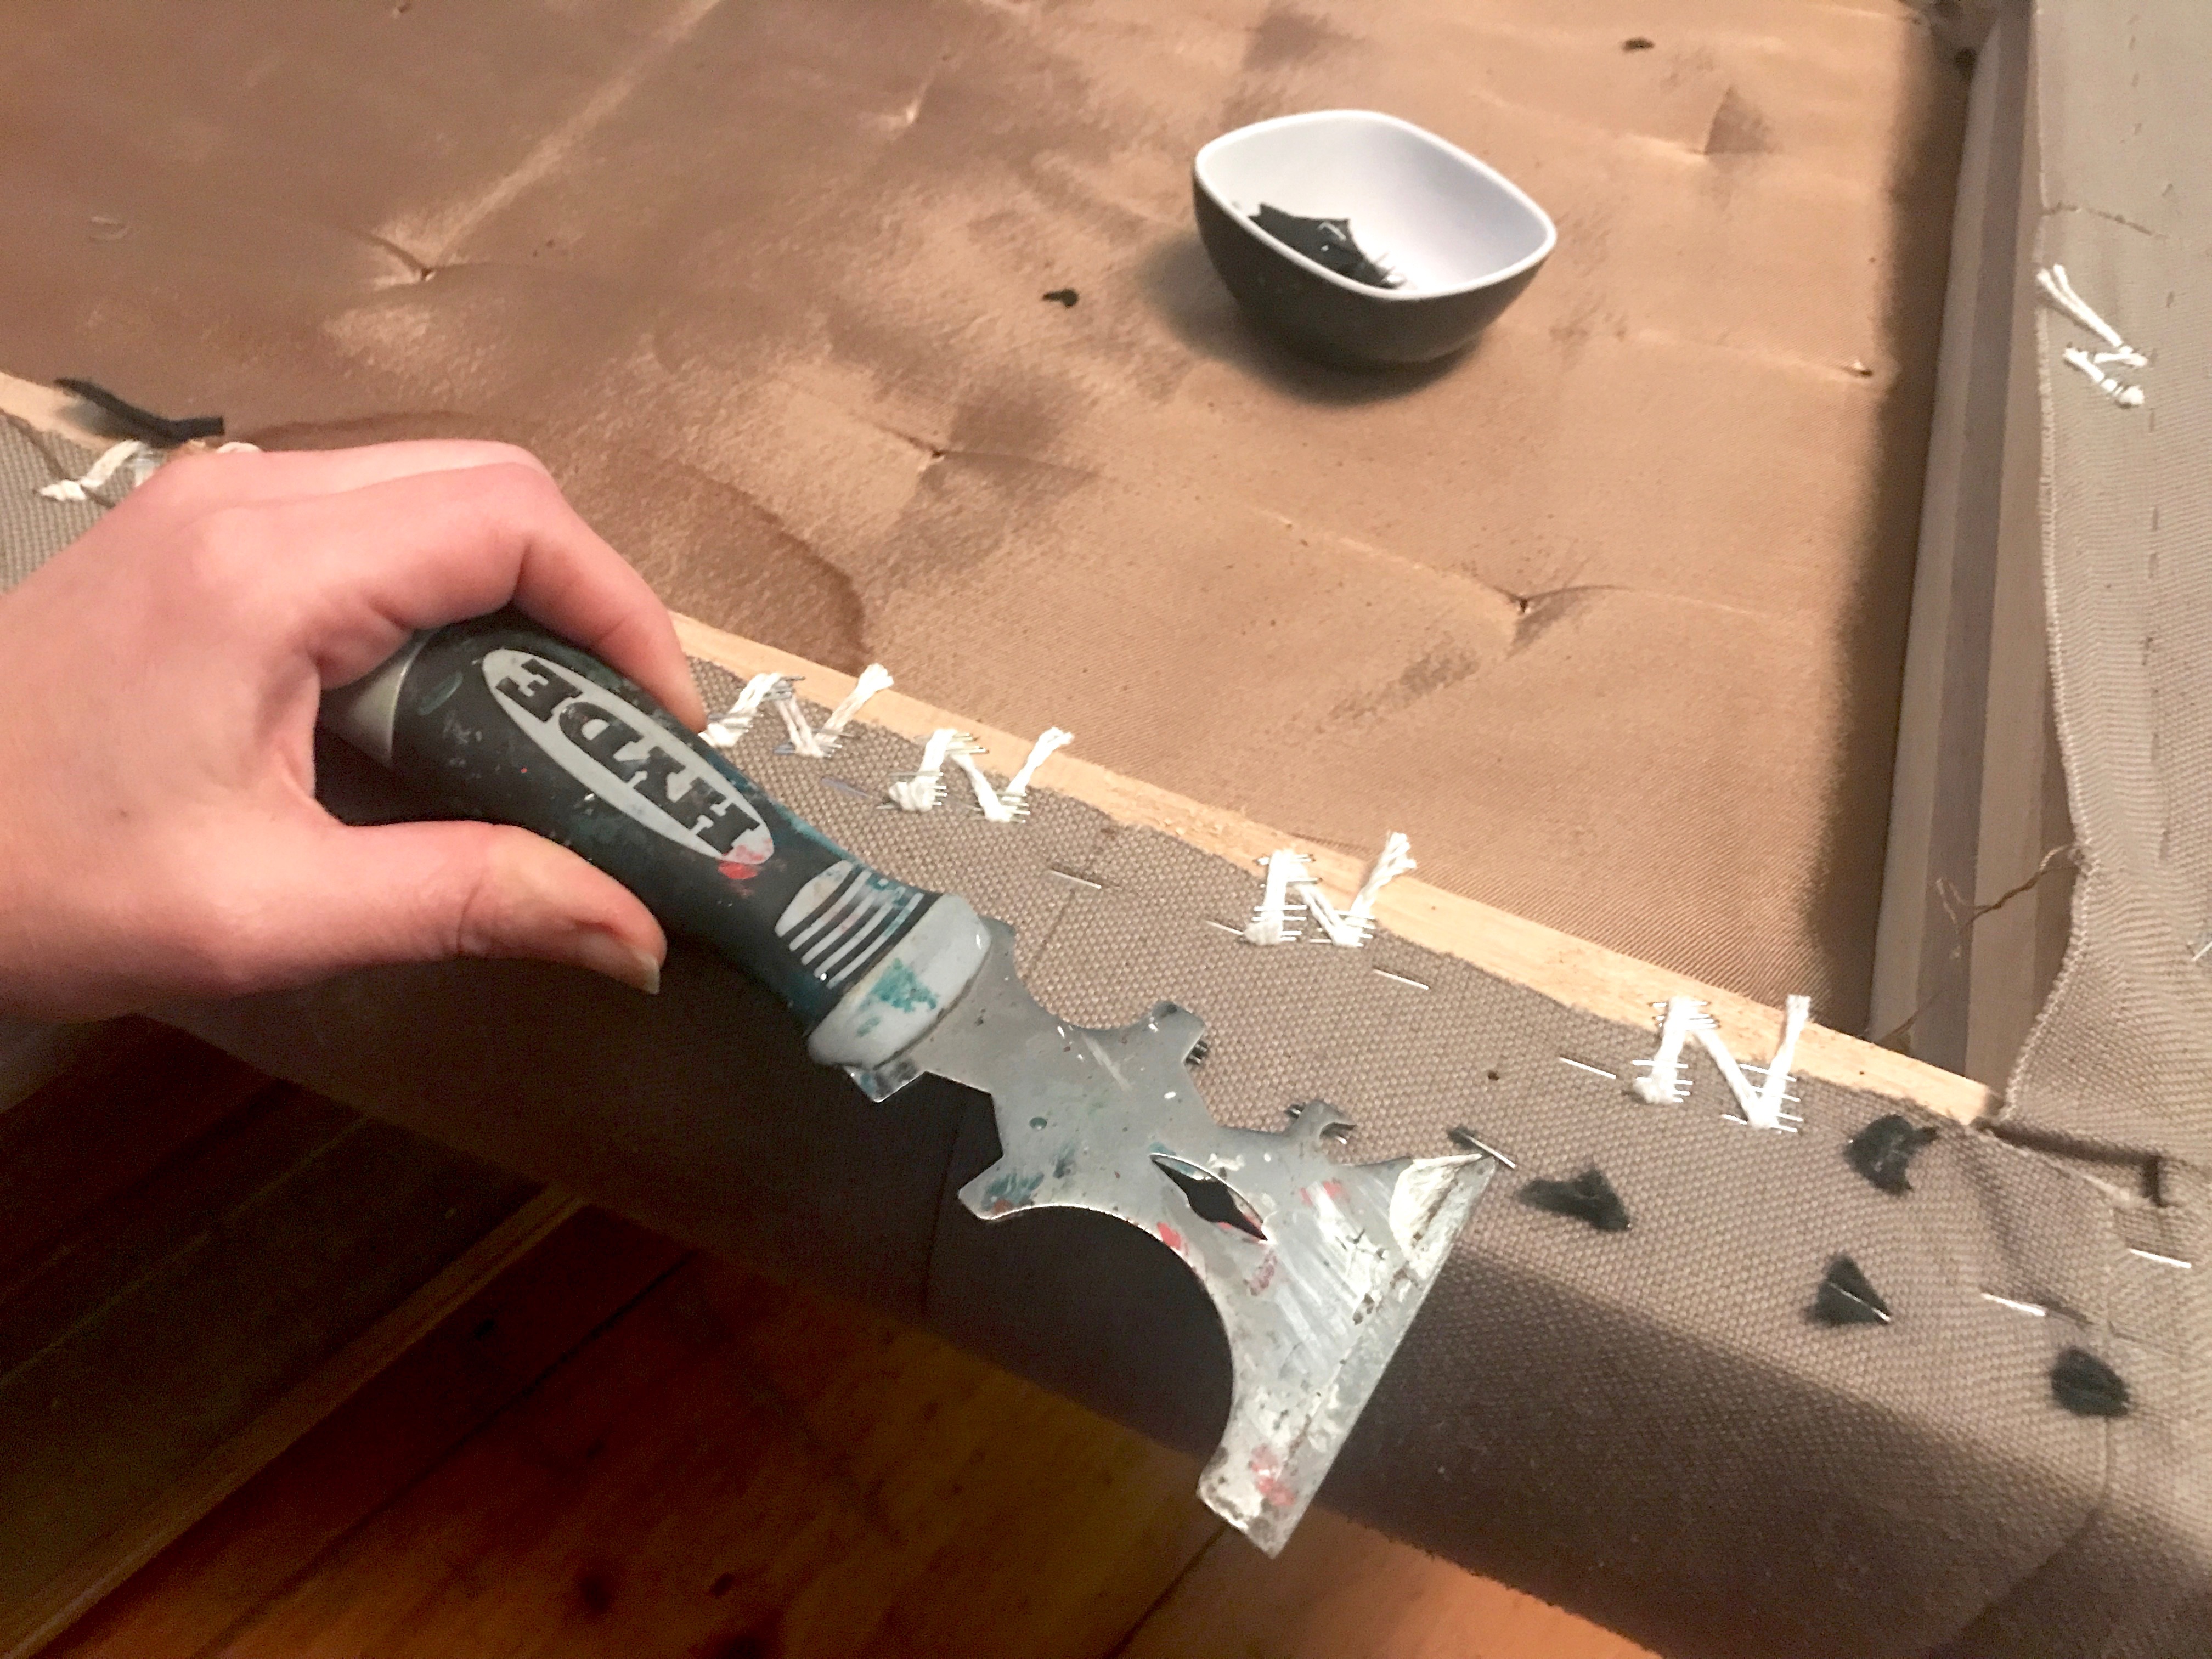
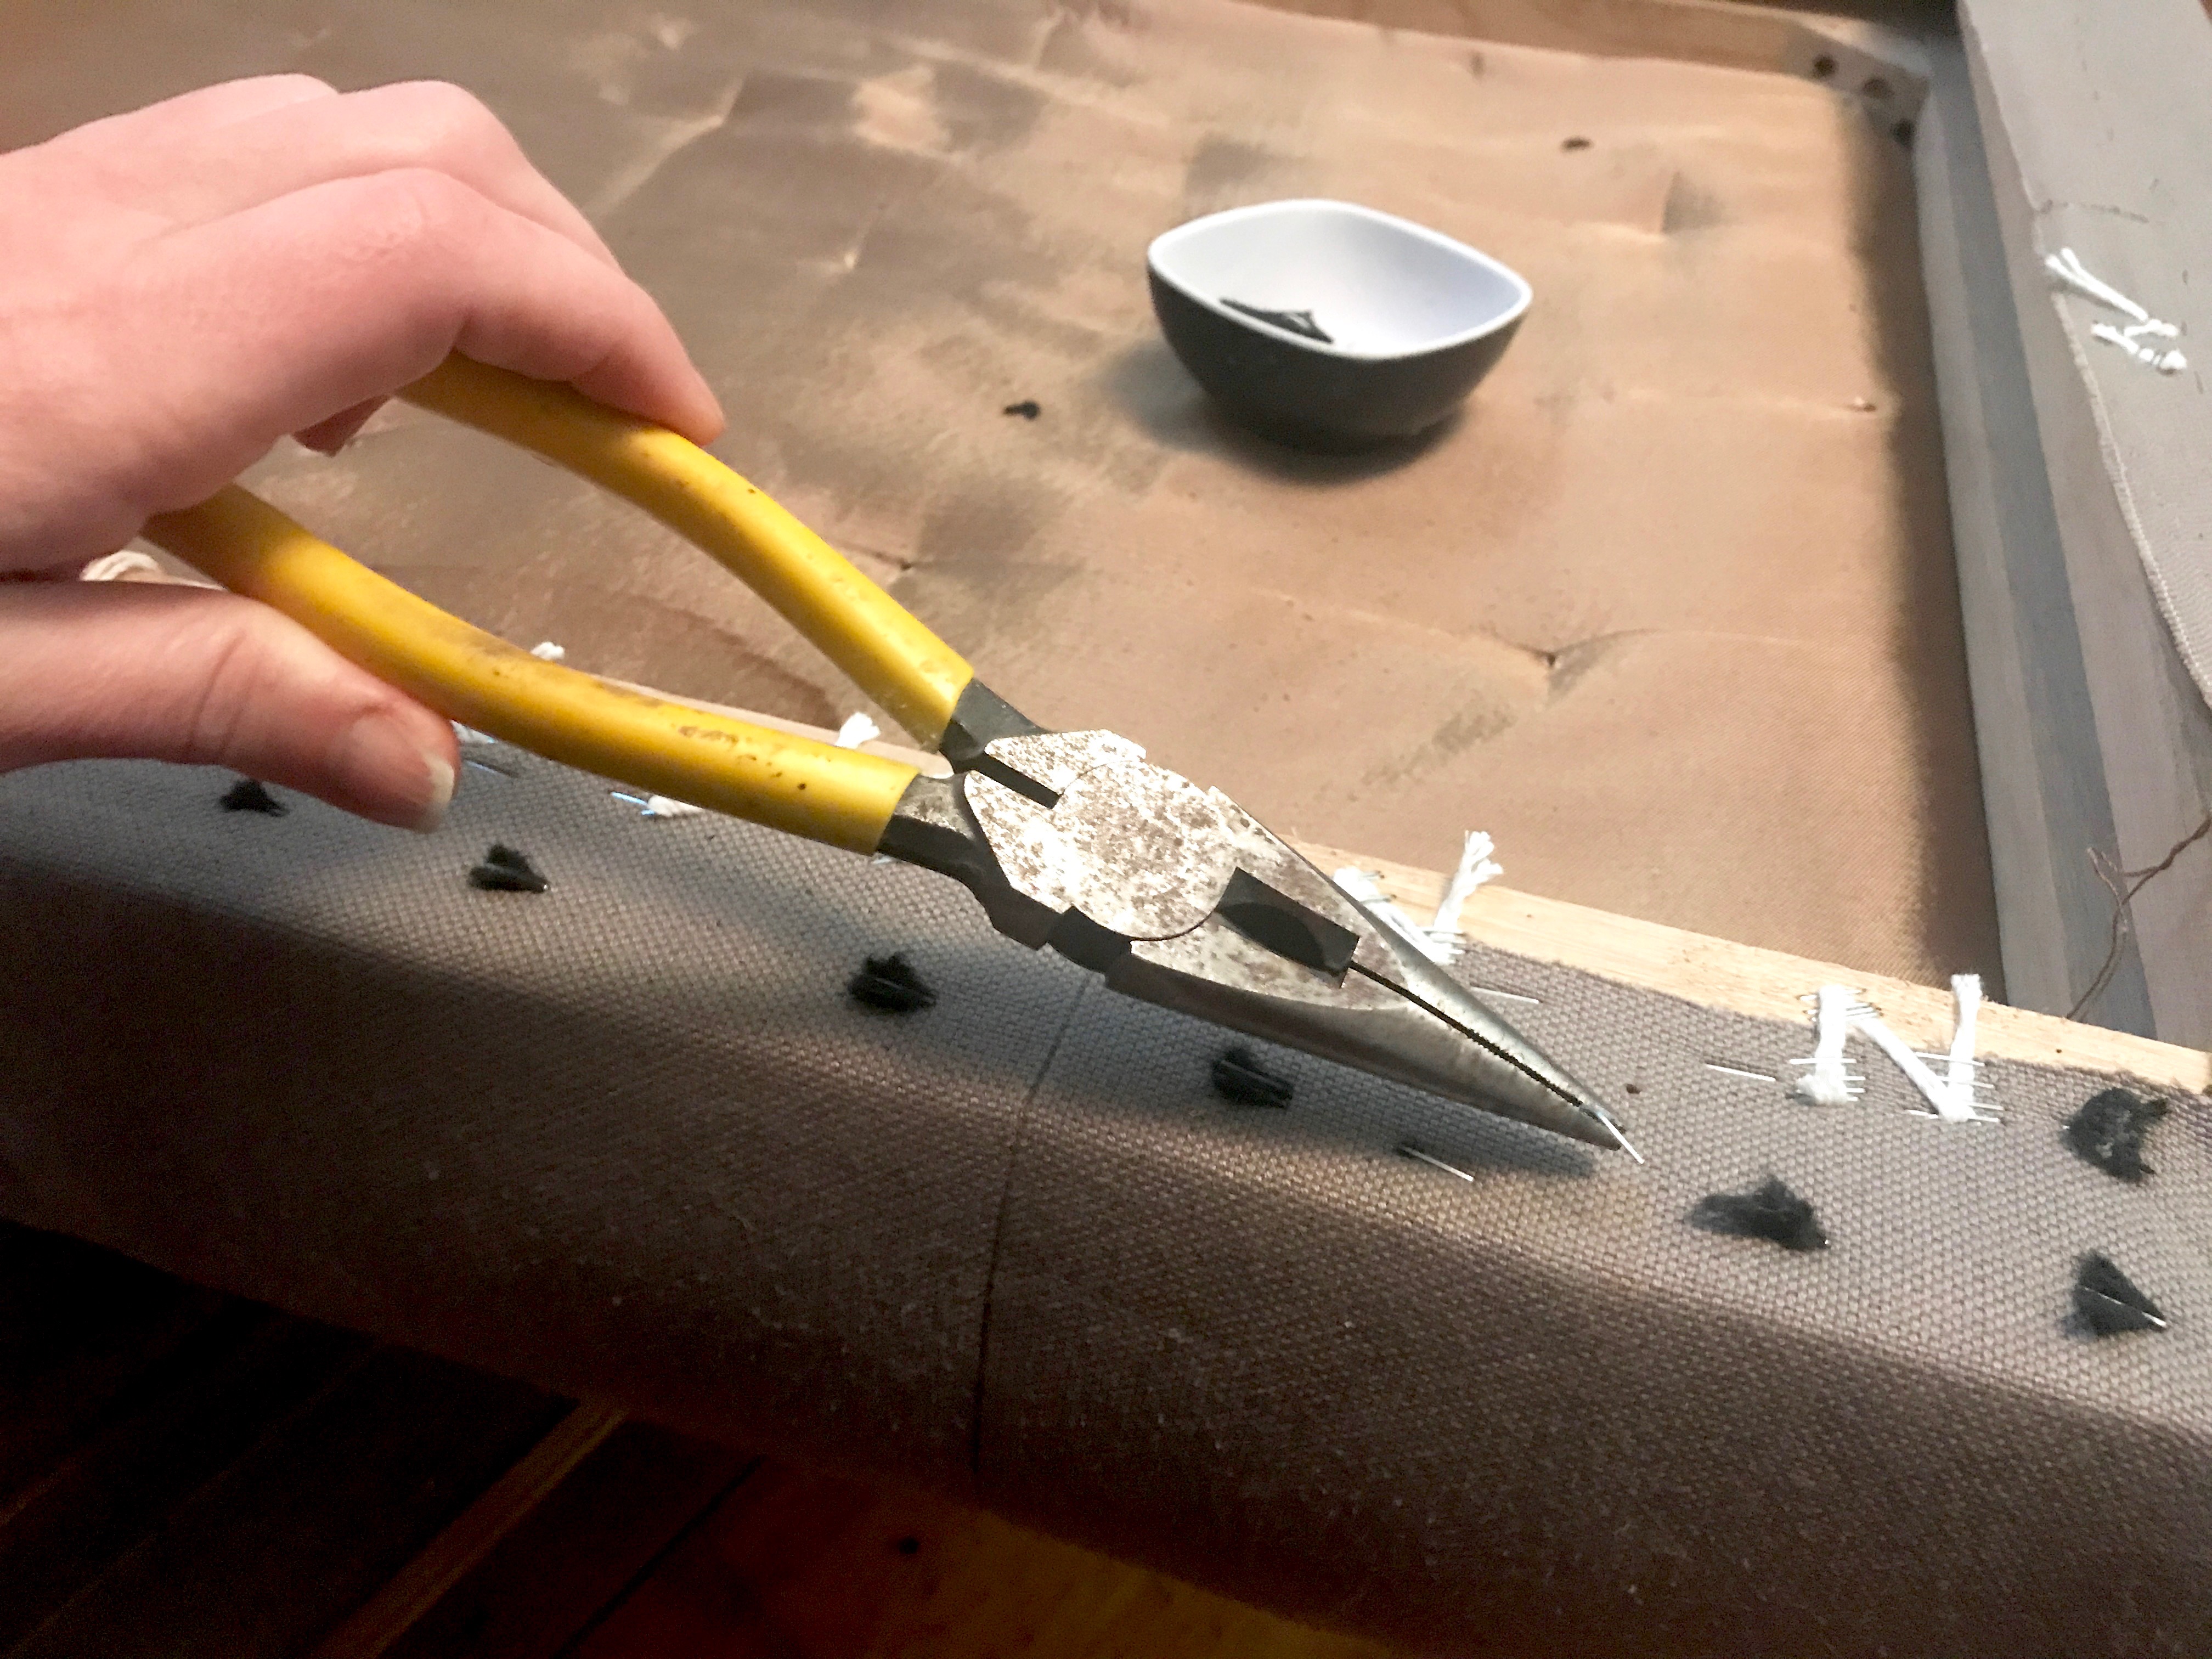
After I removed the buttons, I cleaned up the frame by removing the staples that were proud. For this purpose, I used my handy HYDE multi-tool.
After getting the staples popped up, I used pliers to get the staples the rest of the way out.
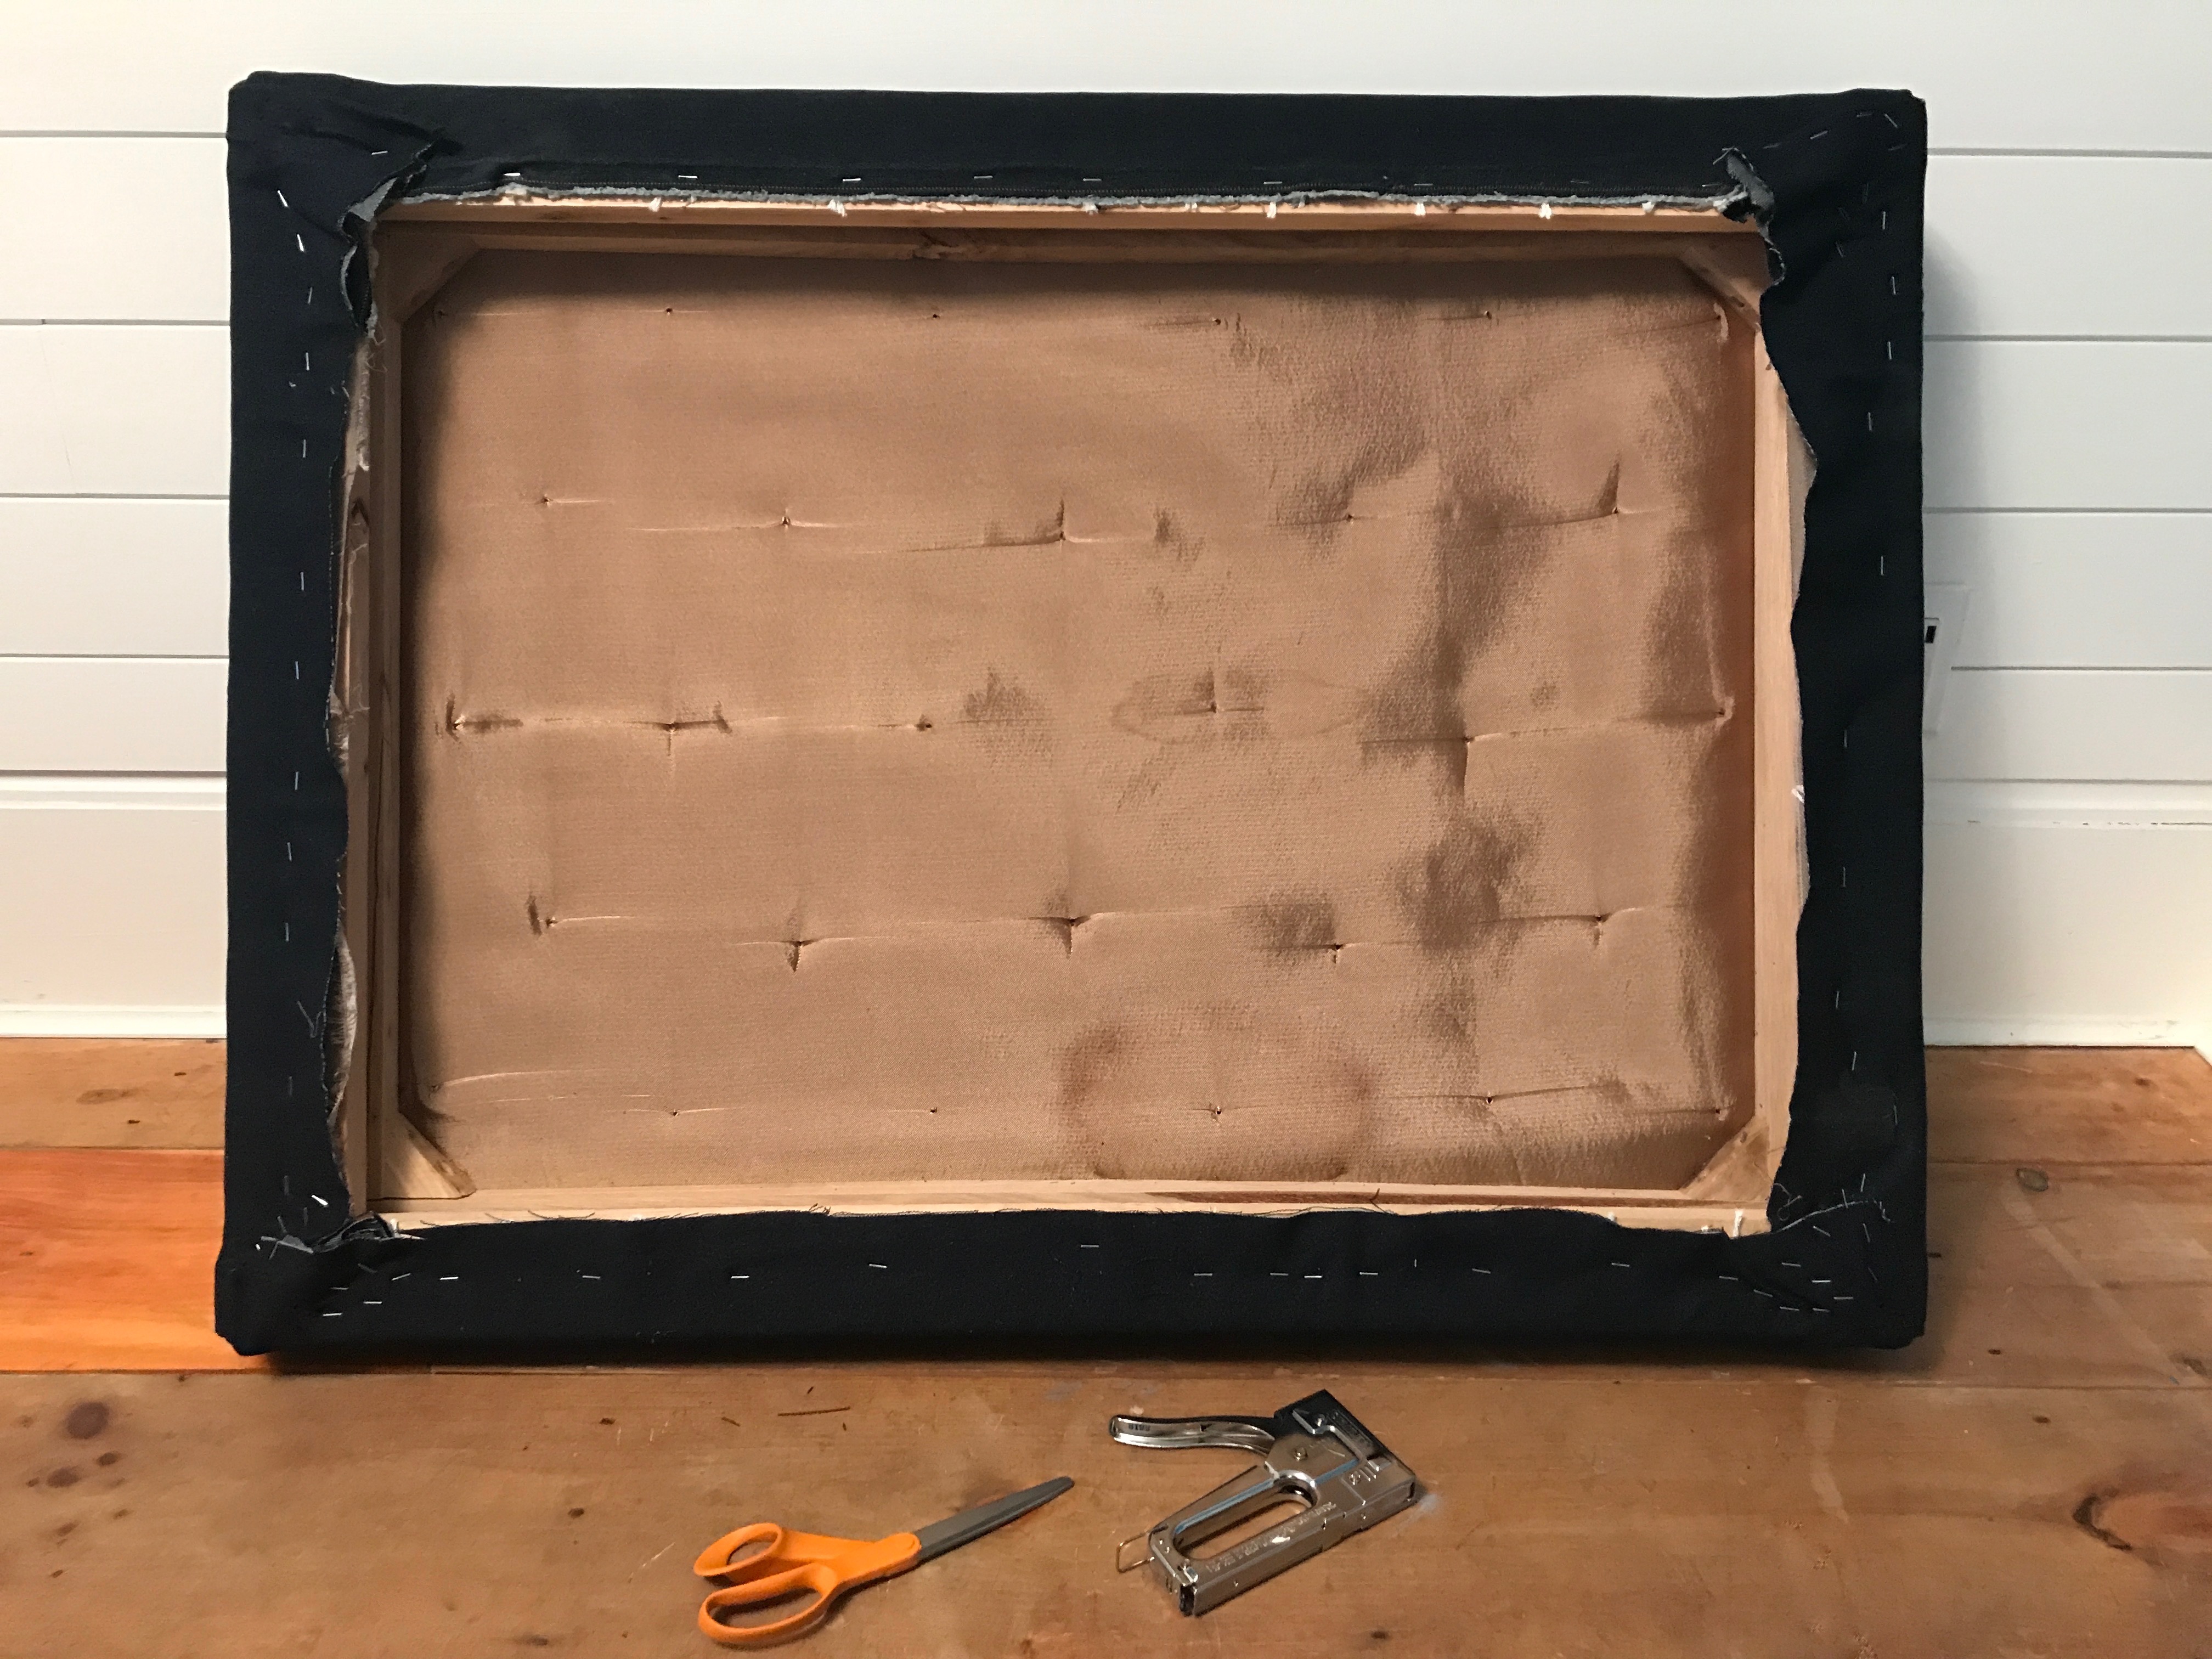
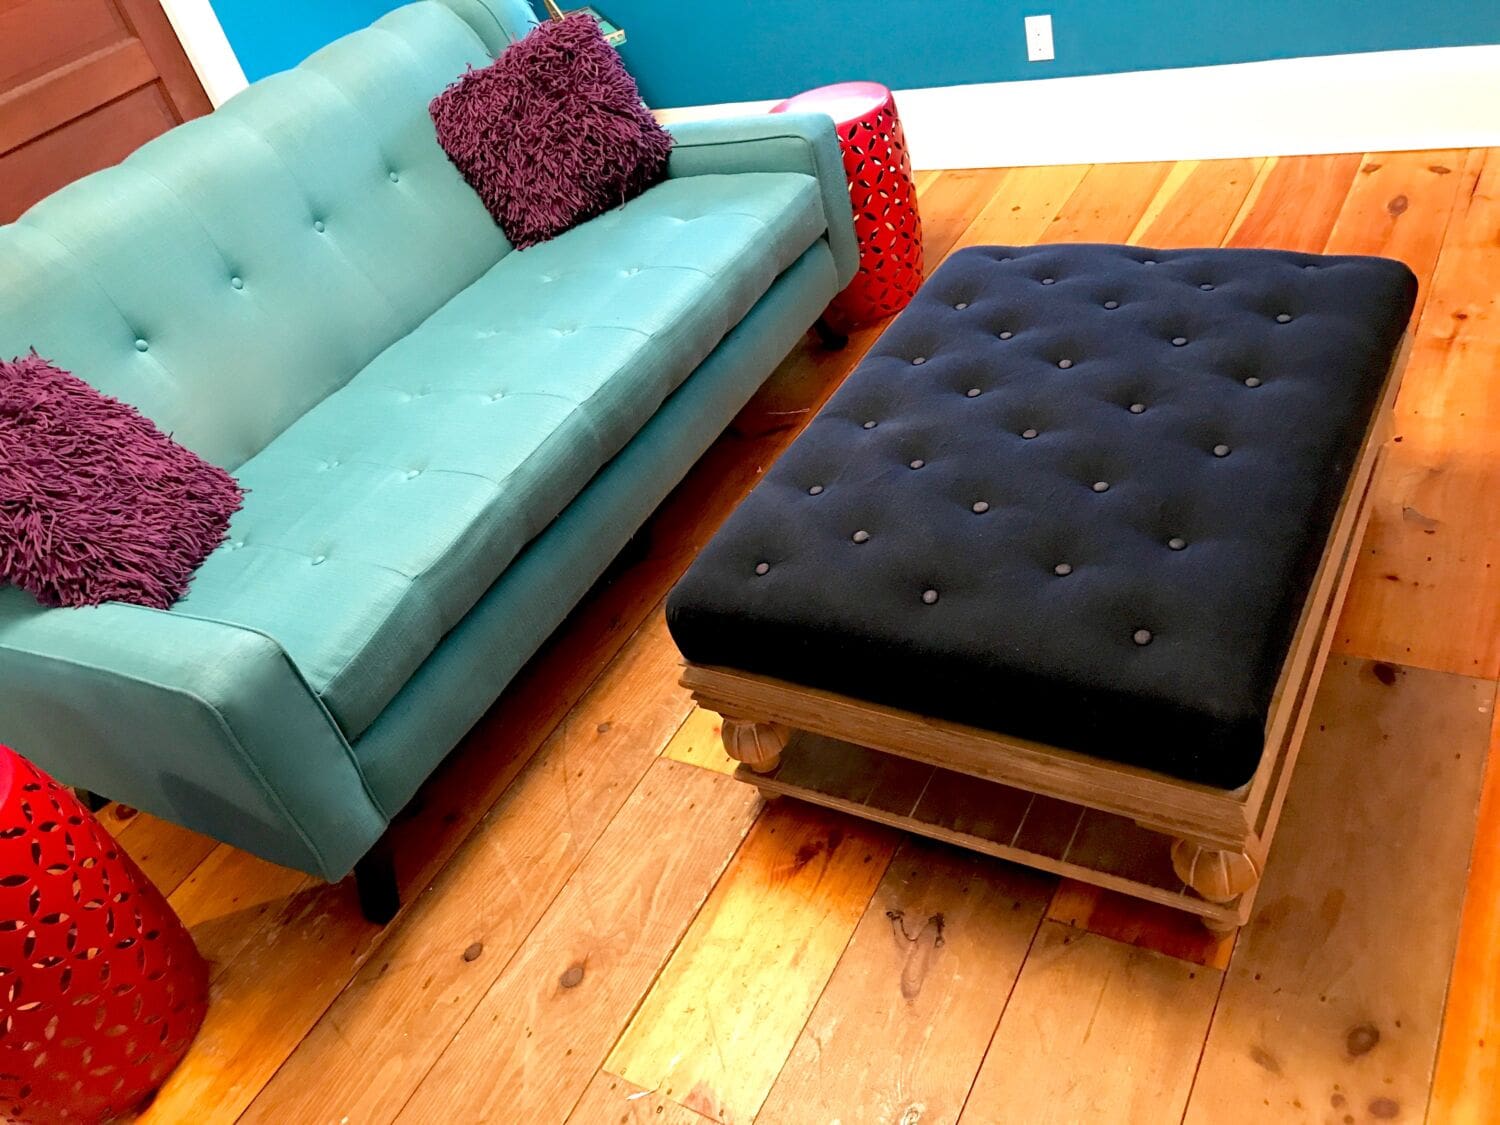
Next I chose a dark denim fabric to cover the ottoman. Not only is it durable, it’s dark so it won’t reveal messes as quickly. I started stapling from the center of the long edge, pulling it taught.
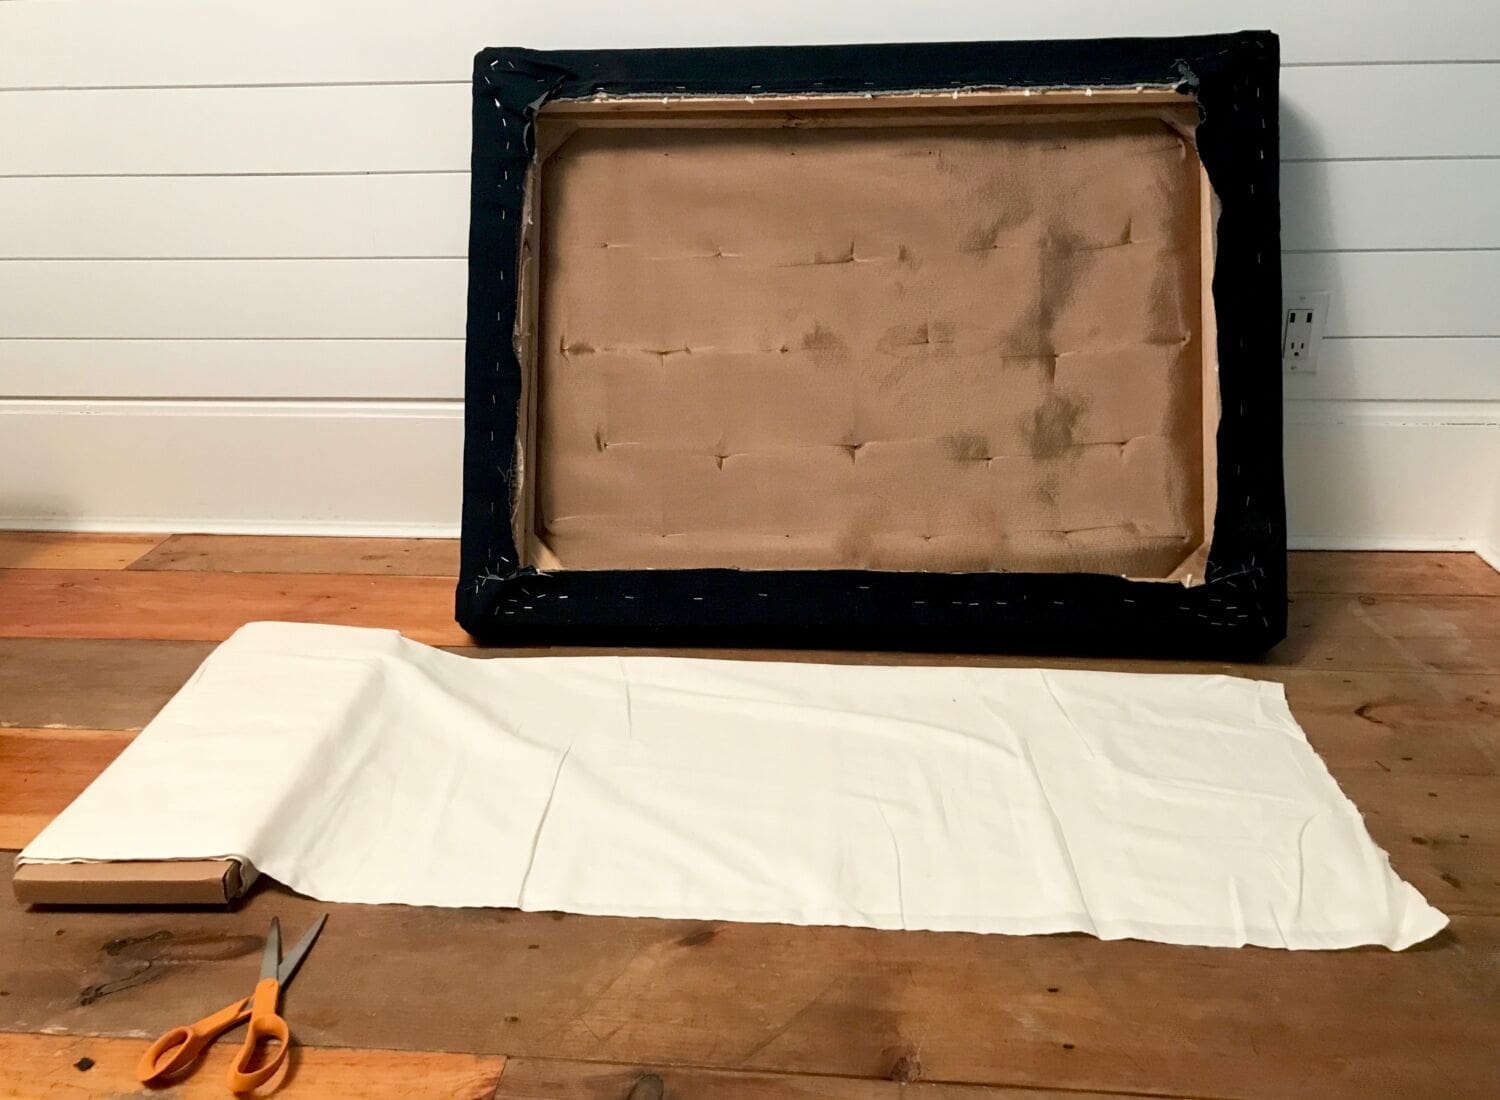
After stapling the long sides, I started stapling from the center of a short side. In addition, it’s important to make sure the fabric is as flat and tight as it can be.
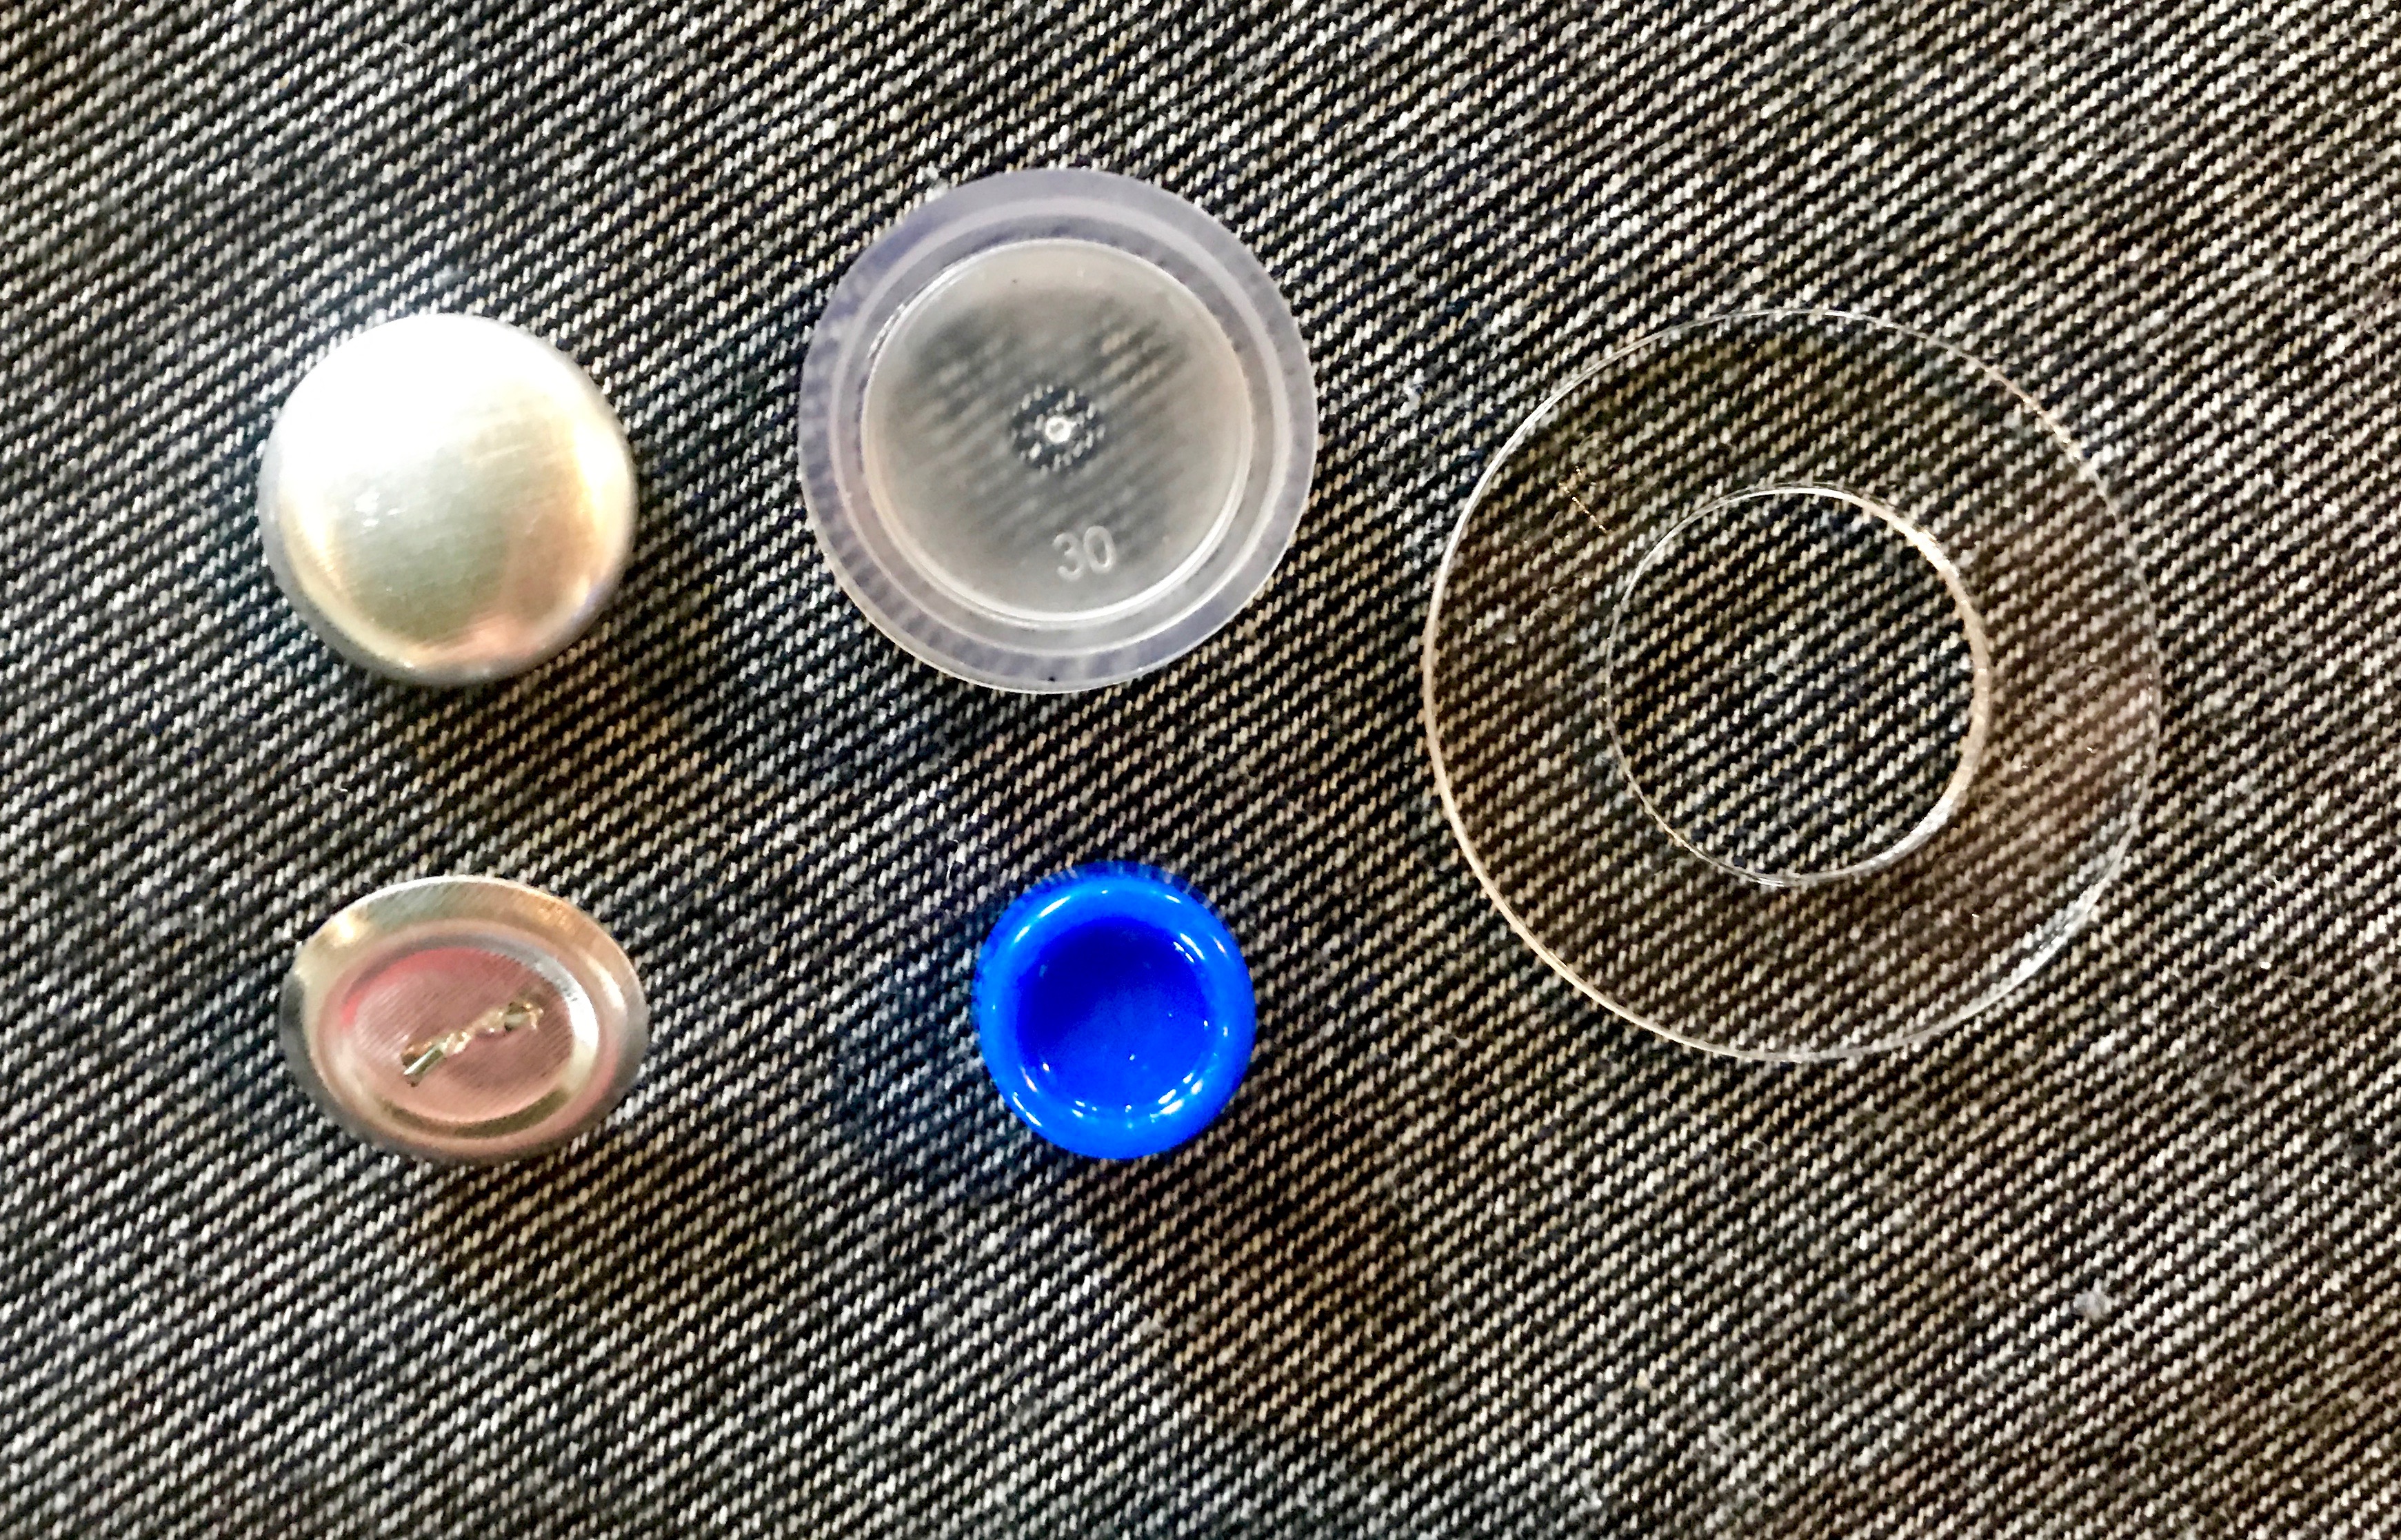
The next step involves the small work of covering buttons. This is what comes in a button covering kit. It’s fairly easy to use.
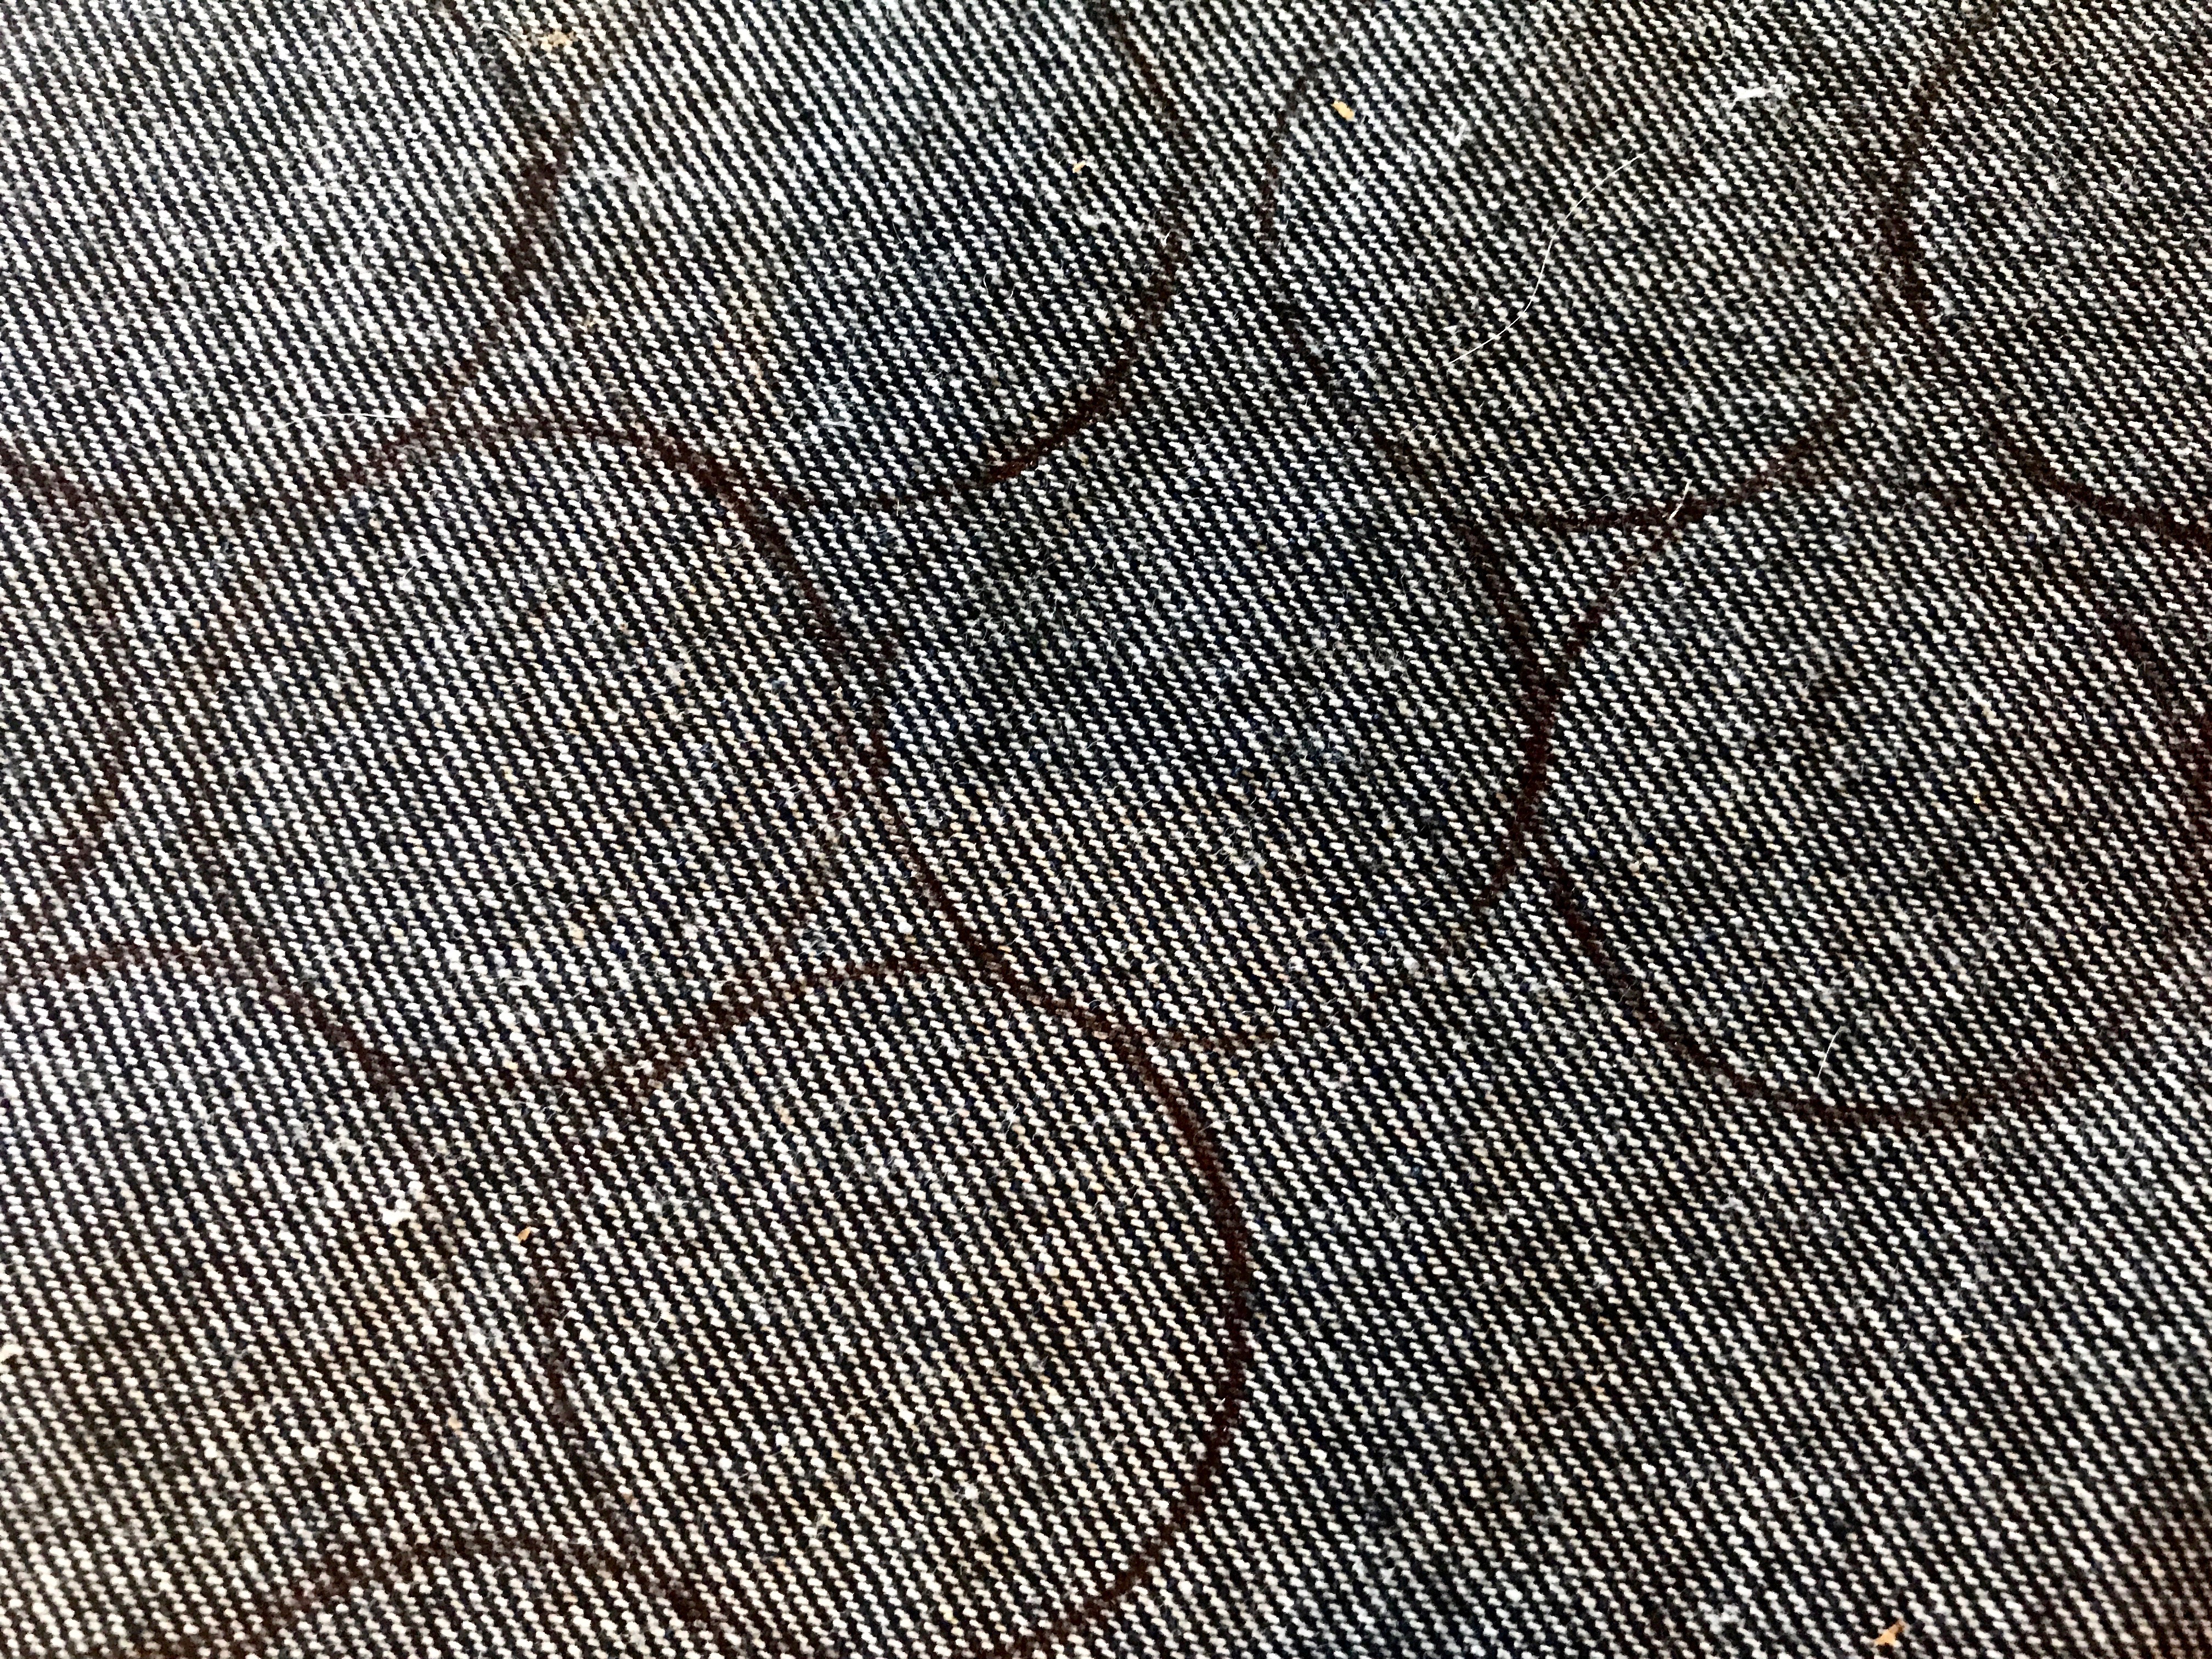
Then I used the clear template to mark 28 circles, one for each button, on the back-side of the fabric.
With the buttons ready, I used an upholstery needle and twine to attach each button through the top of the ottoman. I stapled the twine on the back frame, just like it looked before I cut the strings for the old buttons.
Now I’m thinking about how the ottoman looked before the new denim fabric... I can’t believe I waited even a week to do this makeover.
Theresa is a handy designer and writer. She shares DIY projects, tool how-to, and home makeovers as a book author, home show speaker, DIY workshop coach, and radio host. Plus, she has a degree in journalism with a minor in architecture, and is a Certified Aging-in-Place Specialist (CAPs) and certified color consultant.
She’s created fast-paced makeovers for TV shows, and shares home trends and DIY tips as a freelance writer and guest on news shows and satellite media tours for TV and radio.