If you have a backyard wood playset that needs some stripping, cleaning, staining, and sealing, this how-to is for you. I’ll walk you through the steps to clean a playset and stain a wood playset.
I think I encountered every deck-stripping, finish-applying, pressure-washing challenge bringing this baby back up to snuff. Pick up a tip, or check out how to build your own. There’s something for everyone.

Note: We partnered with Thompson’s WaterSeal on this project. The how-to, process, and deep-dive DIY—along with life lessons and a super sweet project at the end—are 100% MyFixitUpLife.

About ground contact and pressure treated lumber
First, learn how to build this backyard playset here. However, whether you chose to build or buy your playset, make sure the lumber you select is ‘rated for ground contact.’
Reason is, leaves aren’t dirt, but they can turn into it. Even though I blow the leaves off from time to time, enough of them decayed and got trapped in the decking to create a little ecosystem in there that could support life.
It didn’t hurt the pressure treated lumber, but it would have been problematic to stain had I not gone to extra effort.

Mea culpa. It’s not like I didn’t see it or care. It’s just all the other adult-ing I had to do for other, more pressing projects. This, of course, got me in the habit of saying, “I’d better get to this.” Then, the first thing I did was not get to it.

This is a picture of what running out of excuses looks like.

I don’t know it yet, but a few minutes with the garden blower is about to turn into a few hours and realizing just how far I’d let this get ahead of me.
Come along as I start another chapter of the this home improvement mission—and learning and re-learning the many lessons of owning a home, having children and the DIY life of building our own backyard playset.

What’s the problem?
The original finish we used looked like it wanted to pack-up and move out the day we put it on. In a few places it had already left.

You have to tend a garden for it to grow good stuff.
This garden is, at best, a weedy mess. But as I look at the Wiffle ball bats, croquet mallets and other stuff strewn about, I’m starting to get excited for how much better it’s going to look once its cleaned up and properly treated.

How to clean the playset
I started with a witch’s broom and garden blower. Yeah, no.

There was more dirt jammed between the deck boards than I thought. To get it out, needed a more focused stream of air. I also used my painter’s tool—which I use on every job, it seems—to gouge out dirt from between the boards.

Finally, the leaf blower is the right tool to blow the debris away with. Also, this is the big/small dynamic developing. Even though I have a lot of ground to cover, I’m still doing it in a child-scaled environment which makes moving slower and trickier. Yes, I bumped my head about 80 times.

Pressure washing
Before gearing up to remove deck stain or do pressure washing style jobs, I keep a few things on-hand or in-pocket. A long rag is awesome and puts me in mind of Epstein from Welcome Back Cotter (yes, I am 1,000 years old).
Because the Thompson’s WaterSeal Maximum Strength Deck Stripper is just that—maximum strength—I want to keep it off my skin. While the face shield (right) goes a long way to keeping my face and eyes protected, if my nose is itchy I’d scratch it even if my hand were on fire. Human nature.
So instead of scratching it with my gloved hand, that may have stripper on it, I use the rag.
Soapy water is for quick clean-ups or to wash my hands; some glass cleaner for the shield. Long sleeves and pants are a must. The water bottle goes a long way to keeping me hydrated and my limited brain activity functioning normally.

How to stain a wood playset
When embarking on this next part, stain a wood playset, it’s important to consult the directions on the label of the stain. The directions on the Thompson’s WaterSeal products I used advise testing in an inconspicuous place before you start. It’s a good idea.
Not because there’s much (any, really) risk of the product doing damage. Rather, it gives you a preview of what you’re up against. I made the mistake of NOT doing it on my pergola project. Lesson learned.
Deep-dive DIY can inspire you to find ways of making the mountain of work more molehill-sized.

Using the deck stripper
The Maximum Strength Deck Stripper works best when the wood is soaked with it. So I applied some with the garden sprayer, where I ended up spraying more into the air than I wanted to. Next, in a light bulb moment, I put a little in bucket, dipped the bristles of the brush in it, then scoured the railing parts.
First, 90% of it went on the wood, not into my lawn or fence. Next, the old finish didn’t stand a chance. Then, stripper mixed with old stain and formed a slurry in the bucket that kind of hung on to the bristles and the wood better than straight liquid. It was a lifesaver.
Although this process definitely involved some manual labor, the Maximum Strength Deck Stripper was the perfect product to work with, and wet-bristling the verticals crushed the finish and enabled me to get in virtually every nook and cranny.
And, yes, it occurred to me how weird it was that a person who owns all-the-tools-ever is using a $4 grocery store scrub to clean a mega-playset complex.

Look close and you’ll see the old finish coming off. I try to work two balusters as a time. It means that I’m far enough away from the wood with the pressure washer nozzle to keep it from fuzzing it up.

I noticed a grit on the playset as I started apply the sealer.

While I thought it was wood ‘fuzzed up’ because I go too close with the pressure washer, it wasn’t. The wood held up tremendously well. It turned out to be dirt and mold and yuckiness that the stripper/brush treatment left behind. It’s not a failure: Stripper strips finish. Detergents clean dirt.
Using wood cleaner
So, despite being pretty exhausted, I re-booted to apply Thompson’s WaterSeal 3-in-1 Wood Cleaner. Technically, I should have scrubbed it as well, but I also realized another truth about deep-dive DIY: Sometimes, done is better than perfect.
The 3-in-1 Wood Cleaner + pressure washer brightened and restored the wood’s natural color, getting it to near-perfect conditions for adding stain to the backyard playset.

More truth: You can’t burn water and you shouldn’t paint dirt.
Because of rain and pressure washer spray, mud and dirt spattered onto the wood. So, brush-time again. The dirt was powerless.

Few tips
I like to wear gloves when applying the color. My hands stayed reasonably cool, no stain soaked through them and it was easy to manipulate the brushes I used.
Also, after pouring out I keep a paper towel to wipe off the can’s spout. This makes it easier to open the next time I need it.

As an added precaution, I tucked the can of Thompson’s WaterSeal Waterproofing Stain Trasnparent in Acorn Brown, the same color I used on the pergola earlier this summer.
Tip: As an added precaution, I tucked the can I used into a corner to minimize accidental kick-over. Big/small again.

Ladder safety
When doing projects—whether it’s this or crown molding or something else—be aware that when you’re off balance is when you knock over the ladder or spill the paint. Be mindful of your body position. It wouldn’t take much to send that tray of stain sailing off the edge.
Stain a wood playset
In this case, a 9-inch Purdy paint tray held the perfect amount of stain for each section I worked on, and using the Purdy White Dove roller cover didn’t leave a trace of roller lint behind and applied smooth, even coats.

Everything is connected to everything else on this job. I’d love to say there’s a one-size-fits-all rule of thumb for process, i.e. starting from the bottom up, or the top down. But there isn’t.
Spills and spatters—which are mostly muted or erased entirely when color is applied—are inevitable. I worked my way from Up to Down in this section. I would have made the exact same spatters had I worked in the opposite direction.

Fortunately, working with Thompson’s WaterSeal Waterproofing Stain Transparent in Acorn Brown was the easiest part of this whole process—the stain went on smoothly with the Purdy 3-inch XL Sprig, which is made for use with all paints and stains. The stain also added just enough color to enhance the (newly revived) wood, protect against rain, and resist UV and mildew damage for years to come.

An important consideration before you stain a wood playset is to plan your exit strategy if your backyard playset has rooms or decks or a multi-level situation. This isn’t just my backside, it’s me staining my way off the deck surface.

Clean accessories
To clean the accessories, I filled my wheelbarrow with household cleaner and water. The brush wiped out the mold and dirt on the playset toys like nuthin’. It’s so awesome I even wore a collared shirt.

A few strips of wood on the ceiling and all that stuff that there was no space for has a home.

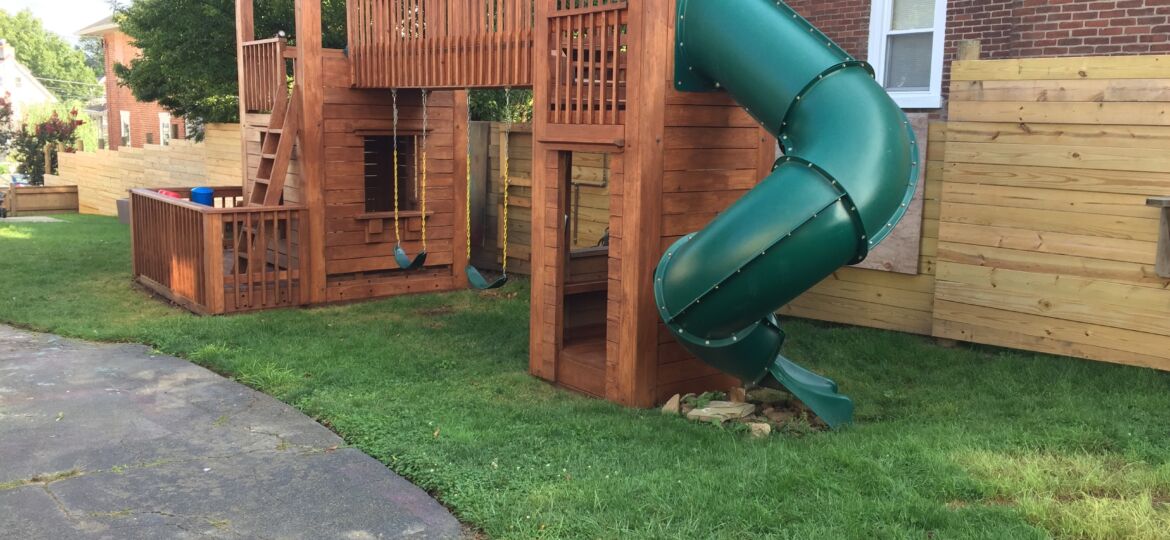
DIY all done
This is a photograph of time well-spent.
The quiet—I was going to say satisfaction and joy, but those are the wrong words.
Relief is the right word; the quiet relief I get walking by this each day, knowing our backyard playset has been cared for makes me…ahhh…relieved.
That it has has a layer of both protection and beauty on it from the water and leaves and dirt settling on the wood…all the little things I ignored all these years…makes me feel what I think might be an adult feeling, and I savor it. Relief.
Wow. Life. Lesson. Learned.
Image already added
About the Author

More DIY home improvement


